DanDaMan007's blog View Details
Posted by DanDaMan007 | Nov 25, 2014 @ 02:21 AM | 11,501 Views
Ever since I picked up the FMS RocHobby P-51 Voodoo I knew it was only the beginning of the end! The whole RocHobby Reno Racer line was quickly adopted at my flying field and before we knew it we were holding regular races with them..

Some of you may have seen my scratch build .46 size Miss Foxy Lady. Yes she still lives and splits air molecules while that YS 115 thunders in the cool morning air.
That mean only one thing... It was time to build a Foxy Lady #2...

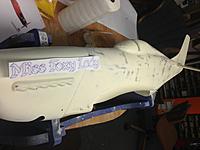
This started life as a Strega since it is mostly white. All decals were easily removed except for ones over the paint. Removing them also meant paint and the top layer of the foam.

Remember this is a Racer and that can mean a short life span.... So I wanted to build one that looked great but perfection was not my end game here. What I ended up with I believe is a great looking bird that is a blast to fly and does nothing but turn heads at the field. Just don't tell them that all that clear coat made me a little faster..

I can get video up if needed. I will get better pictures soon as sunshine emerges again. Enjoy!
Posted by DanDaMan007 | Nov 12, 2013 @ 02:55 AM | 11,611 Views
So as many know that followed my Build Log of the Hangar 9 P-47d, you know that I have tried quite a few different power plants. The first was to be the Saito FG-21 however it never made it in the air before it had issues and got sent back.

Well the FG-21 came back and a couple weeks ago she finally got to take to the skies. Only to my disappointment .... This motor had nowhere near the vertical or the speed as the new Evo 20cc which I find a little lacking compared to my OS GT22 but still an awesome motor for the price and overall I prefer the Evo to the OS. Price makes a huge difference and it is easier to start.

I never did get any videos of the FG-21 sorry. I tried 3 different props and I never made more than 2 laps around the field as it just felt so under powered.

I have gotten good at motor swapping on this plane. I can go from gas to electric in about 45min now lol...

Last weekend I tried the E-Flite 110 on 10s with a 16x10 prop and she flew awesome! I am going to try a 15x12 this weekend and will get some footage for you guys.

I also got it today the new DLE 35ra that I want to try in her next. I would love to swing a big 4-blade on the front of this bird.

What are you guys flying?

As always thanks for following

Danny

Posted by DanDaMan007 | Sep 29, 2013 @ 02:41 AM | 10,986 Views
I was invited out to do a promo clip for a National Racing Associations Outlaw Cart Racing event. I decided to give the little Blade QX 350 a go and she performed awesome during the event.

Red Bluff Outlaws Race of Champions 2013 (2 min 6 sec)


Posted by DanDaMan007 | Aug 06, 2013 @ 01:08 AM | 15,089 Views
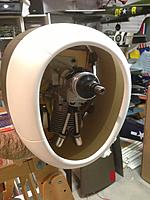
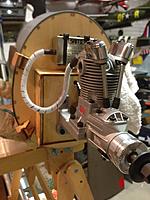
So I finished up the P-47d. I got the Saito FG-21 mounted and the depth is perfect for the cowl. The cowl has about an inch or so of play so it keeps the motor options pretty wide open.

Only thing left to do is cut the cowl for the muffler or change mufflers. I have not decided which way I want to go yet. I sure would like to change to a 90 degree pipe and shoot it out the bottom of the cowl to keep the clean lines. I will probably decide after maiden.

Like most I had to add a bunch of weight up front. Now I am sorta wishing I would have went with a power 110 on 10s so I would have plenty of ballast weight. Than again I am super excited to play with this FG-21. I have a couple of the FG-17's and they run like a clock. Perfectly smooth with no burps or gurgles like the 2-stroke gas motors give you at times.

The wings were a tight fit so I am glad the wings will be left on in the trailer

I usually don't put in pilots as I usually have a GoPro in their place but this time I decided to throw one in. He has been on the bench and kinda lonely...

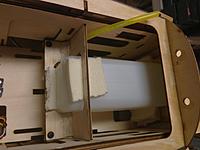
The tank mounting system worked out great! I love how clean everything installs on this bird. I used the lower servo mount so it is hidden under the fuel tank. I put a long filler line and stuffed it in the cockpit. So the outside is clean like my electric birds

If anyone has questions or needs some advice or whatever just hit me up anytime on here, pm or just call me. Thanks for watching. I will put up some videos...Continue Reading
Posted by DanDaMan007 | Jul 28, 2013 @ 03:31 PM | 13,287 Views
So before I move forward with the update I don't want to clarify that I have ironed the whole plane down after I mounted the Landing Gear. I was just going to do the bottom the wing since I cut out a bunch of covering there, but I read about some having covering issues.

I was not having issues with it holding down anywhere but went ahead and gave it a good iron over. The ultra coate is super easy to iron and the wrinkles disapear even on this pained stuff. I still can't get over the fact that Horizon used silver ultra coate as the base vs white. Totally cool weathering!!!

LANDING GEAR

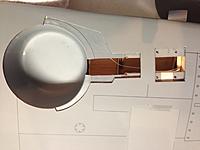
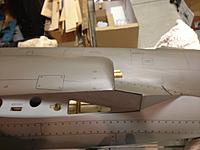
Ok so moving on. I got the Landing Gear mounted with the struts and everything thing went together great!

1) Dry fit the LG with the strut in the wing before doing anything
2) remove the strut from the LG and hold the axel area flat on the bench and grind a flat spot with your dremel where the set screws touch.
3) Make sure the door mounts are on the strut at their designated spot as printed in the manual.
4) Mount the landing gear and be sure to use locktite on the gear mounts and strut mounts. Not the door mounts yet.
5) Set the gear mounts so they lean a little towards the LE of the wing so they are level with wing or maybe a tad forward. This will keep the LG Door flush and tight on the front edge.
6) Mount the gear doors as printed in the manual.

NOTE: If your gear door has a gap on the LE of the wing just adjust the gear door mounts until that is a little snug. The air pressure...Continue Reading
Posted by DanDaMan007 | Jul 21, 2013 @ 02:21 PM | 11,864 Views
So I am not a huge fan of white plastic servo horns so I paint them. Sometimes I paint the control linkage to match and sometimes just leave it.

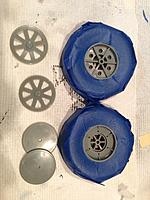
I also painted the wheels as well. I usually don't use this color on the wheels but going to see how it looks mounted before I decide how much I like it. I am glad Horizon didn't use a cheap foam wheels though!

For paint I use model masters and I airbrush it on. So little goes on you done see any weight gain, just makes it pretty

Motor mounting to begin today
Posted by DanDaMan007 | Jul 20, 2013 @ 03:16 AM | 13,419 Views
I got started on the wing tonight. Servos are in and control surfaces are glued.

I like the laser cut servo mounts slotted in vs a couple blocks. I added glue to the joints to be safe.

Some cool features:

1) There is a plastic tube to run the servo wires down. Yes both wires fit fine.

2) the flap servo mounts to a plate in the wing vs the servo hatch.

I am using hitec hs-430hv servos and 12in extensions in the wings.
Posted by DanDaMan007 | Jul 19, 2013 @ 12:02 AM | 14,489 Views
So the infamous Hangar 9 P-47d arrived today! YAY.... I remember asking Dave a few months back when they were going to make me a .60 P-47 Razorback. Glad my wish came true!

The plan is to use a Saito FG-21 or an Evolution 20cc. I have both sitting here so will see which one fits the best under the cowl. We all know how it flys on the Evo as that was the power plant of choice for Horizon's video...

Couple cool things...

1) Horizon used a silver ultracote as the base. So now if any paint chips you have weathering I tested it in a few spots and looks to be the case....

2) The laser cut ply looks a step above the BF-109 and light-years above the blue nose! I really to believe that Horizon has raised the bar on ARF Quality! I am no Fanboy of Horizon's, I have been bit a few time by them.. Man they sure do know how to build a beautiful bird!

3) Upon closed inspection of the tail wheel mount I see no reason why a servoless tail wheel retract wouldn't almost be a drop in fit. I think it may even be possible to tap into the rudder linkage for steering. If not I see room to block in a small MG servo for steering.

4) There is a lot of small design touches that really impressed me. Everywhere I look I see one I like. From the screw guides for the wing bolts to the rounding of the front edge on the hatch so it glides under the cowl.

I noticed we get Drop Tanks & BOMBS! The new E-Flite servoless bomb drops are going on order right away!

Well more to come as...Continue Reading
Posted by DanDaMan007 | Feb 14, 2013 @ 01:16 AM | 13,029 Views
So the maiden went awesome! The winds were 15-24 all day and they died all off. But by the time we got to the field they were back up to around 10-12 @ 5:15 so we went for it.

I plan on more videos and pictures this weekend but here is the maiden voyage.

Miss Foxy Lady P-51 Race Plane (1 min 57 sec)

Posted by DanDaMan007 | Feb 06, 2013 @ 01:04 AM | 13,448 Views
So all the painting is complete as well as the clear coat. Now comes the final assembly and hopefully a maiden this weekend!
Posted by DanDaMan007 | Feb 05, 2013 @ 01:29 PM | 12,143 Views
So all the paint work is done and ready for a clear coat. The red head, Pennzoil decal and start on the vertical are water slides.
Posted by DanDaMan007 | Feb 01, 2013 @ 02:37 AM | 12,043 Views
The first coat of primer is on and sanded down. Now just doing some dry runs of stencil prep before we go all out on the paint...
Posted by DanDaMan007 | Jan 18, 2013 @ 02:25 AM | 12,075 Views
Flew the Blue Nose last weekend and got a GPS level flight ground speed of 128mph. The wind on the meter was 3mph today so not much help in that dept.

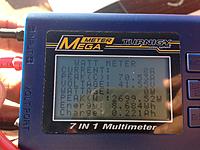
I am really impressed and can't wait to get the speed prop on her and have some real fun. Spektrum telemetry stats to come this weekend. Here was the meter stats before takeoff.

Running a E-Flite Power 110 on 10s with a APC 15x12.
Posted by DanDaMan007 | Jan 18, 2013 @ 02:17 AM | 12,074 Views
So the build for the Miss Foxy Lady is going well. Those that do not know I am building a .46 size warbird for our warbird class of pylon racing. It will be running a YS .115S for a power plant.

I stripped and used a world models fiberglass fuse. I CA Glasses all the wood on the bottom and started the change on the cockpit, as it just didn't look racy enough!

The wing is a custom home built foam core wing that will be CA Glassed soon. Here are some progress photos so far...