Posted by GeorgeG97322 |
Mar 27, 2018 @ 11:19 AM | 16,728 Views
Wow,
It's been almost a year sense the last post. Lots of little ups and downs thru 2017 and into 2018. I have been somewhat busy doing some modeling which is evident here:
https://www.rcgroups.com/forums/show...Building-Begin
Lots of work has been done on the ole home stead which has taken most of my time. Thus I have set aside the scale builds of the DeHavilland Puss Moth and the SE5E, although I have dusted off the plans for both and should get back to them soon.
I have been lurking here at RCG this whole time as well.
Cheers,
George
Posted by GeorgeG97322 |
May 29, 2017 @ 07:30 PM | 20,036 Views
Well Folks,
I have been torn away from the modeling work on a bad note for quite a while... My father-in-law was taken from us a few days after his 80th birthday rather suddenly, and to top that off, my sister-in-law lost her eldest daughter a few weeks after her father. On a more joyful occasion came my daughter's wedding. Wow life has been crazy around here.
Anyway,
I now have all the ribs cut out for the DH Puss Moth and all of the spars, leading edge, trailing edge ready. Still over thinking the wing connection to top of fuselage. I think the best approach at this point will be to add wing tubes and wire. Of course the Guillows kit was simply glued to the side of the fuselage which would be adequate for a small free flight model. I have made a frame and covered it with doculam for testing paint. I will be using Tamiya acrylic paints for the Puss Moth. They seem to have adhered to the plastic very well so far...
I'm the old guy far left in the attached photo...
More soon,
George
Posted by GeorgeG97322 |
Apr 08, 2017 @ 11:15 PM | 20,487 Views
Well,
Been way too long... Not that I haven't been tinkering with models mind you. I finally took my "Bug" out for a few discus launches. First launch was not bad, Second launch was better, at least it felt better. I guess it was all still trimmed in. Third launch was a big surprise, torn the right wing clean off during the launch. Sounded almost like a free flight plane when a wing folds up (yup got experience with that too). Knowing that the ground was really soft (wet) where I was, I just let it lawn dart. No damage to radio. Picture included below...
I have also been slowly tinkering with the DH80 Puss Moth. I have most of the wing parts cut out and ready to assemble. Taking time to re-engineer some of it for both a more scale like appearance and for better strength as an RC aircraft. I have been in close contact with a fellow RC Groups member trying to determine a color scheme. I was looking for something close to a WW2 color scheme, sense several Puss Moths were impressed into RAF use. It was determined that the Camouflage over yellow would be appropriate for a early 1940's RAF communications plane. I did stumble upon the picture below never knowing that the US Navy owned two Puss Moths. After some discussion back and forth, we thought the colors looked to be white over Red with the reverse for the lettering. I eventually found some written notes that the color was actually silver over dark blue. There is quite a bit of history to be found if one digs deep enough (and a lot of fun).
George
Posted by GeorgeG97322 |
Jun 26, 2016 @ 06:36 PM | 22,091 Views
Well Folks,
Back at the computer for a few minutes.
I have puts some work into the DeHavilland Pus Moth.
Picture 1 shows the beginning of the lower fuselage hatch as well as the balsa fairing around the forward landing gear strut wire. I hope, with the forward wire not being attached that it will give some movement to the main landing gear without too much bounce.
Picture 2 shows some of the work at the back end, namely the scalloping of the formers.
I am still pondering how to build the tail wheel assembly. A little research shows that most all of the original aircraft utilized a tail skid, and most of the retro-fitted aircraft were converted to tail wheels (obviously for better ground handling). With as many Puss Moth's that were empressed into military service for the British Royal Air Force, I am a bit surprised that not a lot of information is out there about the colour schemes that were used. Even the Canadian aircraft seems top have a void of information.
More again soon,
Cheers,
George
Posted by GeorgeG97322 |
Jun 05, 2016 @ 02:46 PM | 22,564 Views
Good Day...
Found time again to continue with the De Havilland Puss Moth. Added stringers to the fuselage as in the first picture.
Created a plywood LG former and attached the front landing gear. As is notable in the pictures the front strut wire is free floating in a plywood guide attached to the top of the lower longeron. This is similar to what the Guillows plans called for on the free flight model. As one can see, there are short wires extending upward at the wheel collar area. These are for the shock struts which are attached at the top of the fuselage at the near the wing. I plan to use a brass tube in that strut and allow it to float on these wires.
Next up will be the lower center section hatch and the tail wheel/skid.
I have been searching for information on colour schemes used by the RAF, RAAF or the RCAF. There is several good sites that show serial numbers and the fact that quite a few Puss Moth's were indeed pressed into war time service. I have not however found anything relating colour schemes of those aircraft.
Cheers,
George
Posted by GeorgeG97322 |
May 30, 2016 @ 11:03 AM | 22,656 Views
Good Day All...
I thought it was time to post again. Attached are pictures from my "secret" build which has made some progress within the last couple days.
What you see here is a scaled up set of Guillows plans for the DeHavilland DH60 Puss Moth from the original scale of approximately 9/16" = 1 foot to what is now close to 1/10th scale. The wing span will be 44-1/8"
This plane will be sport scale only, due to it's origin. I have not settled on a color scheme yet. Power system will be electric, probably around park 300 or thereabouts.
Until later, Cheers,
...Continue Reading
Posted by GeorgeG97322 |
Apr 04, 2016 @ 08:57 PM | 23,242 Views
For those who frequent my blog,
Things have been going slow in my modeling world as of late (too much work being done on our new master suite).
Some of you may have caught on that I have been spending some time posting scale information on this thread:
https://www.rcgroups.com/scale-drawi...ree-views-860/
I have put forth a little time on several of my AutoCAD files of scale designs, but not much worthy of mention.
This past weekend was rather beautiful for Oregon, and I decided to take my bug out for a couple of flights, only to find that my old nicd battery pack which I have been nursing along has finally bit the dust. It will no longer take a charge.

So I guess it's time to find an alternative battery setup for my bug. Problem is however, I need the ballast weight up front because that's the way I set it up. I will probably try a single cell lipo and then just put more lead in the nose.
Cheers,
George
Posted by GeorgeG97322 |
Feb 06, 2016 @ 07:37 PM | 24,044 Views
Good day all...
Just took time to go through approximately 21 gigabits (almost 46,000 files of scale documentation) to determine how many AutoCAD drawings of scale aircraft I have started and at what percent of completion they are at.
I came up with 23 different aircraft anywhere from just starting (5%) to 3 or 4 that were near complete (85-90%).
I have started construction on 3 of the plans.
1) The Fokker F.VIIa which was part of Scale Build Off 3. Unfortunately I have all but given up on it. The fuselage sits upon my storage shelves giving me that glare of impatience. I have pondered what I need to do to it from time to time.
2) I have been working on a Thulin "K" and have been tinkering with it as of late. Wings are framed up, stab and rudder done, main landing gear completed, basic fuselage is done, and I am detailing it slowly. I have decided to build the cowl together with a battery/motor controller tray so that everything just simply pulls out the front when maintenance is needed.
3) I have started to build a mock up of the front end to an Avro Commodore. As I fit up parts to form the cowling and top of fuselage back into the cabin, I try to imagine how Peter Rake or Pat Tritle would design it, it really makes me envy these two guys and their superb designing talents.
I have come to the conclusion that I need to build me some home made tools if I want to continue building scale models. I need a vacuformer of some sort,
...Continue Reading
Posted by GeorgeG97322 |
Jan 30, 2016 @ 01:21 PM | 25,630 Views
Hello Everyone...
Here we are, the beginning of 2016.
I have been chopping balsa for... you guessed it, another new build. For now it's going to remain a secret project.
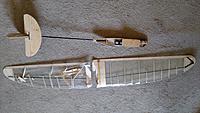
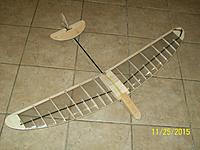
I have finished up the 44" wing for my "Bug" and have made a few successful test flights. Being winter here the flights were short, but very promising. By my calc's the wing loading with the new wing was reduced by almost 1/3. It is a bit awkward to handle compared to the 30" wing, and with a peg instead of grabbing the tip between my fingers.
I have had time to work on several AutoCAD files for various designs including a couple of free flight models. My time was spent on the following: Curtiss Fledgling, 1913 Dyott, Pietenpol Sky Scout, "Leepin Lizzard" (E-36), and the "Half Wild Goose" (1/2A Nostalgia).
Best wishes to All of you out there in RCGroup Land...
George
Posted by GeorgeG97322 |
Nov 28, 2015 @ 07:28 PM | 24,392 Views
Good Day Everyone...
I have been working lately on a new wing for my "Bug". It is 44" span (original was 30") There has been a little tinkering around the building board and so there has been a tid-bit of progress on the Thulin "K".
I have put some time in at the ole computer working on several new aircraft plans. I have been concentrating on a 1/10th scale Curtiss N2C fledgling and have worked on several other such as an Avro 621 Tutor, Bristol Taxiplane, 1913 Dyott monoplane, Yakovlev AIR-4, and the Douglas DC-5. Others I have not put time to as of late are the Avro 641 Commodore (which is awaiting a mock up of the cowling and nose section), Bede BD-4, Cato Butterfly, Sikorsky S-16 and the Waco XJW. Others that have been started and set aside are the Neiuport N-17c triplane, Vickers Viking airliner, Piper PA-15 Vagabond, Kinner Airster (Amilia Earhart's little biplane), and a Fleet N2Y-1 biplane.
Lots of other things in life going on as well. My new daytime job seems to be going well, I guess I'll know for sure after my review is completed.
Cheers,
George
Posted by GeorgeG97322 |
Sep 07, 2015 @ 10:53 PM | 24,865 Views
On Sunday the 6th of September my wife of 35 years (our anniversary being the that day) and I took a tour of the Western Antique Aeroplane and Automobile Museum (WAAAM) in Hood River Oregon.
I have uploaded a few pictures in the "general aircraft / Scale drawings and three views" threads titled Piper J-5, HE-1 (later AE-1), (later PA-12 "Super Cruiser") and Waco UBF. The museum is a great place and I would encourage everyone if the opportunity is right to go there and look at all of the outstanding planes and cars there. Only one airplane in the Museum is not airworthy, meaning all of the rest are flown from time to time. While there, the staff was bringing the Rearwin Speedster back into the hanger after being defueled. Seems they do want fuel in the hanger with all of those beautiful planes and cars. while the hanger was open, I was allowed to go behind the ropes up close to the Waco UBF and take the up close pictures. Boy was that a treat.
I have been busy with new employment and rearranging the boxes and other junk in the hobby room, I hope to get back to the building soon.
George
Posted by GeorgeG97322 |
Jun 12, 2015 @ 09:00 PM | 25,115 Views
Well everyone,
I just about have this little side project finished up see photos...
I have done a little bit of work on the Thulin "K" landing gear and a lot of pondering about what needs to be done on all of the partial builds I have going...
No real plan of attack at this point. But I'll try to keep the Thulin going.
George
Posted by GeorgeG97322 |
Apr 21, 2015 @ 10:20 AM | 25,940 Views
Good Day All...
Well, the slow boat arrived the other day. I now have lots of covering material and several servo's to play with.
I tried out the doculam on a vertical fin (can't seem to think from which build thuough)

So far I like the doculam. One does need to be accurate with the initial application of doculam on the subject due to not having a lot of shrinkage. So you must be fairly tight right from the start. I will do a test cover on a test frame so I can try painting on it now, before I get too far with covering something that needs to be painted.
I have continued some work on the Thulin "K" mainly for attachment of the landing gear and tail skid. I'd like to have the basics of the landing gear done to support the fuselage while I work on the radio and servo installations.
More again soon, hopefully with pictures this time around...
George
Posted by GeorgeG97322 |
Apr 08, 2015 @ 12:56 PM | 26,545 Views
Just a quick update.
I am still waiting for that slow boat (ship) from china to arrive with my new servo's. I don't want to remove the ones in my telemaster just to have to re-install them to fly it. I have several projects that I need to configure the servo's and linkages.
I should also be receiving a roll of doculam to do covering with soon too.
I suppose this means I need to finish some of the projects I've got going... Just for fun, here's the list...
Thulin "K" at approximately 1/9th scale
Auster MkIII at 1/9th Scale
Fokker F-VIIa at 1/16th Scale
Avro Anson at 1/12th Scale
Curtiss Osprey at 1/9th Scale
and for the smaller stuff...
Bowers Flybaby Biplane at 1/12th Scale
Stinson L-5 at 1/16th Scale
and a couple of outdoor free flight models.
George
Posted by GeorgeG97322 |
Mar 08, 2015 @ 05:44 PM | 26,512 Views
Well everyone, back to the Thulin for a bit of work on the landing gear. In the photo's below I have completed the landing gear by adding the wire holder in the center position and drilled the appropriate holes on each side. I will use small rubber bands as the shock cords similar to the full sized Thulin. I have new servo's on the way so that I can begin setting the controls. next up for the Thulin will be the tail skid assemably and the beginning of the cowling.
Now where did I hide the wing rib templates for the Flybaby Biplane

George
Posted by GeorgeG97322 |
Feb 22, 2015 @ 07:50 PM | 27,469 Views
Whoa,
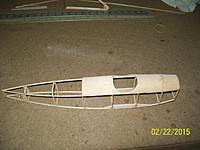
It's been a short while. Not to much going on, I've included a piture of the fuselage which is read for the turtle deck stringers. I need to begin cutting wing ribs, 53 of them to be more accurate... I will be using scale rib locations and I plan to install working (moveable) ailerons.
George
Posted by GeorgeG97322 |
Feb 02, 2015 @ 12:39 PM | 26,571 Views
Had a busy weekend, worked on the Fly baby Biplane, finished the sheeting on the top and cut out the cockpit area. Spent some time on the Thulin K, and was the CD at our local indoor free flight contest too.
On the Thulin, I finished the sanding for the main landing gear struts and began to modify the cowling area and first fuselage former. I plan to make the cowling and battery/speed controller into an inserted style system so that access to the battery and speed controller will be much more functional.
I purchased some light ply to make the insert piece out of and will begin the conversion soon.
George
Posted by GeorgeG97322 |
Jan 25, 2015 @ 10:08 PM | 26,674 Views
Well now, let's see...
I have been rather busy with that darn day to day stuff, work and all that. I have been taking a few minutes here and there and have the Fly Baby Biplane's fuselage framed up (see Pic). I have taken a few more minutes here and there to look for pictures of full sized color schemes (have not decided on one yet).
After finding the full sized Fly Baby web-site and the available biplane information, I have redrawn the wings to be more accurate. More on that after the fuselage and all of the wing ribs are prepared.
I have thought about my other builds a bit too. What stage they are at and where to continue with each one. I have also looked over my outdoor free flight fleet to determine what needs to be adjusted/fixed for the up-coming flying season...
More again soon,
George
Posted by GeorgeG97322 |
Jan 10, 2015 @ 07:50 PM | 26,552 Views
Good Day Everyone,
I have the rough sanding done on the landing gear struts for the Thunlin K. I tested some old Floquil wood stains to see if they would work for the bare wood on the Thulin, not sure yet if I will use them or not.
Stab and rudder completed for the Flybaby Biplane, and I have formed the bottom longeron for the fuselage work (See Picture).
I need to begin cutting wing ribs for the Auster. I have decided not to make operating flaps due to thickness of wing ribs being rather thin at trailing edge.
George
Posted by GeorgeG97322 |
Dec 29, 2014 @ 12:00 AM | 26,892 Views
Mades some progress on the Fly Baby Biplane. Soaked and bend balsa for the ruddr, tail and wing tips. Note that on the wing tips the strips were curved to create the proper shape .
I have based this build on the plans by TJ Blackman shown here:
http://www.outerzone.co.uk/plan_details.asp?ID=3776
I rescaled the plans to achive a 22" span, or 1/12 scale model. I have also located information on the biplane wing construction for here:
http://www.bowersflybaby.com/
Attached are pictures of the laminating process.
George
Views: 252
Views: 264
Views: 249
Views: 222
Views: 262
Views: 263
Views: 252
Views: 244


 So I guess it's time to find an alternative battery setup for my bug. Problem is however, I need the ballast weight up front because that's the way I set it up. I will probably try a single cell lipo and then just put more lead in the nose.


 So far I like the doculam. One does need to be accurate with the initial application of doculam on the subject due to not having a lot of shrinkage. So you must be fairly tight right from the start. I will do a test cover on a test frame so I can try painting on it now, before I get too far with covering something that needs to be painted.


