lessram's blog View Details
Posted by lessram | Jun 30, 2013 @ 11:52 PM | 5,327 Views
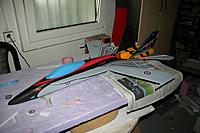
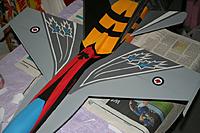
Besides doing decals for Wobisch during my lunch break, I'm slowly progressing with another F/A.18 build.

A few weeks ago, I was ready to brush the back of the plane.
The result was a huge - up. Applying the first black stripe, I was a bit under time pressure and wanted to much to fast.

I was really annoyed, since I had no means to correct it. Whatever I did, it looked worse afterwards. Eventually, I rebuilt the whole fuse and now I'm at the same point again. (Progress wise, not result wise )

This time, I really gave myself the needed time, tripple-checked the masking-tape, brushed slowly and : I'm happy with the result. Two other stripes will follow, but I know now, how to deal with it. So no excuses if I screw up again.

Sorry Clickety, I put your widow on the back burner, but will continue as soon as I'm finished with this bird.
Posted by lessram | Feb 10, 2013 @ 04:00 AM | 6,766 Views
Since it was out, I always wanted to build a T-50.

During lunchtime I began working on a plan. I'm more or less finished with the underside of the plan and decided to build it in 50% of the real size. So I just can use 3mm depron instead of 6 mm. The aim of the 50 % build is more or less a proof of concept. Do the pieces align, ...

Already found some issues and learned the hard way, that exact beveling with 3mm is for me a thing of impossibility

So here is the result


Update:
Made some progress with the upper part.
The vertical tails are a tic too small, have to correct...Continue Reading
Posted by lessram | Nov 04, 2012 @ 02:51 AM | 5,510 Views
Just began building a new nose for my F-5 variant. Here's a pic series, how I am doing it....Continue Reading
Posted by lessram | Oct 10, 2012 @ 03:20 AM | 5,440 Views
And another step forward ..

Finished the bottom of the right wing and in the process of finishing the left side as well.
Posted by lessram | Aug 28, 2012 @ 09:56 PM | 6,018 Views
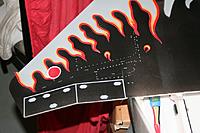
Flames are just loosely laying on the wing.

Problem: How to get all this little gray squares onto the wing. I have no clue yet.


Added Aug 30:
Left wing: Done !

Added Oct 1:
First side done!
Posted by lessram | Aug 12, 2012 @ 11:26 PM | 6,056 Views
Thought I'm not yet finished with the back section, I aleady began painting. Just to see whether my idea will pan out.

Here's the result:
Posted by lessram | Aug 05, 2012 @ 12:56 AM | 6,176 Views
As I stated in Steve's official thread, I'm roughly 97.34173 % finished.
It was sometimes a real pain to get to this point:
For example, I realized, the the motor mount is not stable enough, or building the exhaust nozzles, I experienced first hand, that the thickness of depron is not always exactly 6 mm.

So the time get's near, where I have to get out the rattle cans .

So long
Olli
Posted by lessram | Jun 30, 2012 @ 01:15 AM | 5,893 Views
Finally had some time to go on with the F-15.
Installed the aileron servos, glued the elevators and tested them.
Movement are ok, though still have to reverse some channels.
Once more, for the elevator I use a 4 mm carbon rod in a 6 mm carbon tube. Not all too much friction and it worked to be a proven setup.

I still consider to paint the wing first before I glue it. Just don't know yet.
Posted by lessram | May 28, 2012 @ 03:03 AM | 6,137 Views
Eventually, the motor arrived.
Did some soldering and tests. Had the wires right for the first time .

Intakes are done and the front part is finished.

Next thing is the back. I made a first version of the exhaust nozzles. Still needs some sanding but I hope it will pan out fine. (Especially since I don't have another idea how to do them .)

Side project

As a side project a did a small profile F-5 for my youngest to throw around. As it turns out, it's a lawn-dart in it's truest sense.
I'm playing with the idea to enlarge the plans a do a real profile.

will see
Posted by lessram | May 17, 2012 @ 02:14 AM | 6,611 Views
Had some time this morning and started sanding the cockpit section.
As I mentioned earlier, I hate sanding canopies. The end up too bulky.
So I tried a new approach. Just draw up the base of the canopy and also how should the canopy look like at three different places (formers). I just glued these templates on thin cardboard.
First I sanded the canopy sides, so it matches the base.
Then I took the first former, and pressed it gently onto the canopy at the right place. This gave a nice little dent into the depron. So I just sanded the canopy down at this place until the dent disappeared. I repeated this until I was happy with the form of the canopy.
I did this with all three formers, and had just to send down the in between sections. So I got a nice round canopy.

Then I glued the canopy base onto the "ground plate" and just sanded everything down until it matched the nose- resp. turtledeck section.

Result not real scale, but ok....Continue Reading
Posted by lessram | May 08, 2012 @ 06:00 AM | 6,184 Views
Lunch time is usually the time, I tinker with plans or do the decal work.
Depending of the scheme I want to use, this takes some time.
As for the fins fins of the current build, I took me about 10 hour's to draw them up.

The way I go:
I look for good hi-res pictures in the internet, save them, putting them into Visio or Paintshop Pro and draw them up.

=> The availability of hi-res pics decides the camo
Posted by lessram | May 06, 2012 @ 04:36 AM | 6,327 Views
Here's a little update of my weekend work.

For ailerons, I decided to go with torque rods.
Since I got no response from the question last week, I made them as short as possible.

Additionally, I sanded the turtledeck and began with the much dreaded canopy section. Pieces are cut, laminating will be next.

If you think, something is wrong with the canopy outline, you're right. I just took the rounder canopy of the double seater.

I just hate doing canopies, so I declare the current setup officially as "attempt number 1".

Until next week
Olli
Posted by lessram | May 06, 2012 @ 04:25 AM | 6,205 Views
Reported last weeks progress in the official thread:
https://www.rcgroups.com/forums/show...79660&page=217
Posted by lessram | Apr 28, 2012 @ 03:01 AM | 6,226 Views
Since I broke up the original bottom, I had to build another rig, so the sides will be parallel.

Additionally, I already sanded the inner side of the nacelle bottom.

Pleased with the result so far
Posted by lessram | Apr 28, 2012 @ 02:51 AM | 6,141 Views
Just four steps
  1. bevel the back part
  2. bevel the front part
  3. the transition between the back and the front part
  4. round up the front

The last two pics are the famous "before and after"
Posted by lessram | Apr 28, 2012 @ 02:27 AM | 6,160 Views
I always have problems with the nose:
  • laminating => Sticky fingers
  • alignment of the pieces

Fist problem:
I just set the pieces on a needles, so I can spray them without getting my fingers dirty.
To prevent sticky fingers: Just rub them with baby powder. You may even touch the glued pieces without any problems.

Alignment:
Just made a quick and dirty rig, so I the pieces are automatically aligned.
Posted by lessram | Apr 28, 2012 @ 02:19 AM | 6,142 Views
I just decided to document the build of my F-15 in my blog, since it's 70% according to Steve's plan and I don't want to overload the original blog.
Like I already posted in the original blog:
There are more or less 2 visible mods:
  • I added fuselage side rails and therefor had do "relocate" the vertical tail
  • I cut fuselage bottom and added an additional layer for the nacelle bottom

Here it goes...
Posted by lessram | Jun 13, 2011 @ 03:37 AM | 6,902 Views
A toolbox fell on my half finished SU-27 three months ago

So I just throwed everything into the trash and gave up.


Disclaimer:
Instead of spoiling Steve's original thread with building pictures, which are just a replicate of tons of others, I'll blog it in here: If I think there's something noteworthy for the other Su-37 builders, I'll post it in the original thread.

Just began with a new build: SU-27.
Special specs:
- Single motor (no TV)
- Ailerons and normal elevator

What I have done so far:
Taping the printout's and cutting out the different paper pieces: 2 hours of work.
Taping the paper pieces on the depron board: 45 '
Cutting all the depron pieces: 3 hours!
Here's a clip featuring myself cutting depron:
Cutting depron (Warning: It's sooo boring) (3 min 31 sec)

Be warned: It's 1 1/2 hours cutting in 3 minutes, and it's sooo boring, you'll fall asleep !

Nacelles are doubled and ready to be glued
Vertical fins are finished, side booms sanded
Fuselage will be next.

So long
olli
Posted by lessram | Apr 24, 2011 @ 01:43 AM | 6,790 Views
Update May 31
Finished and first flights done.

See original thread: https://www.rcgroups.com/forums/show...06817&page=207


Update May 24
More or less finished with the build, and now the fun part. Painting !
So Sunday morning and today evening, I began. Unfortunately I have some trouble with the masking tape, since it seems not stick to the depron.
Today I had to leave the left wing alone, since I suddenly realized the masking tape is off.


After my Mig 29 experience, I just took a timeout. Nevertheless in late 2010 somehow I wanted to do a new plane. A "Patrouille Suisse" F-5.
Gathering information about the F-5 history, I just stumbled over the Iranian modded version. "Why not ?". So I tinkered a little bit with Jetset's plans and now I'm currently in the process of building it. (Since about October 2010).

The reason I blog the build here instead of the official T-38 thread: I just display the progress and I just follow more or less the process like 100 others before. So there's nothing what you haven't seen already in the (currently 206 pages long!) T-38 thread. When I think there's something special to provide to the community, I will post it in the T-38 thread. And for sure, I will post the finished result.

So current state: Just glued the...Continue Reading