Inflexo's blog View Details
Posted by Inflexo | Jun 13, 2009 @ 05:52 AM | 11,200 Views
CLOSED

Well, it happened, I managed to conjure up a fault, amusingly it occured while I was fixing a PCB layout fault.

Come and see the details about the defect and have a shot at winning the prize (EDIT: Both prizes are won, but you can still enter for the 3-montly big prize by building up your glory-points).


Get all the details and more here -
https://www.rcgroups.com/forums/show...4&postcount=26
Posted by Inflexo | Jun 12, 2009 @ 07:56 AM | 11,007 Views
Well, it's time to return back to where I started in this R/C electronics business once more.

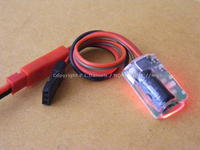
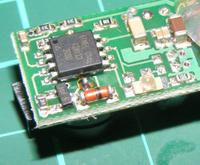
Today I received a batch of boards for making more Lipo Normalisers. Very simply, you plug a 1, 2 or 3 cell pack into the normaliser is it discharges the cells down to 3.8~3.9V, when the lights are out, you unplug and store your lipo away. Very simple.

One thing that has to be done for each new batch of Normalisers is recalibration of the parts. Because the turn-on properties of the transistors used varies a few 10mV per batch, it is required to make a small test batch (in this case, 3 units) and tweak the resistors to get the right cutoff values for the lipos. I could use a microcontroller but using all discrete parts does make it easier and faster to build in a lot of ways.

Normalisers are available at NQRC again, a lot of people buy them for the art-value here - http://nqrc.com/?vp=PLD-LN3S-01
Posted by Inflexo | Jun 05, 2009 @ 10:08 PM | 11,140 Views
Competition is now closed

Do you think you're good enough to find the defect in the circuit board shown here? If you think you know what it is, come to the "defect" thread ( https://www.rcgroups.com/forums/show....php?t=1056880 ) and have a shot at winning a legitimate prize.

Just a couple of points;

* All the right parts are installed (there's no missing parts)
* All the parts are in the correct orientation
* All the parts are intact (eg, no parts are burned/broken)

Give it a shot, you can try as many times as you like.
Posted by Inflexo | Jun 04, 2009 @ 05:48 AM | 11,034 Views
As a manufacturing business, there's never a shortage of first-pass failures coming off the assembly line, these failures can be anything from a part in the wrong place, orientated wrong, bad luck with the soldering or even literal bugs on getting into the wrong place at the wrong time.

To make good of these bad moments, I thought it'd be a great idea to run a small competition where I post up a photo of the failed board and then let people try to determine the cause of the failure.

There's two modes of the competition.

1) The "just for fun" mode, where you get to guess and you get told if you're right/wrong but you're not worried about the prize, you just want the glory.

2) The "prize" mode, where you do want the prize.

I've already run one round of the competition and it was quite popular, attached is a photo of the dud board as an example (along with an updated version showing the defect).

You can join in by going to the competition thread at - https://www.rcgroups.com/forums/show....php?t=1056880

The prizes aren't big and really this is more about getting people to see and learn about the things that we run into during production.

Some bugs can be fixed in seconds, others force you to have to just throw the whole assembly into a box marked "Let the new guy try fix it!"

Most of all, have fun!

Below is an example of one of the 'faults' that were run (this is not this week's competition, to see the current one you have to go to the thread).
Posted by Inflexo | May 26, 2009 @ 08:30 AM | 12,807 Views
Ideal for small gliders with 2 servos up to park-size.

A lot of people are finding they need to buy small ESCs to give them a BEC facility on their gliders (eg, 5V from a 2S pack), however of course this is an overly complicated option and there's a moderate amount of expense in the purchase that you just don't use.

Once again, time to scratch that itch and I've started producing the PLD-BEC-1A.

It's very simple, 2S lipo in, 5V 1A peak out, however where it excels against normal ESC options is that it has a much greater decoupling capacitance on hand and vastly lower noise levels. You don't see much more than 2mVpp noise on the 5V line even under load. The PLD-BEC-1A has decoupling capacitors over several magnitudes of size to help clean up ripples and noise even from external sources like servos.

With a speed-controller solution you'll always have the signal noise of the ESC rippling along the power lines even though it's not actually doing anything. Speed controller BECs also have very limited heat dissipation area and are usually only minimally decoupled.

The PLD-BEC-1A is roughly the same size and weight a 10A brushed ESC however that weight and size is used for the improvement of the BEC output.

It's a simple and low cost solution for small gliders on the slope.

These units are designed and manufactured right here in our workshop, these are not from China. All the support and work is done right here.

Available now at NQRC - http://nqrc.com/?vp=PLD-BEC-1A&ln=rcgb ($19 AUD ~ $13 USD)
Posted by Inflexo | Apr 22, 2009 @ 04:38 AM | 10,472 Views
ESJ-CHG-RX and -08

Finally the new circuit boards have arrived and I'm really pleased with them as well.

These new ESJ units are fantastic to use, no more do I have to keep ripping open the fuselage canopy or taking the wings off, now I just insert the plug and pack things away. When it comes time to charge, I just connect the charger to the lead on the plug.

- If you're flying small park models up to 10~12A current demands
- If you're flying a glider
- If you're flying a glow or gas plane


... then the ESJ's are what you want to get a hold of to make your battery and wiring systems safer, simpler and lighter.

The difference between the ESJ-RX and the ESJ-08 is only the actual power leads involved. the ESJ-RX uses a lighter gauge, more flexible wire with servo/3-pin type plugs and sockets, this suits the 4 and 5 cell NiCd/NiMH receiver packs that are normally found in gliders and glow motors

Available now at http://nqrc.com/?vp=PLD-ESJ-CHG-RX (~$20 USD)

The ESJ-08 uses 22 AWG JST plugs/sockets and is meant to be for connecting up to 5 and 6 cell Ni* or 2S and 3S lipos (anything up to 20V actually), it has a constant current of 8A rating and will cope fine with peaks of 10~12A.

There's now a discussion thread on the park-flying forum area and I've got one more ESJ-CHG-08 to give away free to those who can find the 'fault'.
( https://www.rcgroups.com/forums/show....php?t=1038024 )

Available now at http://nqrc.com/?vp=PLD-ESJ-CHG-08 (~$20 USD)
Posted by Inflexo | Apr 15, 2009 @ 04:07 AM | 10,022 Views
The BAC-ESJ has arrived


Available at - http://nqrc.com/?vp=PLD-BAC-ESJ


I'm really pleased with how this one has come out. The board does feel a bit bigger than the normal BAC units (understandably) but when you consider the simplicity of being able to put this single unit in to control your power and charge it really makes things cleaner.

The new weight is 6.1g without any covering.

I have omitted covering on this unit because it makes it impossible to keep the socket flush to the outside of the airframe. I will however be dotting some insulation paint onto the power lead section to prevent accidental shorts.
Posted by Inflexo | Apr 10, 2009 @ 10:21 PM | 10,149 Views
New product - PLD BAC-1A; 1A class linear regulator.

First up, yet another new product churned out. This one is really a very simple device but very handy for small gliders. It's a 1A 5V output regulator that'll accept 2S or 3S lipos as an input. The BEC-1A is well decoupled to keep the electrical noise right down and keep those receivers happy.

You could use a small brushed ESC to do the same task but the BEC-1A is lighter and provides superior current output under demand because of the larger copper area meaning that the regulator doesn't overheat so quickly as does happen quite frequently with small ESCs.

Some people may also argue for a switchmode buck or boost converter, while they are certainly quite efficient and cooler running for most situations it is a lot harder to keep their noise output under control without adding bulk and weight. For two or three servo situations (9g servos etc), the simplicity and reliability of the linear regulator combined with its more than ample power capacity (most 9g servos don't draw more than 250mA stalled) make it a suitable choice.

* Very low weight - 3.6g
* Very small - 19 x 12.5 x 6.5mm
* 2S/3S lipo input
* 5V output
* LED indicator for power
* 1A linear BEC for minimum RF interference
* (2S) 250mA constant supply, 500mA for 1 minute, 1A for 10 seconds (thermally limited - better cooling gives longer duration)
* Thermal and short circuit protection
* Large copper backplane to improve heat-sinking of...Continue Reading
Posted by Inflexo | Apr 10, 2009 @ 05:23 AM | 10,162 Views
Well, the ole "scratch that itch" sensation has hit again and I've decided to churn out another new product.

I'm now creating an electronic switchjack to replace the existing 3.5mm mechanical contact systems. The ESJ-8CH's rely on the contacts being open to keep the power flowing. Because the switching is electronic there's no contacts to get dirty and no spring-metal to get weak, eventually causing intermittent faults or voltage sagging.

To disable it or charge, just plug the 3.5mm stereo plug into the socket. To use/arm, simply remove the plug. For even more safety a second switch can be added requiring you to remove the plug and enable the switch before the systems are powered up.

The electronic component by default can handle 8A without a problem and bursts of 20A with ease, in fact the wiring will sooner fail than the actual switch (this can be increased again to 20A and 100A respectively with appropriately selected MOSFETs).

The ESJ-8CH also allows charging of your pack via the plug, simply connect up the charger to the polarized 2-pin servo lead (or cut off and install your own).

So far I've only produced the first prototype and it's already working great, though the final version will end up being 23 x 12mm in size, most of which is used to provide a pair of 2mm holes 20mm apart for mounting.

There's also a high intensity LED on the underside of the board that'll be quite visible through most semi translucent fuselages (not that it's...Continue Reading
Posted by Inflexo | Mar 10, 2009 @ 09:29 AM | 9,401 Views
Just over 1 year since the original BAC-001 was designed and released, and now a new one is out (about the 6th actual board revision).

The new BAC-004's and BAC-MP's are the result of a lot of work over the year both with myself and the community.

Both BAC units now feature combo audio + visual outputs. The audiable alarm alerts you when the lipo is getting too low (7.2V or lower) and the LED blinks out to you the actual voltage of the pack (very handy to view between flights).

These BAC units are light weight (4.5g ~ 5.5g), compact and very useful.

No more flat battery situations when you get to the field only to realise you forgot to charge you 4 cell Ni pack the night before and find that it's lost half of its useful charge already.

BAC-004, normal size, 1A peak regulated 5V output, very popular, used by many leading DLGers.
http://nqrc.com/?vp=PLD-BAC-004

The new BAC-MP, smaller and lighter than the BAC-004
http://nqrc.com/?vp=PLD-BAC-MP

With the high popularity of the BAC units, it's forced me to have to reinvent a lot of the gear that's used in building them. I now have my own surface mount solder paste stencil cutting system, reflow oven and of course reflow workstation. Plenty of tricks have been picked up and now things are getting smaller with the move to 0402 size parts (1.0 x 0.5mm parts!).
Posted by Inflexo | Jan 26, 2009 @ 07:42 AM | 11,697 Views
(Summary: useful for measuring resistors below 2 ohms, great for checking your motor windings and can be used to track down short circuits on PCBs )

As some of you have been following, you'll notice that i've recently started doing a fair bit of stuff with low ohm devices, including batteries and such.

One thing that is often needed that a standard multimeter just can't provide is a low-ohms range, measuring from 1mR through to a couple of ohms. I for one need such a device so I can measure the value of the load-resistors being used in the IRM-004 in order to set the offset/compensation values.

Like a lot of people, I had to scratch that itch too Since I've just finished working on the whole production run of the battery internal resistance meter ( IRM-004; http://nqrc.com/?vp=PLD-IRM-004 ) I already had a lot of the layouts sorted, so making a low-ohms (passive) meter wasn't going to be too much trouble.

The way a low-ohms meter works is that you pass a constant-current through the unknown resistor and measure the voltage drop across the resistor. In order to make it more accurate you use a 4-wire test rig, known as a "kelvin" lead, the principle is that you pass the current over one pair of leads and you measure the voltage with the other. Using a kelvin configuration means that your test leads don't manipulate the true value (within reason). The reason why it works is because voltage drop along a wire is proportional to the current (V = IR),...Continue Reading
Posted by Inflexo | Jan 20, 2009 @ 11:23 PM | 8,242 Views
After a couple of weeks and 3 prototypes, the PLDaniels IRM is finally going into production.

Already more than half of the preorders have been gobbled up (especially with the Australian dollar so weak compared to the US dollar).

The latest version of the IRM features two screen modes, one that has the original information regarding cell voltages and calculated resistances, as well as a new "human" mode which uses the gathered information to provide power output, efficiency, and suggested C ratings.

People wanting to get in early can pick up a preorder of the IRM by purchasing it at NQRC - http://nqrc.com/?vp=PLD-IRM-004 for $69 AUD (about $45 USD and only about $9 postage from Australia via AIRMAIL).

I must say that I'm really pleased with how things turned out, there was a lot of great community support and we managed to get the cost down from $60 USD to only $45 and we packed in a lot more features, so that's a great achievement.

Many thanks to everyone who chipped in their ideas.

Best of all, the IRM's are flash-upgradable if required, so you could even go and create your own version.

Regards,
Paul.
Posted by Inflexo | Jan 07, 2009 @ 07:29 AM | 13,064 Views
Have you ever noticed that the 'C' ratings for lipo cells (and Ni*) are generally meaningless thumbsuck values in most cases?

Your 20C from one brand is probably a 15C or 12C in another brand, really there's just no standard and it's mostly luck that you get what you need.

So, being the "scratch the itch" sort of person, I've started working on my internal resistance meter - and yes, it will be commercially produced.

What is "internal resistance" you might ask, well, it's the resistance value of the actual battery cell, this is a very useful figure because from it you can work out things like your voltage-drop under load and how much power is being burned up inside the cell as heat, also it finally lets you -really- compare between packs, rather than just hoping the 'C' values are the same.

As an example, if you have a cell with a 50mR resistance inside, it's a 2S pack, so that's 100mR for the whole pack, we'll ignore the lead and connector resistance for now (though they can an DO cause problems at times - witness people using JST connectors at 10~15A... meltdown).

Okay, so we've got our 100mR pack, we want to draw 9A from it... what's the voltage real voltage (from 8.4V) and how hot will that pack get?

V = I * R
V = 9A * 0.1R
V = 0.9V drop at 9A, so that means your 8.4V pack only gives you 8.4 -0.9V, 7.5V at the motor/ESC

Now, how about how much power/heat is being lost in the pack itself...
P = I * I * R
P = 9A * 9A * 0.1R
P =...Continue Reading
Posted by Inflexo | Jan 06, 2009 @ 07:39 AM | 9,130 Views
( The items being built here are actually R/C electronic gadgets, hence why it's on RCGroups, they're all sold at my online R/C store - http://nqrc.com )

If you're trying to do modern electronics, especially surface mount and you want to move to using a reflow oven rather than doing everything by hand all the time (believe me, when you have an order of 100 units to fill, you want to be doing something else other than hand soldering ), then you're going to need solder paste stencils.

Normally solder paste stencils need to be made from either very thing sheet metal or mylar. The mylar sheets are easy to obtain but don't last as long. You can typically get laser cut jobs done for $25 or so in the US, however I'm in Australia and I often need special variants depending on particular customer requests, so, bring on some thinking and new ways of doing things.

What I did have in my workshop was a simple 600mm wide vinyl cutting machine from a failed venture... I didn't have to confidence initially to try use it for stencils but I'm glad I did in the end

I'm using 3 thou thick mylar sheets, backed with vinyl transfer tape, I export my stencil pattern from Eagle PCB as HPGL, convert it to DXF, edit in QCAD, save and then convert back to HPGL with some 'tricks' to make things really work well.

This is all being done under linux incidently. I ended up writing my own HPGL->DXF and DXF->HPGL converter software (it's free and available for download at my site, http://pldaniels.com ). Especially important is the final DXF->HPGL conversion, where I make the software repeat the same polygon ~3 times without lifting the cutting knife, this is crucial as it lets the blade get through the mylar sheet without suffering from repositioning precision issues.

In the end, I can have myself a new stencil ready to go in less than 10 minutes.

Here's some photos....
Posted by Inflexo | Jan 04, 2009 @ 07:27 AM | 8,092 Views
It's been a while since I last updated but there's certainly been a few things going on.

A lot of work has been done on the backend of the assembly systems here including a move to a better solder-paste / reflow oven system including our own stencils cut onsite (great for making on the fly adjustments). There's a lot of work in perfecting the stencil cutting process and we've been sharing this with the community a lot.

On the new product front, the biggest newcomer for the new year is of course the PLD-BAC-004 which is a feature improvement on the existing (and very popular) BAC-001. If you want a 5V supply for your receiver/servos off a 2S lipo pack, then the PLD-BAC units are the thing to have for loads up to 1A peak. Fantastic for discus-launch-gliders (DLG) or small slopers.

The new BAC-004 features a built on LED for a full decimal readout of the current voltage (eg, 8 + 3 blinks for 8.3V) and even more decoupling capacitors crammed onboard to keep that 5V rail as smooth as possible and with as little sagging as possible.

The new PLD-BAC-004 units are already available for purchase at the NQRC store for only $30 AUD (about $20 USD !!!).

Also, we've added two new combo LMA (lost-model-alarm) + LVA (low-voltage-alarm) units for people running on 4 or 5 cell packs in nitro or glider planes.

The lost-model alarm is incredibly useful, it's frightening how many times a plane can be lost in the grass ( or tree! ) and people still don't see it even with a couple of metres.

These units work with Spektrum and other 2.4GHz gear, so no worries there either. They're very compact and light, excellent insurance to have in your plane.


Original PLD-LMA-01 ($21 AUD, ~$15 USD)
Combo LMA+LVA for 4 cells PLD-LMA-LVA ($23 AUD, ~$16 USD)
Combo LMA+LVA for 5 cells PLD-LMA-LVA5 ($27 AUD, ~$18 USD)
Posted by Inflexo | Jul 13, 2008 @ 07:49 PM | 9,371 Views
While preparing my Cessna 180 for flying the other day, I realised that I was getting sick of trying to pull the wing off and connect/disconnect all the wiring just to turn it on and off or charge the lipo. To fix this, I created a new product, the PLD-ESJ-CHG series. Now I can turn on the plane just removing a light weight jumper and I can charge the battery by plugging in a 3 pin lead, simple, effective and saves me breaking my plane by accident.

Of course, I couldn't keep this all to myself, I had to go and make it a new product on the NQRC store


Quick specs (5A model, 10A model):
* Current rating: 5A-10A constant, 10A-15A peak.
* Wire: 20AWG high flex silicone, 100mm long (total)
* Weight: 4.0g
* Size: (PCB) 12.5 x 10 x 8mm
* Voltage: 6V to 12.6V
* OFF current draw: 7uA (0.007mA/hr).
* ON current draw: 10mA/hr (for LED)

* 5A on resistance: 8mR (0.008R - 200mW dissipation @ 5A, 800mW @ 10A)
* 10A on resistance: 4mR (0.004R - 400mW dissipation @ 10A, 900mW @15A )

The only difference between the two is the MOSFET being used.

These units are available right now at the NQRC store, you can get them at;

5A unit - $17.00 AUD; http://nqrc.com/?vp=PLD-ESJ-CHG-5A

10A unit - $19.00 AUD; http://nqrc.com/?vp=PLD-ESJ-CHG-10A

Using the units is very easy, they fit between your battery and your ESC. To turn off the system, you insert the 2 pin jumper that's supplied. To turn on your setup you just pull out the jumper and put it into your pocket or such (don't lose it ).

To charge your lipo, just insert the jumper and then connect your charger up to the servo socket lead.
Posted by Inflexo | Jul 11, 2008 @ 03:32 AM | 9,657 Views
It's been a few weeks now since I posted any mass sort of notice but during that time I've been really busy with the new developments here at NQRC.


First up, I've split the electronics catagory into smaller ones, so when you go to the NQRC site ( http://nqrc.com ) things will be spread around a bit more with the electronics.


Finally the new lipos for the DLG's and small gliders arrived. I suppose you could also use these lipos for powered flight with indoor models as well (they're 12C rated, though I prefer to only run them at 6C).

2S200-12C - http://www.nqrc.com/?vp=SH-LI-2S200-12C
2S300-12C - http://www.nqrc.com/?vp=SH-LI-2S300-12C
2S180-12C (restock, the new ones are without a balance connector).

Speed controllers -
PLD-ESC-18A - http://www.nqrc.com/?vp=PLD-ESC-18A
18A brushed speed controller with 16AWG leads. This little beast took a while to get to market because there was a major hold up on getting hold of decent 16AWG wire. With 18AWG things were heating up too much on the leads, so the move to 16AWG really brings the 18A ESC into being properly configured again.

Electronic switch jacks -
Been working on these a little while now and finally everything has come together. Electronic switch jacks are a more reliable solution to the old mechanical interruption system using DC or audio plugs. You just use a simple 2 pin jumper which is included with each ESJ, when you plug it in, the ESJ disconnects the power, trickling at only 7uA/hr, that's...Continue Reading
Posted by Inflexo | Jul 02, 2008 @ 07:18 PM | 9,861 Views
We've all had it before - the troubles of using mechanical jacks for our power switches, so, since I've got the tools here I've decided to put an end to the problems (one hopes) and I've created an electronic version which is both smaller/lighter than a jack and hopefully easier to install as well.

Features and Specifications

Supported battery types: NiCd, NiMH, LiIon, Lipo, LiFeO4

1A:
Voltage range: 4 ~ 15V
Size: 12.5 x 8mm
Weight: 0.6g (without wires)

5A:
Voltage range: 4 ~ 20V
Size: 12.5 x 10mm
Weight: 0.9g (without wires)

Quiescent current while off : 7~8uA (3 years to discharge a 180mAh pack)
Idle current while on (with LED): 3mA

CURRENT STATUS: Preproduction (Circuit boards are now with FedEx and being delivered, estimated delivery is July 9th)


The electronic jacks will work in such a way that you insert a jumper into a 2-pin hole (each hole is about 0.8mm dia, 2.54mm spacing) to deactivate the system. When you remove the jumper/short the system will become active.

Quiescent current of this device will be in the order of 10~20uA (that's 0.01 to 0.02mA) - basically your lipo will likely self discharge before this device drains it.

I'm estimating the RRP of this device will be about $10 USD for the 1A and $12 for the 5A version.

There is now going to also be a reed-switch version (magnetically operated) which will cost another $2 per unit ($12 USD for 1A, $14 USD for 5A).

I've already started working on a much higher current version, complete with fuse protection and charging ports, this will be good for small/medium electric models that need up to 20A of current.

Video link
I've created a small info-video using the prototypes that I've made up, you can see it here - http://www.pldaniels.com/flying/vide...sj-001-360x288

Paul.
Posted by Inflexo | May 14, 2008 @ 04:56 AM | 9,713 Views
Two things to happen here at PLDaniels today.

1) We got our 20 and 22 AWG super flexible high strand count silicone wire which is lovely to use. Subsequently we replaced the existing wire (18AWG) from the 5A ESCs which was a major overkill, back down to a nice light 22AWG which still does the job very nicely but is a lot lighter and easier to route around the fuselage, not to mention easier to solder onto Deans-micro type connectors

2) We created a new product. The PLD-LVA-MINI-NI is a very small, very light low voltage alarm for 4 cell NiMH/NiCd packs. Weighing less than 3g it's being aimed at the DLG/HLG market where every gram counts considerably. Best of all, we were able to do it using an existing board design (for the PLD-BAC-MINI) which means that it was much faster to bring to market.
Price: $19 AUD

PLD-ESC-05; http://pldaniels.com/rcshop/frame.ph...-ESC-05&ln=blg
PLD-LVA-MINI-NI; http://pldaniels.com/rcshop/?vp=PLD-LVA-MINI-NI&ln=blg
Posted by Inflexo | May 08, 2008 @ 06:40 AM | 9,573 Views
Got the parts today (finally!) and rigged things up. Most important were the low-ESR electrolyte caps which I wanted to add on to really squelch out the high current spikes during the PWM switching.

I was pleased to see that the 100uF and 220uF low ESR's were about perfectly compact for the 12 and 15A ESCs.

The 20A ESC I'm seriously thinking of derating to 18A in the interest of survivability in less than 'ideal' mounting conditions (eg, someone mounts it inside a fuselage with no airflow - as often can happen with smaller models).

The nice thing about using the off-board low ESR caps is that I can now use the landing pads (which were originally for SMC size tantalum caps) to mount 2 extra 1206 size ceramic capacitors for increasing the damping of the high frequency ringing from the motor on the rails. Optimal selection has yet to be determined but it'll probably be a 1uF + 0.1uF + 0.01uF combination (coupled with the existing 1uF, 0.47uF external caps).