bill clark's blog View Details
Posted by bill clark | Nov 25, 2016 @ 12:11 AM | 7,469 Views
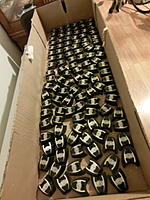
I designed and manufacture these for CK Aero. They are mainly used in F3A on the YS185 supercharged 4-stroke. Check out Bryans site http://www.ckaero.net/ for some bad ass pattern ships
Posted by bill clark | May 05, 2014 @ 06:55 AM | 9,928 Views
Still can go smaller. I believe
Posted by bill clark | Mar 03, 2014 @ 11:33 PM | 9,694 Views
Probably way more than the number of valve covers I have made for them but so far we have produced over 90, about twice as many as we thought we would sell. Some of these are going to Japan and some to Hong Kong. Overall I think this was a pretty good product to develop because market demand is small which means overseas manufacturing will probably not come along and sell them for half of what we sell them for. I did shoot myself in the foot however by selling them too cheap but its helping Bryan and that was the whole point anyway.
Posted by bill clark | Feb 16, 2014 @ 12:22 AM | 10,145 Views
I have been around CNC machines since I was a kid. Around the age of 16 I went to work for Tampa Sheet Metal Co. in Tampa, Fl. and immediately started training to operate their CNC punch press/plasma cutter. I don't remember the tonnage but it was big and the turret held 20 or so tools. This was back in the day when tape readers still existed (circa 1986). I guess that 4 year journey planted the seed for my carrier. Between then and 12 years ago I spent my time honing my metal fabrication skills mainly with race cars and hotrods. Fast forward to 2001 when I bought a Haas VF-2 mill, Bobcad software and taught myself how to use it all which ended up taking more than a little while to become proficient at. I originally wanted the Haas to augment my metal fabrication business but it quickly turned in to a passion fueled by the seemingly endless challenges. Contracts with companies like Northrop Grumman and Sonitrol really brought my skills as a machinist to a high level. I still am a professional fabricator/machinist, still have the Haas but use my friend/business partners Milltronics VMC mainly these days and am still very passionate about making things. A quick cruse through my blog here will verify that.
Once again the bug has bitten to explore new challenges so I ordered a 3D printer. I am very excited to get going with this but I still have another few weeks before it arrives. In the mean time I have decided to jump in to a field I have always shied away from.....advanced...Continue Reading
Posted by bill clark | Dec 15, 2013 @ 02:38 AM | 11,141 Views
Making some progress on Dennis' and my planes. Both will have the new landing gear, mine will have the pulleys and his will have some of my machined aluminum horns. I was dreading all the hinging I have to do and came up with a way to save some time. Instead of putting glue down in the hole for the pin hinge I poked a small hole about 3/8" back, intersecting the hinge hole, inserting the hinge dry then put several drops of CA through the intersecting hole, bonding the hinge in place.
https://youtu.be/9SF7FHpxY_Q?si=4h8M-Vy3dm7cYiOl
Posted by bill clark | Oct 12, 2013 @ 07:18 PM | 10,543 Views
I am so backed up on my Rc projects so I have to prioritize and that means, since I fly almost every day, I need to have my foamies operational. Since I'm down to my last one (Aerokinetics 42" Vizion) I have been building 2 42" Extra 330SC's. I used the basic moments and areas of the Aerokinetics Yak 55 that I had flown the wings off for the last several years. I am incorporating some ideas that I have had for awhile such as a pulley control system and carbon landing gear designed specifically for the crucifix style foamies. Once the design was complete I machined .090" down into .125" 3003 H-32 aluminum sheet to ceate the tools for the gear. After forming to the correct profile I annealed the material. This made it "dead soft" and allowed me to use my thumb to planish the thinner section giving it an airfoiled shape and helping with rigidity of the finished part. I will add the layup process and pics of the finished parts as I move along.
Posted by bill clark | Jul 16, 2013 @ 10:44 PM | 11,064 Views
Here are some pictures of the control horns I manufacture for my good friend Bryan Hebert (pronounced "A Bear") and the prototype valve cover for the YS 160-185 we are developing. If you are a pattern junky Bryan needs no intro. If you are not He is a very well known and respected Designer/Builder in the F3A community with popular designs such as the Patriot, Valiant and Shinden. Most recent accomplishments are a 3rd place finish in "F3A Pattern" at the 2012 Nats with team pilot Brett Wickizer on the sticks in Bryans most recent design, the Alferma Biplane. These guys will be competing at the Worlds in Africa next month. The control horns are for sale on Bryans site http://hebertcompetitiondesigns.com/. They are more expensive than your typical imported hardware but they are made in the USA and are of the highest quality possible. I guarantee that . Pic up a set and support the USA Team. These are not just for F3A. You can use them for your 3D bird or whatever and can be moved to your latest plane so they will essentially last forever.
The YS has a slight issue with heat especially in the fuel pump. This valve cover has made a huge improvement in cooling and eliminated this problem. Other enhancements have netted a slight rpm increase as well. I am working on reducing the weight and and changing the shape slightly to improve the looks. We will have our first production run in the next couple weeks.
We also will be developing other high end hardware...Continue Reading
Posted by bill clark | Apr 27, 2013 @ 10:56 PM | 14,539 Views
22 years in this business and this is a first. Blown big block Chevy, Nose high, motor high, long ladder bars and leaf springs all around, a straight axle up front and a piece of schedule 40 pipe full of lead for the rear bumper. Oh, and a tilt front end. This Is how it was done back then when rear tires sucked. Old school? Absolutely. I am building this for Dennis O'Brien (2012 Nats champ-Super Sport Quickie pylon) Interestingly enough neither of us new of our common interest in Rc although Dennis has been around it a few more years than I . This project came in to the shop as your classic 70 year old basket case. I had to remake almost all the floors because they were rotted out. Dennis is very detail oriented and likes things done a certain way (imagine that, a picky modeler ) No big deal they don't come any pickier than me so I knew exactly what he wanted. We are about 5 months in but I just realized most of the pics I have taken are for a book I plan to write some day and not "looky pics". I guess I need to get the camera out again. heres a few...Continue Reading
Posted by bill clark | Mar 22, 2013 @ 07:32 PM | 14,192 Views
I have been flying electrics for about 8 years now using off the shelf motors but my latest project (gear reduction, contra rotating drive for F3P) has finally forced me to begin learning about the finer points of the brushless motor and motor building mainly because what I need cant be bought, atleast assembled and ready to go. I have CNC's so the mechanical part is less challenging. The motors' electrical side, I am trying to learn. As most know F3P requires the maximum in efficiency with the minimum of weight. I believe there are 2 approachs in this application, the low rpm approach (more motor torque/less gear) or the high rpm approach (less torque/ more gear). If this was V8 racing engine i would know exactly what to do. But its not. I am shooting for somewhere in the middle of those 2 approaches hoping to take advantage of the potential for higher efficiency. the criteria for the project is-
-an entire drive weight of no more than 22grams. motor,props, gearbox and mount
-210g of thrust using 2x 10", 3g each carbon props spinning about 2900 rpm
-4'ish amps on 2s 120-180 packs.
-12'ish gram motor weight
What I think I need at this point is a motor with a 14-20mm stator wound 2500-4500Kv. I have a 18mm kit and various wire sizes on the way from Gobrushless, what I think is a 16mm stator motor and various magnet sets coming from another source along with a few 20mm cdrom motors I salvaged from an old desktop. I can get my feet wet with this. what I will need to...Continue Reading
Posted by bill clark | Feb 25, 2013 @ 01:02 AM | 17,298 Views
We all have things that we tend to be a little obsessed with. For me, in general, its those small details. When it comes to my planes one area that I always find myself devoting excessive amouts of time and energy to is the actuation of the control surfaces and the linkage geometry. I find it justifiable. Buying (or making) the best hardware along with expensive servos then just bolting it all together using a few "rules of thumb" (most are wrong) doesnt make much sense to me. Many setups usually end up with excessive subtrim, unequal endpoints and overall poor mechanical characteristics. Does optimizing all this make for a better flying plane? I think so. I believe 50% (or more depending on how bad it was to start with) is actuall improvement to control quality/feel and the other 50% improvement is mental. Knowing that I have a well setup plane just adds confidence. For a competitive F3A ship, F3P, high speed jet, IMAC or F3D bird I think accurate control setup is mandatory. For a 3D stick banger it will mean simply extending the life of servos and hardware. In the coming weeks or months I will document what I have learned. For starters, Some guidelines..................

#1 Ratios
Set the servo arm to control arm ratio according to the required throw. Using +- 60deg of servo travel and needing +-20deg of elevator for example, the arm lengths should be set to achieve this. We'll show how to do this later. There should never be a need to use a 1:1 ratio. Every...Continue Reading
Posted by bill clark | May 28, 2012 @ 11:11 PM | 11,439 Views
spent the weekend making prototype control horns. a couple, one time, titanium brackets too. this is the kind of machine work I enjoy. servo arms and wheels next
Posted by bill clark | May 05, 2012 @ 01:28 AM | 11,231 Views
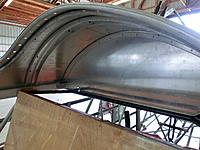
front skin is done (less fasteners) for the Stearman and passes the "house of mirrors" test which means the second to last major fab project is out of the way. Still have wing root fairings to make once the wings go on. They will be compound with a reverse curve
the other thing that looks like some space/time transporter is a prototype I am building for a fitness trainer. he wasnt happy with the results from rolling rectangular tubing leaving ripples so I came up with the bright idea to have the arc faces waterjet cut, roll the flat bar sides and then spend 3 days TIG welding (116 feet) and finishing it. the things I get myself into its supporting some valuble leasure activity for the family and making the RC budget larger and thats what matters. now that I think about it I am very blessed and thankful
Posted by bill clark | Apr 28, 2012 @ 12:15 AM | 11,490 Views
The Wind 110 is flying (in the trimming process). The racecar I built for my good friend Don Martin is complete and the Stearman is getting close. Actually the Stearman has to be done for Oshkosh this year and that date is quickly approaching, This week I have been finishing up some sheetmetal. Since my last update we have been reassembling the plane. details details, and still alot more details. working extra and I dont think I'm happy about it cuz I'm trying to finish the prototype stetching machine for a customer out of my shop. Oh did I mention I got some interest on my aluminum control horns and will be doing some production runs on aluminum horns, servo arms and wheels. Performing some needed maintenance on the CNC for this. Damn I'm busy. Trying to get reinspired to finish my 35% Edge also. 2 other small projects that desperatly need attention but I wont mention those ...Continue Reading
Posted by bill clark | Feb 03, 2012 @ 10:45 PM | 12,671 Views
I'm on a roll with my blog updates so I'll keep going.
I have modified this plane enough that I think it gives me the right to change the name from Wind "S" to Wind "X".
-Sebart 110e Wind S pro
-Futaba 14mz tx
-Futaba 6008HS Rx
-Futaba BLS551 x2 on ailerons
-Futaba BLS451 on rudder
-Futaba BLS153 x2 on elevators
-Futaba FMA 5065 300KV outrunner motor
-Castle ICE 100 ESC
-Tech-Aero dual redundant regulators/batteries
-TP 1320 2s x2 for RX
-TP 3900 8s PL or Outrage 4200 8s for motor power
-17 or 18x10 Xoar prop
-Eagletree telemetry including airspeed and GPS (to analyze my pattern accuracy)
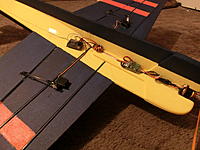
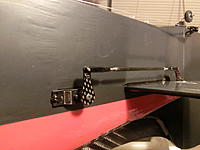
I used CAD and some geometry software to optimize the control geometry then machined aluminum horns off of this information. I also decided to try a pulley set up on the rudder using a Hangar 9 servo pulley and my own design pulley on the rudder. No slack here boys. The rudder hinge line on this plane is laid back 2 deg so I had to remount the servo to keep the setup pependicular to the hinge line. Works perfect. I will be triming the plane using the "positive incidence" method as outlined by Bryan Hebert http://hebertcompetitiondesigns.com/triangulation.aspx# Since the wings are recessed I had to make spacers and wing adjusters. I will make the stab adjustable too but need to fly it first and see how much travel and which way first. canopy will get some paint work inspired by the baddest hotrods on the planet....Top Fuel hydros. Will be...Continue Reading
Posted by bill clark | Feb 03, 2012 @ 08:54 PM | 11,737 Views
with my roots in drag racing the flamed Kimball Pitts Model 12 of Greg Connell gets my attention. In for its annual recently and to add spades on the ailerons Greg flys his routine 3 times to find which spade design he likes best. Private airshows "in your face" are exciting. Ok, work isnt that bad most of the time. My wife came to the shop on the day he was flying and at one point Greg does a point roll on a vertical down line coming straight at us from above. when he pulls level at 50 feet I turn to look at my wife and she has relocated a good distance away. LOL I guess she found that a little too thrilling. Sorry I forgot to video. next time
Posted by bill clark | Feb 03, 2012 @ 08:32 PM | 11,815 Views
The sheet metal, rigging and final touches on the 4E are complete. Everything comes back apart and Clint starts covering the fuse. While hes having fun there Kevin designs the speed ring and I spend the last 2 weeks taking it from concept to (almost) finished part. these parts will go fast through the air but "fast" isnt a word one would use when describing the time it takes to make this...Continue Reading
Posted by bill clark | Jan 28, 2012 @ 11:13 PM | 11,602 Views
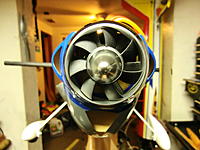
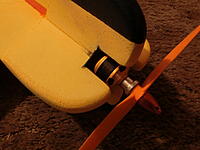
I really enjoy coming up with new things or refining existing things. My latest project has been a Sebart Wind 110e. I have found from experience that keeping motor temps under control lets you run them harder (dah!!!). The nose area and firewall on the Wind just about makes it impossible to effectively move air through the motor and around the windings. This is the most important type of airflow I believe. After thinking about the problem I came up with a solution that just may be the ticket. A little lathe work on a GP spinner and a trip to Skycraft for a circuit board fan netted something I think looks pretty cool and just may work. Data aquisition on the plane will confirm just how much of an improvement, if any this will provide. I will be taking steps to seal the back plate to the nose and around the blades. So far I havent seen this done yet but I cant belive someone hasnt tried it. I will post results in the weeks to follow.
Posted by bill clark | Oct 30, 2011 @ 09:36 PM | 12,197 Views
Pre-production unit designed by Jason Thornton (3Deranged) and Blake Hilson (Hilson87)
-6mm Depron Foamy
-Futaba 14MZ 2.4g Tx
-Futaba R617FS Rx
-4x Hitec HS-65MG
-Castle Creations Phoenix 35
-Castle 10amp BEC
-Scorpion 3008-1220
-Xoar 11x5
-Sky Lipo 1300ma 30 and 40c batts
-23.5oz AUW
-58oz of static thrust
Still have to finish up the paint work but decided to throw it up anyway. 3 flights tonight in 20mph winds. This thing is a rocket. After 30+ planes this one has the highest power to weight of any. Double upline snaps...... no problem. This thing is gonna be fun. Crazy response in acceleration and still can prop up a bit. Should be 22oz but I opted for the bigger motor because I had it and also wanted a plane to allow my freestyles to be more aggressive and as a good outlet for stress relief. Because of the season and time change I will outfit this one with LED's for night flying. Videos to come once the wind settles.
Posted by bill clark | Oct 19, 2011 @ 11:05 PM | 15,126 Views
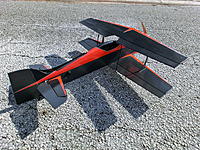
Just about got it flying as good as I'm gonna get it. This is my second one.The first one I liked so much (the looks mainly) I decided to do another and try to fix some of its nasty tendancies like bad roll coupling, some pitch coupling and roll sensitivety that was a little too much for my liking. After a little consulting with 3deranged and thumpin' my own knocker the decision was made to remove about an inch off the rudder top to reduce roll coupling and remove an already over authorative rudder, added 2" to the WS to dampen the roll, bigger ailerons to be moe effective in 3D, moved the battery up high to raise the roll center (higher CG) and help the roll (to upright in KE) coupling, pull pull on the rudder for obvious reasons, carbon strake on the rear turtle deck for a final tweak to eliminate the pitch coupling, even with a rearward CG and more recently, but not pictured, small SFG's on all 4 wing tips which helped rid some transitional rock with a positive side effect of a almost rudder only KE loop. I am still tweaking the design on these and then will be making the final version out of thin lexan or carbon. On top of a complete re-cover I machined carbon horns and servo arms with robust but light carbon/Ti linkages. Installed 3156 MG Futaba digitals all around a CC Pheonix 25 ESC, MicroDan 2510-3D on a 10X4 Xoar making 55 oz of static thrust @ 32amps with an all up weight of 29oz with the 3s 2200 and 26 with the 1350. The result was a 34" plane that flys straight w/o any mixes and plenty of power for upline snaps, etc and is alot of fun. Put the CG in the trunk and it will tumble and 3D with the best of them. CG forward and it tracks great for pattern work. Dual purpose.... ya. Slow speed/high alpha is great too. It still has that "lots of wing" biplane feel but that makes it fun. All in all its a perfect plane for my fleet that feels way different than a mono but in a good way.
Moded Fliton Rogue Bipe (8 min 12 sec)

Posted by bill clark | Oct 11, 2011 @ 04:03 PM | 12,496 Views
This wonderful economy has put a cramp in my buisness's ability to maintain a consistant work load so its elsewhere for a steady paycheck. I am very blessed to have multiple skills to fall back on and decided to give 1:1 aircraft work a go. My interest in RC may have had some influence too???? Since race cars and airplanes share the same construction techniques I felt there may be some enjoyment to be had in trying my hand in this field. Certainly a thing or 2 to learn as well. Kimball Enterprises, maker of the 1:1 "Beast" Model 12 biplane (R.I.P. Bryan) is 18 miles from my home and has proven to be a fine place to work and good people.
The project of late has been a complete restoration (mostly remake) of a 1929 4E Stearman biplane and my part is the sheet metal work. This plane has some interesting history. Originally purchased by the Richfield Oil Company then became the official plane for the Jimmy Allen Flying Club (old timers remember), a stint as a crop duster in the 40's and presently owned by Sarah Wilson. Progress is slow as many parts and pieces have to be meticulously hand formed and fitted to represent an "as close to original as possible" reproduction of the original. Truth is the quality probably surpasses the original by a good bit. This is the third 4E to go through Kimballs shop. The first was 20 years ago. The second was in 2006 and now this one. I have been working off photos from the original manufacture, the 2 previous birds and...Continue Reading