Larrikin's blog View Details
Posted by Larrikin | Dec 31, 2019 @ 04:18 AM | 12,660 Views
I was hesitant to categorize this blog entry as a “Build Log” because when one buys a moldie, it’s already built.
All that’s required is the installation of off the shelf items.

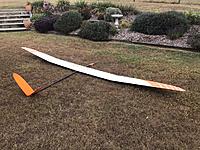
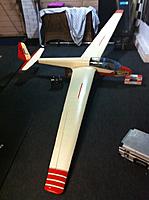
I’m logging the fit out of my V-Tail, Slim fuse, Explorer Big Flap F5J model because there’s either so little info to be found or it’s not in a single location that’s easily identifiable.

Firstly, I wasn’t expecting the extra long boom. About an extra 115mm longer than the Normal fuse.
Why would this matter? ... CG.
I’d ordered the 75gram Leopard LC 250-30 4040kv motor with the 5:1 micro box from Reisenauer.
The last thing I want to have to do is add lead to the nose for CGing it.

I was also surprised that a Horizontal stab plus a vertical stab weighed the same as my 2 v-tails. Both configurations are approximately 60g.
It occurred to me that the Explorer may require 60g tails, regardless of configuration, for an achievable CG.
As some form of confirmation of that idea, my Vixen 2 V-tails are heavier than my F3J Vixen (winch launch) V-tails.
The only explanation I can think of is weight and balance.
I’m 99% certain that the v-tails are built to a minimum weight and could be lighter.
Posted by Larrikin | Dec 02, 2018 @ 10:49 PM | 11,010 Views
This blog won't interest many. It's for me as I learn a new transmitter logic.
I want to keep a record of things as I "discover" them.

Like "Logical Switches" (LS) for example.
It took some reading ... and re-reading ... and ... re-re-reading before the light bulb came on.

What I wanted to do was to have a Master Switch (on/off) govern the 3 position (off/partial/full) motor switch.

No matter what combination I tried to get the (il)Logical Switches to work it just wouldn't happen.
Then it occurred to me that the operation or the application of the LS doesn't happen in the LS menu.
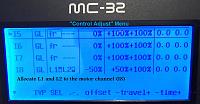
All one is doing in the LS menu is creating a single switch from 2 switches, which is then applied to a channel/function in the "Control Adjust" menu.

For the motor example, in the Control Adjust menu, scroll down to I8 (motor channel) and apply the newly created LS(s) to the respective channel.
Also noting that should the switch require reverse operation, it's done by selecting the "LSi" (i for inverted) switch option.
Posted by Larrikin | Jul 01, 2016 @ 04:30 AM | 15,348 Views
While I'm focused on getting a Rubicon or 2 going, I still get pumped about utilizing the Larrikin wing moulds to make a DS cruiser.

With 3 meters of DD92-8416 (RG14), a 'T' tail and using the TLAR design principles, I reckon it'd be a sweet model.

The wing is proven. It's vice-less. It handles like a dream.
I know it'll never get a top speed for the day while there's a Deepend or a Kinetic on the hill. But there's something about the presence of a 3m model ripping up the DS circuit.

Anyway, just ramblings at the moment. I wanted to get dibs on the Legato name.

British Dictionary definitions for legato

/lɪˈɡɑːtəʊ/
adjective, adverb

1.
to be performed smoothly and connectedly
noun (pl) -tos
2.
a style of playing in which no perceptible gaps are left between notes


It seems fitting, don't you think? A smooth, connected sound.

D.
Posted by Larrikin | Feb 25, 2015 @ 06:13 AM | 43,054 Views
It is with great reservation that I post a build log of the Wabbit evolution ... the Rubicon.

The reservation comes from the realisation that not one thing that I've blogged about has ever been completed
Edit:- I finished it ... yay ... go me
Having said that, the desire to have a DS model(s) ready for this year's season is high and the time to begin is now. Well ... at the rate I've been building lately, it maybe for the 2016 season ... but I doubt it.

After negotiations with Andrew (AVB) he's cutting the wing moulds on his CNC. The construction will be the same as his SCratcho curvy wing moulds. Corian bonded to laminations of ply.

The fuse mould will be of conventional, non-CNC methods. The fuse plug that was intended for the Wabbit will be reinvented as the Rubicon fuselage.

More info to follow
Rubicon #1
Rubicon Maiden Flight (2 min 27 sec)


Rubicon #2 Fast Forward to 3:00 where it's finding form.
The Rubicon v.2 (5 min 10 sec)
...Continue Reading
Posted by Larrikin | May 04, 2014 @ 05:48 PM | 18,586 Views
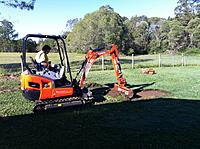
I have the privilege of being able to build a purpose-built model workshop/Man Cave.
It's been months in the preparation stage but today the first sod has been turned and I plan to blog the progress.

Please jump in with any suggestions along the way.

Very VERY excited.
Posted by Larrikin | Mar 31, 2012 @ 03:03 AM | 16,885 Views
I've been waiting for some bits to arrive so I may continue with the refurbishment.
The parts have arrived so I had no excuses left, time to get into it.
I'll state in advance that I underestimated the level of difficultly when working with other people's repairs.
This '13 has a hardwood nose block with a plywood "keel" and at some point an aerotow release was made for the nose. Drilling into the nose, through the ply without it wandering would have been difficult and as it was, the hardwood chipped and splintered at the hole opening.
With the tow release unit, I found a suitable brass tube diameter and epoxied both the release unit and the brass tube into the hole and filled the chips and splinters around the hole opening at the nose.

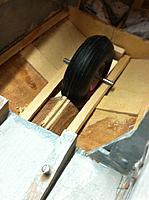
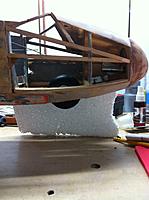
Now for the nose wheel. I cleaned up the area where I intended to put the wheel and cut two pine rails to epoxy in between the fore and aft bulkheads. The idea was to sit the axle onto the rails and clamp with "Saddle Clamps". But first I had to see how much of the wheel was protruding below the fuselage. I'm using the clamps in a way they weren't intended to be used but I hope they'll do the job. ( I bought spares )
Now that this is done. I'm ready to begin planking the outside.

D.
Posted by Larrikin | Feb 27, 2012 @ 07:00 AM | 17,113 Views
The Bees.
Liam is pushing to have the Bees flying asap so on Sunday arvo we had a combined build session. The next stage of the Bees was to Shoe Goo the leading edges of both of the wings. Not ever having done this before we tried equal weights of Goo and Xylene and that seemed to work pretty well. Scuff the moulded foam surface with 120 paper, brush on the thinned Goo, let it dry, scuff and repeat... (3 times in total). The next step is to apply the 3" wide fibre tape.

ASK-13.
Having sanded a lot of the paint off the fuselage it has become evident that dad didn't fibreglass all of the sheeted balsa on the fuse. The fin and tailplane are just doped and painted over so the grain of the balsa is still visible. And the areas the are glassed are done with polyester resin.
Crikey there was some paint on it . Both Liam and I spent a lot of Sunday arvo sanding.
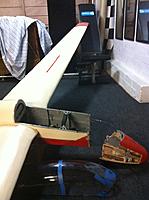
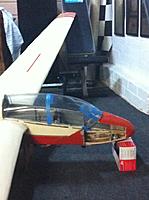
My attention then turned to the canopy frame. Dad made it from square brass tube, soldered and carefully caressed into shape. The canopy was then glued and pinned to the frame. In the crash, the canopy frame was pretty badly damaged. Brass joins were broken, hinge points snapped off and it was bent way out of shape. I spent a few hours tinkering with pliers and soldering iron and it became a little over-whelming and I considered scraping the whole thing in favour of a ply frame that just lifted on and off. A hinged canopy is cool but who cares once the model is barrelling down the runway behind a tug?
I took a break, got my second wind and forged ahead and it looks like it'll be ok ... the hinged canopy stays. I'll get some shots of the canopy frame soon.

D.
Posted by Larrikin | Feb 21, 2012 @ 04:53 PM | 20,023 Views
G'day,
I'm guilty of having too many unfinished projects (like many other people I suspect) but recently, I've been presented with an opportunity that I coundn't refuse.
In the mid 80's, my dad built his first 1/4 scale model from a Cliff Charlesworth plan, the ASK-13. The subject he chose to model was a '13 that both of us had flown in and was based at a gliding center about 3 hours drive from home in Kingaroy. Looking for his next project, he turned to the ASK-18 and he sold the '13 to help finance it.
To cut a long story short, my plan is to have both the '13 and the '18 airworthy so my dad can see both of his 20+ year old creations circling in the same thermal being piloted by myself and his grandson. And if he behaves himself I might even hand him the transmitter (Payback is sweet.)

ASK-13-1.MOV (3 min 6 sec)

Posted by Larrikin | Feb 05, 2012 @ 05:52 AM | 18,416 Views
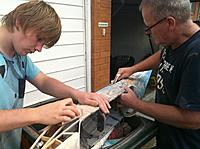
Rather than start yet another BeEvo build thread in the main forum I thought I'd start documenting the build here instead.
I got two BeEvos, one for me and one for my son Liam.
It took about two weeks from confirmation of payment to when they arrived.
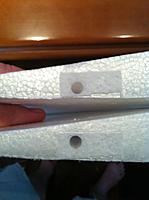
Reading other build logs, I wasn't sure what we were going to get coz there were different versions reported, particularly relating to the carbon rod at the rear of the centre join. Some had the rod but no holes in the foam ... others had the holes but no rod. We got both.
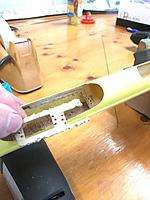
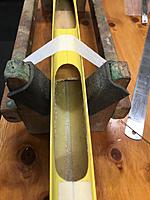
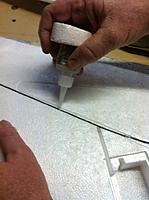
Great, until I do a trial fit to find that the holes in the foam aren't centered equally ... on either model. See image 1. This put a step in the panels across the center join.
Fortunately, others that missed out on the rod or the holes in the previous threads just left the rod out of the model with no apparent side effect. Sounded good to me.
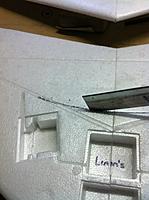
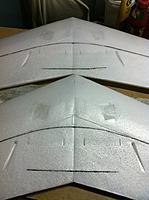
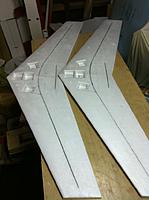
Then I read about the "A$$ Crack". Not ever owned a chevron wing, the a$$ crack phenomenon was new to me. Our solution was to insert a 200mm length of 2mm carbon rod towards the rear of the centre join on both top and bottom skins.
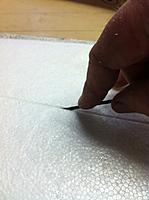
Also, instead of butt joining the carbon spars at the center join, I cut a radiused groove so the spar can be kept in one piece.
Next step, taping the wing.
Happy to hear your experience here. The single page instruction sheet doesn't mention whether to fully tape the skins or just as shown around the perimeter.