Mayday!Mayday!'s blog View Details
Posted by Mayday!Mayday! | Aug 11, 2011 @ 11:26 PM | 17,290 Views
Not so much a build log as a photo gallery.
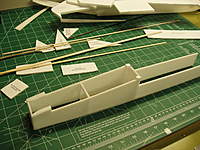
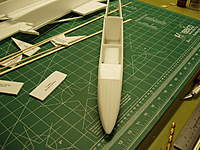
All wires buried for clean look. Used HS-81 servos, AR500 Spectrum Rx, CC Thunderbird 36 amp esc, Exceed Rc Alpha 480 motor, Aluminum spinner and folding prop, used Gold-n-Rod imbedded in both sides of fuse for control rods.
And of course the good 'ol Red, White and Blue paint scheme!...Continue Reading
Posted by Mayday!Mayday! | Jan 14, 2011 @ 01:21 AM | 19,248 Views
I was asked to paint a Rustler body for an 8 year old boy. Of course I was happy to do so. The reason this came about is here- https://www.rcgroups.com/forums/show....php?t=1358404


Well Brian, I got 'er done. Not exactly what I would ride around in, but I betcha Cal would love it.
I went through 3-4 design changes before I actually painted this.
At my age, it's hard to think like a child LOL!

I was informed that he really is into Mario. And that the paint job should reflect so.
I tried to keep it simple without going into to much detail. Also tried to keep the colors clashing so it would be visible at farther distances and what direction is forward/rear.

Ok, 'nuff chit-chat. Here ya go bub!
(Hank stopped by my house while I was in the middle of painting it. He got first look at it. Just thought I'd throw that out there )...Continue Reading
Posted by Mayday!Mayday! | Jan 08, 2011 @ 03:39 PM | 18,871 Views
A fella here on groups posted a wanted ad for someone to paint some depron for him and I figured I would lend a hand.
This is the plane that was sent to me--
http://dynamicfoamy.com/V35%20nano.html

And this is how he said he would like it painted, or close to---
http://www.greatplanes.com/airplanes...33-views-2.jpg

Not exactly the same style of plane, but we'll make do.

Well started with the kit and got it unpackaged. I think my pinky toe weighs more than this plane. Not much there.

I taped off the body for the top red, white stripe, black stripe and white under.
I also taped off the wing for the red leading edge, white stripe, black stripe and the rest white.
Painted the black lines first and then the red on both the body and top of the wing.
I then moved to the bottom of the wing. Again just taped off the lines and started with black then red.
I also painted the side peices red while I had the red loaded in the airbrush.
I moved on to the tail feathers and it's the same as the wing. Just tape off where ya need.
I then came back with black and put the lettering on the sides and painted some windows on.
That's pretty much it.
I took some pics with the pieces together as much as I could. Since I am not building this one (strange for me) I could only place the pieces close to give an idea of what it looks like.
Hopefully when he is done building it, he will post back here with a completed picture of it. I am sure it will look nice.
Well enough chit-...Continue Reading
Posted by Mayday!Mayday! | Nov 26, 2010 @ 09:48 PM | 19,912 Views
A fellow I know asked me several months back to airbrush a body for his RC truck-- link to that-- https://www.rcgroups.com/forums/show....php?t=1300454 with the HULK on it.

He liked it well enough, he asked me to do another. Course when I met up with him, he asked me to do two of them.
He said he would like Frankenstein on a Silverado 1500 body for a Slash. And the other body is a Bulldog for Associated B4.1 Said it didn't matter what was on it.
So, I figured I would try airbrushing True Flames (in reverse), not to easy to do. And I went with a black and white Frankenstein.

So here is a few photos of 'em. Let me know what ya think....Continue Reading
Posted by Mayday!Mayday! | Oct 22, 2010 @ 05:46 PM | 29,690 Views
(Click where it says comments to read the rest)

Parts used--
Fenix 100 Glider from http://lazertoyz.com/

Motor- http://www.hobbycity.com/hobbycity/s...idProduct=2069
This can also be bought from LazerToyz

ESC-- http://www.hobbycity.com/hobbycity/s...idProduct=4204

Servos-- http://www.hobbycity.com/hobbycity/s...idProduct=7475

Battery-- 2 cell for indoor and light wind, 3 cell for wind and more power--
http://www.hobbycity.com/hobbycity/s...idProduct=6788

Transmitter and Reciever will vary. I use the DX7 and this Rx-- http://www.hobbycity.com/hobbycity/s...dProduct=11972

You will also need Exacto blades, hot glue, servo linkage, blenderm tape, painters tape, and carbon tube for the elevator.


A friend of mine (Bighank13) has asked me to make a build log of the Fenix.
He is a teacher and also teaches his class to fly RC. Now they will be building RC

So this is where I come in.
BH- hope this guide/build log helps.
And kids- DON'T let the teacher use the knives, glue gun or soldering iron. He will look funny with alot of Scooby-Doo bandaids

Well let's get this show on the road.
The first thing you will need is the plane kit.
Don't giggle too much about mine being pink and black. My wife bought it for me for my birthday last year. (maybe why I never built it?)

Here's the kit as it comes-
Posted by Mayday!Mayday! | Aug 30, 2010 @ 09:57 PM | 25,123 Views
A buddy of mine (works here at one of the LHS) asked me to airbrush him up a body for his car. I asked what do you want on it ? Flames, stripes, dots, lightening? What?
He said, whatever doesn't matter.
Ok then. How about colors. Got somethin in mind? Again he tells me, whatever doesn't matter.
So I am going to let him know he has a pink and purple Barbie car ready for pick up
Course between myself and you guys, this is what I come up with.
I did a Spiderman Baja for myself a while back, and thought I would like to do another comicbook hero. I decided on the Hulk.
Of course I stuck with green for the main color. Candy Apple green actually.
I did a ripped effect also with yellow. I used Spaz Stix Mirror for the windows to offset the darker color of the green.
That is one reflective finish for sure.
Anyhow here are some photos of it. I am sure he will want to have some of them before it gets bashed.

Let me know what you guys think-
Posted by Mayday!Mayday! | Apr 18, 2010 @ 07:30 PM | 20,478 Views
Got in some good shots flyin at the field. We had the Super Cub, E-Flite Edge 540, Freewing F-15, Easy Star, Stevens Areo Helium. Bugsplater took most of the pics and flew the Super Cub. He also got some stick time on the F-15 and Helium.
I got my daughter on the buddy box on the Easy Star and Helium too.
Man I am glad spring is here!!!!...Continue Reading
Posted by Mayday!Mayday! | Mar 14, 2010 @ 12:00 PM | 21,344 Views
These are some of the builds for the kids over at Hoffman Trails School.
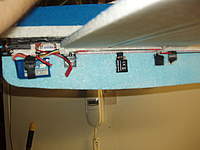
More info on this can be found here-
https://www.rcgroups.com/forums/show....php?t=1147053

Also additional photos of these planes can be found here-
https://www.rcgroups.com/forums/show....php?t=1209979

I won't go into a huge build log on all of these, but I'll show a few build shots of each. If anyone wants any info on these planes or power systems used, shoot me a pm and I'll be happy to pass on the info.

I believe what Henry is doing over there is a wonderful thing and I have been more than happy to help him along the way.
Even if you cannot contribute funds or materials, shoot a post in his thread and show him some support. Many of the kids and parents do read that thread. Let them know that there is an army of support behind them!

Anyhow, some recent additions to the Hoffman Fleet-...Continue Reading
Posted by Mayday!Mayday! | Mar 08, 2010 @ 09:51 PM | 22,388 Views
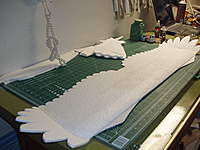
I was contacted by another member here on RCG and asked if I would build an EPP Eagle and also post some of the build.
So here goes-

I got the kit all layed out to make sure all was there (pic1)
Then I started construction on the wing. There are 2 carbon fiber tubes inside the wing for support. (pic2)

I then moved on to adding the wing tips and leading edge. This thing is starting to look like a bird now. (pic 3)

(pic4/5) Got the wing done and ready to move on.

(pic6/7) Doing the fuse construction adding the sides and bottom. Also put in motor mount braces.

(pic 8/9) Got the top on and motor mount in place.

(pic 10/11/12) Tail top done and cutting ply supports for the wing dowls. Also dowls in place with supports.

(pic 13) Started airbrushing the wing black. I was testing a new airbrush I picked up from HobbyKing. This is a really nice gun for the price.

(pic 14/15) All of the black is done and looks good.

(pic 16/17) Doing a nose job Also the nose detail.

(pic 18/19/20) Completed bird ready for power system.

Have fun with this one Joe!
Now I may have to end up getting me one after doing this one....Continue Reading
Posted by Mayday!Mayday! | Mar 07, 2010 @ 01:07 PM | 22,315 Views
If you haven't built a Stevens Areo kit, you are missing out. This is maybe the fifth/sixth one I have built and they have all been great. You can check them out here- http://www.stevensaero.com/

Another member here on RCG sent me this kit to build for him, so I figured I would take some pics and do a small build log on it.
The first thing I would like to note is always read the manual front to back before starting the build. Also try to pre-plan ahead of the build for any changes/mods.


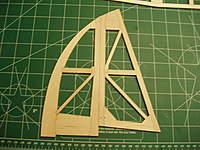
So I started with opening the kit (pic1) and lightly sanded all of the sheets on both sides with 600 grit. It is alot easier than sanding after the pieces are removed.
(pic2) The first part of the build was the elevator/stab/vertical. Very simple and low part count. On this step I planned ahead for CA hinges on the elevator, so I sanded the angles on there in this step.
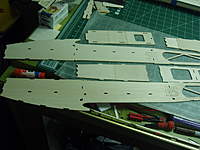
(pic3) Next up is constructing the central crutch and the fuse sides. Pay attention to the forward and top markings on the ply. When the crutch is done it should look like this (pic4).
(pic5/6/7) I added the fuse sides and also the forward bottom sheeting. Make sure everything is snug and straight when doing this.
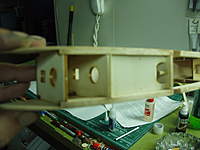
(pic 8/9/10) Planning ahead- I planned that the elevator servo would be in the fuse instead of outside the body. I figure less drag and it would look better hidden. I also planned to use Gold-n-Rod instead of wire linkage for this. That Gold-n-Rod is the best thing since sliced bread. No binding and...Continue Reading
Posted by Mayday!Mayday! | Jan 23, 2010 @ 05:54 PM | 22,662 Views
This was a build for another member here on RCG. Still have to deliver it to him.
Not so much of a build log, but more of picture posting and a run down on what went in to it.

I used the 1300 Kv Blue Wonder with an 8x4 GWS prop & prop saver.
10 amp Turnigy Plush ESC
Turnigy 4.7 gram servos
Spectrum AR6110
Flightmax 3 cell 500mah lipo

I used carbon fiber rods for the linkage instead of wire. It doesn't flex as much and a bit lighter.
AUW came to 7.1 oz. A little heavier than I had hoped, as I was shooting for 6.5 oz.
I airbrushed all the paint using Createx airbrush paints thinned slightly with windex. It flows better this way and seeps into the open cells of the epp without adding alot of extra weight.
Anyhow-, enjoy!
Posted by Mayday!Mayday! | Jan 03, 2010 @ 05:58 AM | 23,201 Views
Anyone who knows me, knows that I love my coffee. Heck, even my wife believes I would trade her for a good cup So I was sitting here one night wondering what to build next and what it would look like. Hhmm?

I love to build, but I always find it an issue when it comes to what the covering scheme will be. I don't want the same boring looks or have it look close to the next guys.
So, here I was drinking a cup of coffee and stumped. And I got it!

Let's make a coffee plane.

I love Tim Hortons (one of the best things that ever came from Canada), so I decided to go with it.
I recently picked up the Helium from Stevens Areo. I just built the Mudbug and it was a great build so I figured the Helium was next on the list.

I started with lightly sanding all of the sheets with 600 grit before removing anything. Seems easier to do it this way.
I moved on to the first step and built the elevator and rudder. These were fairly simple and I liked the way the flat carbon was installed to strengthen these. After they were complete, I covered them.
I moved right along to building the fuse and the central crutch. This wasn't bad at all. Pay attention to the direction of the way the pieces go and don't glue anything until you dry fit everything.
The central crutch is a tank. I think you could plow this plane in and this would be the only thing that survives. Nice.
After I got the crutch and the fuse started together there are a few other pieces that go in. I also planned ahead...Continue Reading
Posted by Mayday!Mayday! | Dec 25, 2009 @ 10:02 PM | 24,205 Views
Well I picked up one of these guys from Hobby Lobby during the black Friday sale. Figured I would put it together.
I got the ARF, so I had no electronics just the fan unit. I decided to go with the E-Flite EDF 480 4000kv instead.
As far as the build goes, it's pretty simple. Just get the elevators, verticals and wings on. The nose and landing gear and linkage.
One problem I did (I knew I would) run into was, I mounted the fan to the rear of the opening because I was going to run a larger lipo. I wanted the least amount of issues with CG as I could.
I used a solder iron to make a valley in the foam (top) for the motor and esc wires. Then I covered the wires with tape and sealed them.
I put the Rx and extra wires inside the battery bay. I also cut the battery bay so that the lipo is put in through the canopy. I really hate flipping a plane to connect a battery.
Other than that, I also covered the entire model with a light coat of polycrylic to help with dents and dings.

Equiptment-
E-Flite EDF 480 4000kv
Turnigy Plush 60 amp ESC
Spectrum AR6200 Rx
4 HS-65 servos on elevator and ailerons
1 HS-55 for nose wheel
Zippy Flightmax 2650 4 cell 20c lipo

A quick note- The ARF comes (this varies) with the elevator servo leads tied together with no reverse on one. You can either flip one servo or slave one channel to the elevator on your Tx and split them.
I split them so I could adjust them seperate. I slaved the gear channel over.

A few pics of the finished bird and then on to the next-
Posted by Mayday!Mayday! | Dec 21, 2009 @ 09:40 PM | 23,483 Views
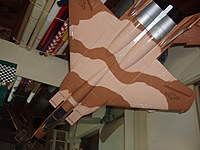
Another member here on RCG asked me to build them a Yardbird F-18. No problem. Well it also had to be made of EPP and painted with the F-16 Bicentennial type colors.
Well not a problem.
Here is some shots of the build pics and the final look before I send it off to him....Continue Reading
Posted by Mayday!Mayday! | Dec 20, 2009 @ 02:19 AM | 27,136 Views
Ok, so last week I got the Mudbug done. What's next? Well, how's 'bout a twin edf?
This is not an in depth build log or step by step as there are a ton of post's on Steves jets and a great manual to use. This is an alternate to the norm and what I did.
Before I go on, I want to thank Steve for the great design and use of the plans. I have built a few of these and love everyone of them.

I also want to give mention to Sal C. He had built a 16 inch w/s with a single edf40 and inspired me to go this route. You can catch his build thread here-
https://www.rcgroups.com/forums/showthread.php?t=383692

So, on with the show already!

I built most of this with 3mm Depron to try and keep the weight down.
I started with the front fuse, keeping in mind about weight.
I used 6mm to piece the nose together with 3M 77. This stuff has a great hold and sands better than CA.
After the nose was complete, I hollowed out some of the nose inside. It still is strong, but trying to save weight.

After the front was done, I moved on to the wing. I used one carbon tube across the wing. I also used triangle stock for the leading edge of the control surface. This helps to give some strength to it and also I find it easier to hinge and have good throws.

I moved on to the rear fuse. I used 3mm for the sides, center walls and formers. I did use 6mm for the bottom here. I knew the 40mm edf's would be a tad tight for the height of the fuse, so this allowed me to carve into it. I really didn'...Continue Reading
Posted by Mayday!Mayday! | Dec 08, 2009 @ 07:03 PM | 25,459 Views
Ok so I picked me up one of these little buggers. This isn't so much of a build log, more of a 'looky what I made'.
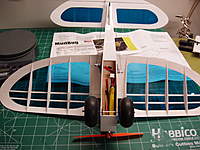
I will say that this is one really easy build and goes together fast. I did stray from the suggested way to finish the model. It's recommended to cover only the open areas in the wing and tail, then seal the wood with poly or lacquer.
I decided to cover the entire plane with Solite.
I did also stray from suggested motor to a 10 gram brushless, so I had to build a firewall closer to the nose.
Because I was planning on covering the entire model, I added support sticks to the tail end. I figured the covering would shrink and I didn't want the sides to crush in. - 'course Solite doen't shrink that much.

Anyhow, the setup is as follows-

Blue and White Solite for covering
10 gram 2000Kv motor with 6x3 GWS prop and prop saver
6 amp Turnigy Plush ESC
(x2) 3.7 gram servos
Spectrum AR6300 Rx (I made my own connectors for the servos and esc to fit the Rx)
2 cell lipo 460 mah 20c
#5 Trexler pneumatic tires (Dang things cost almost as much as the kit! But they do make the look)

I painted the control horns and wing hold down rods white. I think this makes them stand out less. Also painted the inside motor area and firewall white.
I also painted the back wheel black, along with the lite ply doublers for the front wheels.
I also painted the underside of the wing with a light coat of Lustercote white primer. I figured why have everything else white and not under the wing, right?

Believe it or not, AUW--- 3.6 ounces! Not going to be flying in 10mph winds with this one.
Alright, how 'bout some pics--