Comments (4)
Add Comment
-
![Name: mig15ad_1[1][1].jpg
Views: 272
Size: 63.6 KB
Description: This is the plane I'm doing Name: mig15ad_1[1][1].jpg
Views: 272
Size: 63.6 KB
Description: This is the plane I'm doing](https://static.rcgroups.net/forums/attachments/4/4/3/9/1/3/t8064458-19-thumb-mig15ad_1%5B1%5D%5B1%5D.jpg?d=1437077652) Views: 272
Views: 272
This is the plane I'm doing -
 Views: 270
..Or this, same plane, different colours, not sure which is "more correct" but I do like them both! -
![Name: thom3215c[1].jpg
Views: 279
Size: 30.7 KB
Description: This is also a possibility, nice visible markings Name: thom3215c[1].jpg
Views: 279
Size: 30.7 KB
Description: This is also a possibility, nice visible markings](https://static.rcgroups.net/forums/attachments/4/4/3/9/1/3/t8064460-76-thumb-thom3215c%5B1%5D.jpg?d=1437077653) Views: 279
Views: 279
This is also a possibility, nice visible markings -
 Views: 277
My original attempt, for the stock wheels The cool part was that the oleos were oil dampened ( I used RC truck shocks with springs inserted inside) -
 Views: 270
New ones with bigger, more scale size(but still a little small) 3 1/4" mains and 2 3/4" nose wheels. Original HTG struts and wheels beside for comparison. The new mains are the same depth as the originals, but the nose is considerably wider.
-
 Views: 244
Lagg 9 paint scheme -
 Views: 217
Many Russian planes did not have the stars on the wing tops -
 Views: 214
Really should put a red spinner on The wheels are from a Dynam Tempest, nice and light but just a bit small, probably get some 3-3.25 light Dave Brown wheels to better handle the grass -
 Views: 232
Original scheme
-
![Name: me262a1a72bg_30[1].jpg
Views: 256
Size: 58.2 KB
Description: My first choice, I've always liked the browns, (RLM 81) But they are hard to get to look good and it seems there was no consistency in the colours. Name: me262a1a72bg_30[1].jpg
Views: 256
Size: 58.2 KB
Description: My first choice, I've always liked the browns, (RLM 81) But they are hard to get to look good and it seems there was no consistency in the colours.](https://static.rcgroups.net/forums/attachments/4/4/3/9/1/3/t7437277-165-thumb-me262a1a72bg_30%5B1%5D.jpg?d=1420431423) Views: 256
Views: 256
My first choice, I've always liked the browns, (RLM 81) But they are hard to get to look good and it seems there was no consistency in the colours. -
![Name: Me262a2abg_39[1].jpg
Views: 251
Size: 56.2 KB
Description: second, An A2-a converted back to A1-a, RLM 74/75 Name: Me262a2abg_39[1].jpg
Views: 251
Size: 56.2 KB
Description: second, An A2-a converted back to A1-a, RLM 74/75](https://static.rcgroups.net/forums/attachments/4/4/3/9/1/3/t7437285-12-thumb-Me262a2abg_39%5B1%5D.jpg?d=1420431463) Views: 251
Views: 251
second, An A2-a converted back to A1-a, RLM 74/75 -
![Name: Me%20262%20JU87%20DVIII%20FW190D9%20014[1].jpg
Views: 261
Size: 39.2 KB
Description: third, this is an A2-a with the inner pylons and kinda cool, almost Japanese paint scheme Name: Me%20262%20JU87%20DVIII%20FW190D9%20014[1].jpg
Views: 261
Size: 39.2 KB
Description: third, this is an A2-a with the inner pylons and kinda cool, almost Japanese paint scheme](https://static.rcgroups.net/forums/attachments/4/4/3/9/1/3/t7437274-43-thumb-Me%2520262%2520JU87%2520DVIII%2520FW190D9%2520014%5B1%5D.jpg?d=1420431398) Views: 261
Views: 261
third, this is an A2-a with the inner pylons and kinda cool, almost Japanese paint scheme -
![Name: headbk9n[1].jpg
Views: 277
Size: 124.4 KB
Description: And last, probably the hardest to do right, I've seen a few, and when done well, look like this. Otherwise not so good Name: headbk9n[1].jpg
Views: 277
Size: 124.4 KB
Description: And last, probably the hardest to do right, I've seen a few, and when done well, look like this. Otherwise not so good](https://static.rcgroups.net/forums/attachments/4/4/3/9/1/3/t7437335-168-thumb-headbk9n%5B1%5D.jpg?d=1420432638) Views: 277
Views: 277
And last, probably the hardest to do right, I've seen a few, and when done well, look like this. Otherwise not so good -
 Views: 272
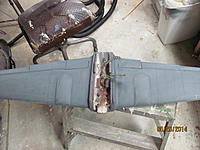
Sanded the fuse with 80 grit to remove paint and tone down the massive panel line that didn't exist on the full scale( Messerschmitt puttied the panel line gaps and flush rivet heads before painting) and put a thinned coat of spackle on -
 Views: 254
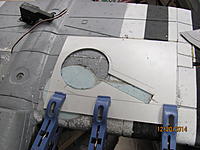
The hatch is very long and somewhat flexible, so I decided to shorten it to the point where the actual gun access panel is( one of the few that are visible) -
 Views: 271
Moved the magnets back further -
 Views: 274
cut and glued to airframe
-
 Views: 299
three views I used -
 Views: 331
fill old wheel wells with dense foam and glue with PU (gorilla glue) -
 Views: 329
sand flush -
 Views: 349
I made a cut out template out of styrene to ensure both sides are the same and equally alligned -
Views: 346
once the foam is hogged out, you will need new gear mounts. -
Views: 340
I used hardwood flooring (beech wood) and ply on the back -
 Views: 358
Gear mount area is cut out to fit the new mounts -
 Views: 348
the gear is bolted to the mounts, and the whole assembly is glued in place
-
 Views: 307
Started by giving the wing bottom a light coat of acrylic enamel spray paint -
 Views: 309
It's not great for finishing (would take several coats to be opaque) but for this it's good -
 Views: 306
left the top grey primer -
 Views: 290
Hit all the panel lines with flat black -
 Views: 312
bottom -
 Views: 286
fuse -
 Views: 294
sprayed my home depot Behr custom sample RLM 76 with a small spray gun -
 Views: 324
just a light coat at a time, let dry add more if desired till you get the effect you want
-
 Views: 247
Start by finding some reference material. Two or more sources are best (plastic model and good three views from book or printed off the internet) -
 Views: 259
Make measurements of each source, usually they would be the overall wingspan and overall length -
 Views: 240
Repeat for each source -
 Views: 262
Make up a simple graph showing your RC model, and scale references then note the figures under each heading -
 Views: 238
In this case I start with the actual RC dimensions and divide them by my books dimensions. The number circled is my book dimensions SCALE FACTOR RATIO. -
 Views: 254
And again for my plastic model. Because the plastic model and the drawings are different sizes, their numbers won't match and are not interchangeable. -
 Views: 275
Now I have all the numbers compiled and ready to use. In the case of this particular subject model (Dynam bf109) the numbers relationship between wingspan and fuse length match quite closely) often times wings get stretched on RC models to improve flying -
 Views: 247
To use these ratio numbers, simply take a measurement on your documentation (aileron length in this case) and just multiply it by the scale ratio number that is for the 3-view your using. The figure you get is what scale size it should be on your RC plane

![Name: 042-Mirage-2000N-EC-2-4-0-big[1].jpg
Views: 199
Size: 403.6 KB
Description: Love those desert schemes! Name: 042-Mirage-2000N-EC-2-4-0-big[1].jpg
Views: 199
Size: 403.6 KB
Description: Love those desert schemes!](https://static.rcgroups.net/forums/attachments/4/4/3/9/1/3/t10164916-49-thumb-042-Mirage-2000N-EC-2-4-0-big%5B1%5D.jpg?d=1498938057)


 ...
...


