IntegrityHndywrk's blog View Details
Posted by IntegrityHndywrk | Apr 14, 2017 @ 04:49 PM | 15,061 Views
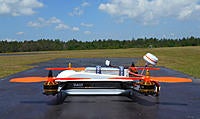
I originally built the SCX 200 a few months back, and really liked it a lot. Just recently when Akk Tek contacted me and asked to review some of their equipment. I thought about just swapping their camera out with the ones already installed on my SCX 200. But then I had a better idea! Why not just build a new SCX 180!

On my original SCX 200 build I did things a little bit differently from this time with the SCX 180. A lot of the on board equipment is different too. The last time I only used one LC filter on the VTX. This time I used two LC filters. One on the VTX and one for the camera. You can really see a difference between the two builds as far as video feed go. As far as I can tell, this early on, this Akk Tek gear going in my SCX 180 is absolutely on par with the gear I used in my older SCX 200 build. It's also a bit cheaper, which is a major plus. Now that I know the 2nd LC filter made this much of a difference, I'm sure once I get another one installed on the camera of my SCX 200. It will probably look just as nice and clear. But for now, it has significantly more horizontal line noise than my SCX 180 with two LC filters and the Akk Tek camera, VTX and antenna .


Here is the short overview video of my SCX 200 build and maiden flight:

SCX 200 - Build & Maiden flight - 106mph on gps (6 min 26 sec)


Now here is a more detailed build video for the SCX 180, which is pretty much the same frame as the SCX 200 but with shorter arms.


Below are links to...Continue Reading
Posted by IntegrityHndywrk | May 04, 2016 @ 10:47 PM | 21,296 Views
I've had this kit for about 2 weeks now. So I figure it's about time I get the build log started. Below are Index links to subsequent posts containing videos or information pertaining to this build.

Index:

Unboxing & disassembly

Initial build

Adding servo for TX controlled camera tilt & upgrading camera

Runcam owl on servo tilt

Rear SMA / VTX antenna mount upgrade

Upgrade camera servo + Foxeer XAT600SM
Posted by IntegrityHndywrk | Mar 08, 2016 @ 09:46 AM | 27,169 Views
Okay guys, with this one I'm going to start with the unboxing and see where it goes from there. I plan on doing my first flights, etc. Then doing a review when I have a little more experience with the machine. I may also have some modifications and upgrades posted here eventually, depending on what happens. As I add info. I will probably add a index of links to additional posts below the following video.

But first here is my unboxing and first impressions:

Eachine Assasin 180 from GotHeliRC - Unboxing & first impressions (13 min 29 sec)


Links:

My first 5 flights

Assassin 180 - ESC replacement with Racer 250 ESC

Green 4045 props from TBS Gemini

Assassin 180 - Lipo charging dock modification

Eachine Assassin 180 - Update on single new ESC replacement

Eachine Assassin 180 - Crash compilation

All 4 ESCs replaced.

Adding a 5V buzzer alarm

Replacement antenna tube

Landing skid and "leg" repair. (if your lucky)

"Face" Smashing repairs

Camera Replacement.

Landing gear replacement - Neoprene foam

Motor magnet repair
Posted by IntegrityHndywrk | Dec 22, 2015 @ 11:53 PM | 21,770 Views
This is a pictorial of my Scorpion Sky Strider build. Individual photos are the easiest way for me to do this. I have made some notes on a few of the photos. But otherwise I think most of it is self explanatory. Or at the very least, hopefully it will help someone.

I will be uploading all of the photos for each section to individual posts below this one to help separate things and make specific sections easier to find later. All together there will probably 7-8 sections, eventually maybe more depending on any changes or modification I do. However I have also taken all of the current photos and compiled them into videos and uploaded them to youtube. I have condensed all the sections down to 3 videos. Which you will find below:

Scorpion Sky Strider - Building the frame & Installing motors (3 min 41 sec)


Scorpion Sky Strider - Installing power distribution, ESCs and camera (1 min 51 sec)
...Continue Reading
Posted by IntegrityHndywrk | Aug 24, 2015 @ 11:09 AM | 20,459 Views
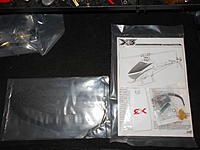
Since I'm very sure there is only a couple of these limited edition kits available at this point and I'm sure there are a ton of other X3 Build logs out there already. I decided not to do a detailed build log of this helicopter. Before deciding this I already edited the photos and added some notes and warnings to them. I might add some descriptions to some of the photos at some point. But for now, they say a photo is worth 1000 words.


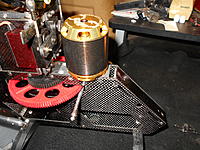
In the photos below you will some some of my little custom changes like adding a cooling fan up front for my Castle Talon 35. Since the Scorpion 2520-1880kv motor is rated for 38A continuous and 50A peaking. I figured adding a fan to the Talon 35 which has a beefy BEC at 5.5v is better than getting a Edge 50 which weighs twice as much and I might just end up needing a separate BEC for my servos too. The fan screams and moves plenty of air. It seems to blow air around my motor pretty well too. So that might help keep it cooler as well.

I didn't like the stock skids because I've heard enough people complain about them. But more than anything they don't match my X5 and X7 swept back skids and they are a little tall for my liking. So I rebranded some Align skids and moved on.

I really didn't like how the torque tube ends were supposed to be attached in the manual. I just don't care for the glue and locking collar compression method. So i went ahead and installed a 1.5mm dowel pin that I cut to length and drilled a hole for on each...Continue Reading
Posted by IntegrityHndywrk | Jul 04, 2015 @ 03:14 AM | 26,542 Views
Okay, so here is the quick run down. One day i was checking some old lipos to see what ones I could toss and which ones were still good. I had a 6S pack which I had removed a single cell from, but left the wire for the balance plug dangling loose. When i plugged the battery into the balance board for my #2 port on my 308DUO. I accidentally let the loose wire slip from under my finger and it contacted a cell. I heard a loud pop, a little sizzle, and could smell the electrical burn, but only faintly. After that the #2 port wasn't balancing properly. I noticed the #1 cell was no longer capable of burning down the voltage like it used to. So the #1 cell would rise right to 4.2v and the current would drop off because it wasn't capable of burning down the voltage for that cell..I went ahead and opened up the outside case of the charger. But once I had the guts in my hands I noticed that the heat sink would need to come off and I wasn't quite sure how much of this stuff I was going to need thermal paste for. I didn't have any at the time. So I came online and asked a few questions in the iCharger DUO thread and quickly got a reply from RCG user: RNFLY. Who I have to send a thank you out to again for saving me so much time and hassle. With him sending me in the right direction I was able to research and find a few other things on the net about similar problems with these chargers. The bulk of that research was posted here: https://www.rcgroups.com/forums/show...postcount=5421

In...Continue Reading
Posted by IntegrityHndywrk | Apr 21, 2014 @ 09:24 PM | 25,568 Views
Gaui X6 FES Custom ( X5 stretch to 610mm )


As the title states. This build is a Gaui X5 stretched to 610mm, making it a X6. I had two X5s and my main one has been so reliable that i never needed to bring the backup one to the field. So I decided to put in some custom work to make the "backup X5" into something bigger and running on 12S packs. During the first couple of flights I decided to stress test the collective on the heli quite a bit to make sure things would hold up. As it turned out, even the black main gears can strip easily if you run too high a pitch range. I stripped 3 main gears on the first day. After about 6 flights i settled on running about 10.5° +/- pitch range and using my max governed head speed of 2350 RPM. That has worked out well from flight 7 till my final flight today, which was flight 16.

The maiden flight went smoothly.

Gaui X6 - Maiden Flight (custom build) (5 min 42 sec)


After the maiden flight is when i started getting heavier on the collective and went through trying to solve the main gear stripping issue. But before that boring mess. You might as well watch one of the better 3D flights first.

Gaui X6 - 3D Flight 07 - 10.5° +/- Pitch Range (4 min 22 sec)
...Continue Reading
Posted by IntegrityHndywrk | Jun 12, 2013 @ 03:24 AM | 30,671 Views
Gaui X7 FBL Build log, Mods and Repairs

Here we go the first post for my Gaui X7 Build Log. This is a very nice looking heli and i like it's design characteristics very much. I have not found much to complain about, so far its nothing but Gaui Grin . I am very excited and hope to see the same quality I have come to know with my X5. I will update this post as well as the rest of this thread as i go.

On this build I want to send a special thanks to Anythingheli.com. The owner Dave is very knowledgeable. He has been very helpful with my helicopter selection this time around. Now that i am moving up to a 700 class model i had some questions and Dave had answers. He made a very good case for the SAB 700 or 770. However in the end, for a few of my own reasons, I ended up choosing the Gaui X7. It was mostly because i already own a X5 and am familiar with Gaui and really like what they have been doing lately. All i know for sure is that whether i choose a Gaui or a SAB. Dave over at AnythingHeli.com will be working hard to keep the parts i need in stock on a regular basis. Thanks Dave!

Click Here To Subscribe to this thread!


Index:

#1 - Index (this post)

#2 - Gaui X7 FBL Unboxing

#3 - Gaui X7 Build - Part 1 - The Main Airframe

#4 - Gaui X7 Build - Part 2 - The Tail Section

#5 - Gaui X7 Build - Part 3 - Rotor Head & Misc. Parts

#6 - Gaui X7 Build - Part 4 - Servo Installation using RJX HV servos

#7 - Gaui X7 Build - Part 5 - Electronics...Continue Reading
Posted by IntegrityHndywrk | Oct 26, 2012 @ 09:34 PM | 34,672 Views
Gaui X5 FES w/ uBeast Build, Mod, Repair log
Well here is the initial post for my Gaui X5 Build Log. I will update this post as well as the rest of this thread as i go.


Click Here To Subscribe to this thread!


Index:

#1 - Index (this post)

#2 - Arrival & Unboxing of Gaui X5 and spare parts

#3 - X5 Airframe, Frame Stiffener & motor mount

#4 - Tail Boom Assembly, installation and servo mounting

#5 - FES Rotor Head & Swash Installation

#6 - Electronics Prep work

#7 - Electroninics Install Pre-TM1000 burn out

#8 - Electronics after TM1000 burn out

#9 - Programming the Gaui/Hobbywing 100A ESC

#10 - Painting the Carbon Fiber tail fins

#11 - Test Hover & final check before full Maiden flight (Video)

#12 - Maiden flight and then some! (Flight Video)

#13 - Fusuno Tail Stabilizer Brace & 84.5mm KBDD Tail Blades

#14 - Flight #10 - Time to push my limits (Flight video)

#15 - 3D Flight #14 - Tick Tocks and Piros - 11-10-12 (Flight Video)

#16 - Reinstall of New TM1000 Telemetry Module

#17 - Flight Video Update 12-02-12

#18 - TM1000 Warranty request update

#19 - Gaui X5 - Replacing First bevel torque tube gear.

#20 - Flight Video Update 02-23-2013

#21 - Flight video Update 03-30-13

#22 - Gaui X5 FES Tail Wag Issues

#23 - Scorpion Backup Guard

#24 - Flight Video Update 04-22-13

#25 - X5 Action shots

#26 - ABEC 5 upgrade on tail box

#27 - Gaui X5 - Upgrade CF Rudder Pushrod

My Youtube, Gaui X5 Playlist link:
http://www.youtube.com/playlist?list..._Sz8nHTeAdmhLV

My Youtube channel link:
http://www.youtube.com/user/IntegrityRC


The images and information found in this build log is that of my own experience. It should be used as a reference point only. You should check your work carefully and against other sources for accuracy. In other words do your own research. Also, you should always use proper safety procedures. I will not be responsible if you experience any damages or injury by following this information.
Posted by IntegrityHndywrk | Sep 23, 2012 @ 04:26 AM | 38,177 Views
Custom V450 - Parts Build & Mods

I am starting this build log for my V450D01 built from new parts. As well as any other modifications, repairs or upgrades. I would also consider this one of the cheapest and ways to get into a 450 size CP heli. You should be able to buy all the parts incrementally and build each section as your budget allows. This log, should be more than enough to help you with your first 450 build.

Subscribe to this thread for updates.

Index:

#1 - Index - This Post.

#2 - V450 Tail Section Assembly

#3 - V450 Airframe Assembly & Mods

#4 - Pressing One Way Bearings, cheaply

#5 - V450 Hybrid Align Main Gear / Drive Assembly

#6 - V450 Main Rotor Assembly / Modifications

#7 - Savox Servo, Electronics Install + Swash & follower leveling

#8 - Removing locktited Tail hub for tail repairs

#9 - V450 Painted Canopies

#10 - Canopy Durability Liner

#11 - Alternative Rudder Rod & RX Mounting

#12 - Straightening V450 Main Rotor Shafts

#13 - Canopy Durability Liner Crash #1

#14 - "New" swash needs different config with "old" rotor

#15 - Upgrade to BeastX phase 1

#16 - BeastX phase 1, Part 2 - Flight Test & Review

#17 - V450 Tail Shaft Assembly Using WK Gear Puller

#18 - Savox 0257MG & Align servo Impact Saver Mod.

#19 - Spekturm Satellite RX Physical install photos - BeastX Phase 1 Part 2.

#20 - V450D01 - Tarot DFC Rotor head upgrade!

#21 - Tarot 450 pro tail boom & tail box upgrade

#22 - Tarot 450...Continue Reading
Posted by IntegrityHndywrk | Jul 08, 2012 @ 02:39 AM | 39,566 Views
Posted by IntegrityHndywrk | Jun 19, 2012 @ 05:00 AM | 25,879 Views
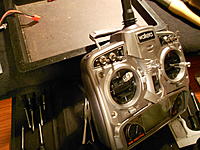
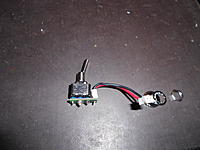
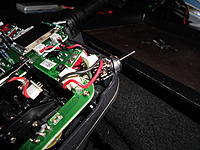
So i was working on my helicopter on the bench one day with the TX in my lap and it slid off and broke the throttle hold switch. No way was I going to waste hours of my life trying to contact Walkera about it. I would have had much better luck calling Wow hobbies. Since my Dad and his father used to own a Radio Shack franchise with a electronics repair shop in the back. I decided to just take matters into my own hands. This should be child's play, IF i can find a toggle switch small enough to fit! So i took a trip to my local shack.
Posted by IntegrityHndywrk | Jun 19, 2012 @ 04:04 AM | 24,065 Views
Well. I've been holding back on releasing pictures or video of this very nice, very cool little project I've been working on. The helicopter has evolved past what i am currently releasing. But, none the less. Here is where i started:


The "4F200SD5"


...Continue Reading
Posted by IntegrityHndywrk | Jun 17, 2012 @ 10:19 PM | 34,685 Views
Ok, I am starting this build log to start getting some of my D05 info and pictures together. Since i didn't take that many pics when i did the initial upgrade to the D02S parts I will touch on it some here where I had to change out the heli's air frame because i broke the RX shelf off. There will also be a modification to strengthen the air frame as well as some other tips and tricks.

Click here to Subscribe to this build log!


Topics covered in this log so far:

V120D05CS-PRO Air Frame Durability upgrade.

V120D05CS-PRO Landing Skid Upgrade

V120D05 Extreme tail fin set

V120D05CS-XTR Extreme Spin 16,300kv Motor Upgrade

0.032 Aluminum Stock/wire Sheer pin

Sheer Pin - 22 AWG Copper solid conductor

V120D05CS08-Pro - HP08-S 16,500kv Motor Upgrade

Latest Flight videos - 01-28-13

Upgrade to 3S (Basic version with Xtreme skids)

V120 3S battery mounting with Xtreme skids

D05 Custom upgrade (silver) tail boom

Crash repair - Main gear hub & front RX tray frame

V120 CF upgrade airframe add on

M120D01 Skids - Weight Shaving

Mounting GY280 and Talon 15 in V120 upgrade frame

3S CF Battery Tray Mod for V120 upgrade frame

Lynx fiberglass Goblin style canopy on V120

Xtreme 130X Canopy post mod for V120 series

V120D05 Main rotor and shaft upgrade to D02S parts:


These are all parts off of the v120d02S model heli used for this upgrade to CS-PRO.

HM-V120D02S-Z-26: Receiver (RX2622V - Compatible with WK Series Radio )

However there is of course the 2622V-D and the...Continue Reading
Posted by IntegrityHndywrk | Jun 16, 2012 @ 09:09 PM | 65,734 Views
V120D02S Modifications, Upgrades, custom parts, builds


Click here to subscribe to this thread for updates!


#1 - Index - First page of this build log:

#2 - BenMLee / Microline Hobbies Slipper clutch install/review

#3 - Bob's Slipper Clutch Install/ Review

#4 - KDBB 130X Main Blades = Upgrade

#5 - V120D02S - Xtreme Skids & tail Fin Weight Shaving

#6 - invert tail boom (by iflyrvs1)

#7 - Sheer Pin - 22 AWG Copper solid conductor

#8 - Metal Canopy Pin Upgrade & Semi-Servo Saver Mod

#9 - Servo gear Replacement/ Repair

#10 - Bearing care and maintenance

#11 - Upgrade to 3S (Basic version with Xtreme skids)

#12 - V120 3S battery mounting with Xtreme skids

#13 - Custom Talon 15 ESC - Adjustable BEC Voltage - for 2S & 3S custom build projects and the various different servos used.

#14 - Custom foam mounting tray for stock RX/gyro

EXTERNAL LINKS:

#1 - Walkera V120D02S V2 Review - Pictures, Videos, Flight Times, Thrust, TA 915 Motor (by Tom Z)

#2 - Turbo Ace 915 with the XP-15A-2 ESC Review and KDBB Blades Review (by Tom Z)


More to come later. I'm just getting started with some of the data i've posted already in the V120 thread. I simply moved it here. There will be more to come including info on sheer pins, servo gear repair/replacement, canopy mounting, and more. I would also like to collect all of the files and documents pertaining to printing your own canopies and get them all together here, or somewhere else i can link to.

The images and information found in this build log is that of my own experience. It should be used as a reference point only. You should check your work carefully and against other sources for accuracy. In other words do your own research. Also, you should always use proper safety procedures. I will not be responsible if you experience any damages or injury by following this information.
Posted by IntegrityHndywrk | Jun 12, 2012 @ 03:26 AM | 22,828 Views
450 class servos, specifications and dementions.

RJX FS-0435HV Micro Servo

Dimensions(mm): 23 X 12.6 X 27.2
Operation Voltage : 6-7.4V
Weight : 20g (0.71oz)

Torque :
2.2 (kg/cm)@4.8V
2.8 (kg/cm)@6V
3.4 (kg/cm)@7.4V

Speed :
0.04 (sec/60° )@7.4V
0.05 (sec/60° )@6V
0.06 (sec/60° )@4.8V

Frequency / Pulse : 1520us/333hz
Gear Type : Titanium Gears
Motor Type : Coreless Motor

Savox 0257MG:

Dimensions(mm): 22.8X12.0X25.4
Weight(g): 14.0

Speed(@4.8V sec/60): .13
Speed(@6.0V sec/60): .09

Torque(@4.8V oz-in): 25.0
Torque(@6.0V oz-in): 30.6

Gear: Metal
Bearing: 1BB
Case: Aluminum
21 Tooth Spline

Align DS410M:

Dimensions(mm): 23.6 X 12.4 X 26.4 mm
Weight: 0.47 oz (13.3 g)

Torque: 4.8V: 25.0 oz-in (1.80 kg-cm)
6.0V: 30.6 oz-in (2.20 kg-cm)

Speed: 4.8V: 0.13 sec/60°
6.0V: 0.09 sec/60°

Motor Type: Coreless
Gear Type: Metal
Band: 1520μs standard band
Rating voltage: DC 4.8-6.0V

Align DS415M:

Dimensions(mm): 22.9 X 12 X 25.8
Weight: 13.9g

Torque:
@ 4.8V: 27.77 oz-in (2.0 kg.cm)
@ 6.0V: 33.39 oz-in (2.4 kg.cm)

Speed:
@ 4.8V: 0.1sec/60°
@ 6.0V: 0.08sec/60°

Rating voltage: DC 4.8-6.0V
Temperature range: -20°C~+60°C
Band: 1520μs standard band

Hitec HS-5065MG

Dimensions(mm) 23.6 X 11.6 X 24
Weight: 11.9g (0.42oz)

Speed: @ 4.8V: 0.14sec/60°
Speed: @ 6V: 0.11 sec/60°

Torque: @ 4.8V: 1.8 kg-cm (24.99 oz-in)
Torque: @ 6.0V: 2.2...Continue Reading