C Robinson's blog View Details
Posted by C Robinson | Jun 12, 2019 @ 07:23 PM | 9,549 Views
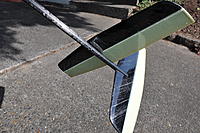
While installing a CR Blade in my Flitz-2 last year, I shot photos and put together a suggested step by step installation guide in pdf format.
The process should work for most wings unless there is a hard point molded in. In the case of my BAMF wings, I template routed a recess in the underside of the wing, epoxied the blade in and when cured, laminated 2 layers of Carboweave slightly larger than the width of the blade tongue using Mylar as a carrier.
Posted by C Robinson | Sep 16, 2018 @ 07:38 PM | 8,655 Views
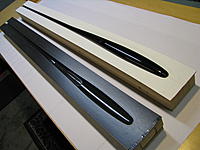
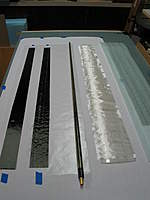
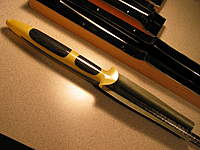
We have several users that have requested custom runs of extra wide blades. In order to continue to make the wide version available at a reasonable cost and profit, I have produced additional tooling and templates.
In addition to the wide blades, I have also revised the standard width blade shape to carry the full width of the blade further towards the tips. This will help distribute the pressure on your finger tips better and increase the comfort of our blades.

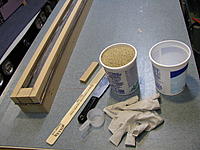
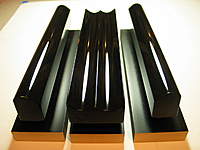
Here are a few photos showing the differences in blade versions along with the updated tooling. Looking forward to getting these new versions distributed and getting some feedback.

Thank you to all who have chosen to use our blades over the past years!
Craig
Posted by C Robinson | Aug 01, 2015 @ 05:26 PM | 12,390 Views
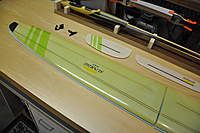
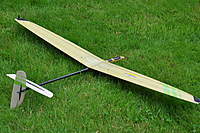
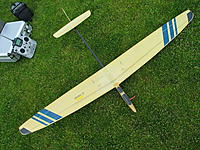
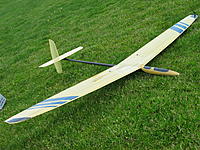
Recently completed Sunrise #4, using one of my new molded fuselages and molded stab pylon. In addition to this change from SR #3, the vertical stab was revised to Gerald’s Z4D foil and I incorporated some of Terry’s Carboline fabric in the flying surface lay ups. Seems like this plane took over 2 years to build but maybe it was only 23 months :/ MAYBE if I quit making major changes, I can get the next one done much quicker.

It came out at 9.4 ounces and flies very well. Here are just a few pictures to share.
Posted by C Robinson | Feb 09, 2014 @ 05:32 PM | 14,731 Views
I have been wanting to build a one pc. DLG fuse mold for a few years now. This one was started a year ago and was completed in about 4 months time.
The shape inspiration came from the Validol and Polaris with the flatter nose shape to reduce side slip drag. So far, I have pulled 4 parts, all useable and somewhat nicer than expected for first tries. Semi-permanent FreKote mold release was used for making the mold and also for the part lay-up's. Next step is to try a few different fabric schedules to get the weight below 43 grams which is the lightest so far.
Now for a picture story

(See part 2 for the rest of the story)
Posted by C Robinson | Nov 20, 2012 @ 09:45 PM | 12,687 Views
Finally finished #3 recently and am pleased with the results

Changes from #2 are:
1/2oz lighter all up weight, smaller horizontal area using Freak V2 foils, bladder molded boom, Sunrise logo cut from Monokote trim sheet using a Cricket machine.

A few pictures...
Posted by C Robinson | Apr 29, 2011 @ 06:26 PM | 13,886 Views
I finally completed a 6 month build of Sunrise #2 on March 3rd, 2011.
The release of Gerald Taylors Zone-V2 foils came at the perfect time and I was able to use them on this 3 panel wing. Two of the foil stations were blended to adjust for minor RE change deviations from the published 2 panel wing cords.
The plane has about 26 43 air hours on it now, including 8 15 local contests and I absolutely love the way these foils perform! Light lift performance is a bit better than the Edge and they react nicely to camber. I am not sure if it covers ground quite as well as the Edge but they are very close in that regard.
Gerald does it again! (Thanks GT for sharing your hard work and intelligence!)

Really need to finish up #3 for the 2012 season. Lets see, build or go fly...
Posted by C Robinson | Jan 05, 2011 @ 08:23 PM | 14,227 Views
We have continued to look for improvements to fabrication methods for these blades with every batch produced and firmly believe that the cause of earlier batch blade de-lamination has been eliminated.
The crotch filler compound consisting of resin and fiber fillers/thickeners appeared to be contaminating that layer of the lay-up while joining the moulds. Although I quickly learned to tool off the excess filler prior to joining, I was never certain there wasn’t still some spread. Several batches ago, we started using 12K tow in the crotch of the lay-up in place of the thickened filler, thus eliminating the possibility of filler spread while producing a pure resin/fiber bond at all layers. This along with added layers of unidirectional fabric and increased blade width now produces by far our stiffest and strongest blades to date, more than able to hold up to our strongest launchers.

My sincerest appreciation goes out to George M., Paul A., Paul C. and Aradhana for all of their help with developing and promoting these blades. I also want to thank all of our many past repeat and new customers! Without you, these blades would not still be available.

We are very proud to report that Neil Stainton of Hyperflight LTD has been carrying our blades since November 2011.
We also couldn’t be more pleased to have ASK of RC Builder represent our blades as of January 2012.
Please visit their great web sites at the following links to order blades, planes and other accessories you may need to better enjoy our sport/hobby!
http://www.hyperflight.co.uk/
http://www.rcbuilder.com/

Thank you so much!
Sincerely,
Craig Robinson

Update 11/7/2012:
As of August 2012, Gen3 version blades have been in use and now available. This revision incorporates H.M. uni-carbon imported from R&G resulting in a lighter weight, narrower blade of the same strength.
Posted by C Robinson | Nov 17, 2010 @ 12:32 AM | 19,409 Views
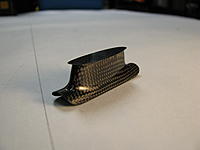
With the help of one of the Nations top DLG pilots, a new ergonomic wing tip throwing blade has been developed. The idea being that a curved blade would help with finger positioning and load distribution. A few were sent out for flight testing with Paul Anderson giving them some of the hardest launches and actually testing to failure. Using his suggestions, modifications were made to the moulds and new blades were tested. Paul used the new blades at the 2011 US F3K Team Select contest and reported favorable results.

Made from Carbon Fiber and MGS resin, they ship ready for final edge rounding and installation.

If interested or if you have questions, please feel free to pm me.

Many thanks to Paul A. for his help in R&D/testing and to George Morris, Paul C. and so many others for their support and enthusiastic promotion of these blades!

Sincerely,
Craig
Posted by C Robinson | Nov 16, 2010 @ 12:24 AM | 16,389 Views
It feels so good to be back into scratch building after several years away from this hobby! Because the process is so rewarding, I thought I would post the results of my latest/ongoing efforts and encourage anyone interested to give it a try!

This build started as pencil lines on paper (with several revisions) and took 22 months from start to finish. It is just amazing how much time it takes to get through all of the tooling set up, plugs, moulds, lay-up testing etc. before all of the parts come together and fly!
In the end, the process is well worth the effort and is very satisfying.
I could not be happier with the way it flys and I am close to getting parts done for plane #2 and #3!

Many steps and details are left out here. I would love to help anyone undertaking a similar project that may have questions or need additional info. Please feel free to contact me anytime!

Sincerely,
Craig
Posted by C Robinson | Jan 19, 2010 @ 01:11 AM | 15,341 Views
I have an old 1981 VW Scirocco that my wife and I purchased in 1983.
It was a daily driver until around 1995 and has since lived in the garage, only to be driven on nice days. It is all original except for some bolt on performance mods and is considered to be in very rare condition. I really love working on and driving this old car!!! Sits low, handles great and loves corners