1Ironhorse's blog View Details
Posted by 1Ironhorse | Nov 19, 2018 @ 11:18 AM | 4,139 Views
Greetings gentle readers;

Wow, life has happened! Its been almost eleven weeks since I posted last. A lot of life issues have kept me busy. I have accomplished a few items of progress on the PT boat project. I did go ahead and rivet the printer enclosure together to complete that task, I still have to drill holes and cut openings for mounting the equipment inside the enclosure and install the clear Lexan doors.

I received all the hull planking wood strips from Kappler Mill & Lumber Co. a couple of weeks ago. Because of the life events we are dealing with, I have put all the boat parts into storage. Hope that before Christmas, I can get them all out and get started on actual construction of the hull.

In the mean time, I have been working on the sound system I am installing in the boat. I chose to use a Benedini TBS Mini for the sound module and a 2x60 Watt audio amplifier (also by Benedini). I did some initial temporary hook-up and got the system to work. A second time I connected up the system, I got proper sound, but then the engine sounds quit and a chirp-chirp-chirp… audio output was heard. I thought that I had shorted out some of the traces on the bottom of the TBS Mini and that this was what was causing the TBS Mini to malfunction.

See the “Mini Chirp” video. https://youtu.be/jlqc1qk85YY

I ordered another TBS Mini from Benedini and as soon as I hooked it up, it did the engine start up sequence and then immediately began to chirp. I...Continue Reading
Posted by 1Ironhorse | Sep 05, 2018 @ 03:06 PM | 17,107 Views
Greetings gentle readers;
Progress continues slowly on the 3D printer enclosure. I temporarily assembled the enclosure using Cleco clamps (I do have some images of Cleco clamps for those who don’t know about them. They are used primarily in the aircraft manufacturing industry to hold aluminum sheet and parts together while they are riveted together.). This temporary assembly is to check fit of the printer and to locate the exhaust fan, filament reel bracket, LED lighting and power cord feedthrough. I planed on locating all the equipment inside the enclosure, however this week it looks like rain is forecast for each evening. When I am able to work on it again, I’ll locate the equipment, then take each panel off as necessary and drill/cut hole as required. Then I will do final assembly and finish up riveting the enclosure together. The last thing will be making the clear acrylic doors and mounting all the door hardware.

As I finished painting the enclosure inner walls white earlier this month, I also painted the battery trays, electrical component mounts, and speaker boxes for the boat. I’ve begun to assemble the primary distribution module. I first attached the three ground bus bars along the right side (starboard) of the primary distribution module deck. Then added the three high voltage master relays with their hold downs. I next attached the battery fuse block (HE100) to the left side of the primary distribution module deck. I then located and drilled the...Continue Reading
Posted by 1Ironhorse | Aug 13, 2018 @ 02:30 PM | 4,198 Views
Greetings gentle readers;

I’m continuing to work on the 3D printer enclosure. I’ve got the two side panels completed, inside painted white, and four ¾” aluminum angle riveted into place, and the top panel partially complete, inside painted white, and one ¾” aluminum angle riveted into place. I’ve ordered and received the hardware for the clear acrylic doors. I’ve ordered and just received a battery backup for the printer. I was printing a couple of parts to test the fit of the parts with some purchased parts. During the 14-hour print, we had a power glitch (lost power for about 5 seconds). That shut off the entire print and left me with ¾ complete parts. Had I been ¾ of the way through a 7-day print, it would have been more of an issue. With the battery backup/surge protector, I should be able to continue printing for approximately 45 minutes before the battery is depleted. Our house power supply is quite reliable, but there are times when the power will trip off for a few minutes every so often. So the idea is for the battery back-up to keep the printer operating through these short power outages. If we lose power for an extended time, then I’ll lose those prints. In the meantime, the printer continues to be idle.

Just got back home from attending the 2018 NMRA National Train Show in Kansas City, Missouri. Just WOW! Fantastic modular layouts in O, HO, N, and Z scales and also LEGO trains.

As for the boat itself, I have been working on the battery...Continue Reading
Posted by 1Ironhorse | Jul 26, 2018 @ 11:03 AM | 3,927 Views
Greetings gentle readers;
I’m getting back to my modeling roots (thus my username – “1Ironhorse”) in model railroading (HO, HOn3 scales and G-gauge). I attended the St. Louis Railroad Prototype Modelers Meet (Collinsville, Illinois) this past weekend ( http://icg.home.mindspring.com/rpm/stlrpm.htm ). Some very highly detailed and weathered railroad equipment. I got to meet some very nice people too. They should have pictures of this year’s meet online soon.

OK, back to Scale Boats: I’m continuing to work on the 3D printer enclosure. I’ve got the five 30” x 30” aluminum panels cut, twelve 3/4” aluminum angle cut to length and notched appropriately, and all the rivet holes drilled. I have one side painted white on the inside (the outside will be polished aluminum finish). This painting process takes the longest time. I’m doing all this painting outside and late in the evening to have cooler environment and relatively little breeze. Delayed last night due to shower in the area. In the meantime, the printer is idle.

I continue to receive electrical component parts I’ve ordered and almost have the entire electrical system components in stock. I need to start assembling the electrical system. I’m doing some modifications to the mounting apparatus for individual electrical system components as I receive each physical part and can validate and/or modify its mount as necessary.
I ordered all the hull planking last week…to many $$$. Big Boats take Big Bucks!


My next task is to get the house cleaned up and better organized. Gotta clean out the garage! -- Boat Workshop!


Until next time my friends, keep modeling!
Posted by 1Ironhorse | Jul 02, 2018 @ 02:06 PM | 7,119 Views
Greetings my friends. I’ve been silent for almost a month now, not because I wasn’t doing anything but because I have been doing a lot of support activities for the build (as well as taking care of my family). I’ve been learning a lot about the 3D printing process I have employed and discovered several potential pit-falls with using PLA material. Example, I recently purchased a new (to me) truck and wanted to make a custom cell phone holder. I measured and created the 3D CAD model. I printed out the part and put it into the truck. It sat out in the sun all day, and when I got in later that day, I tried putting my cell phone in the newly printed part, but lo and behold, the part had deformed. So, doing some more research, I learned “PLA has a relatively low glass transition temperature (typically between 111 and 145 °F). This makes it fairly unsuitable for high temperature applications. Even things like a hot car in the summer could cause parts to soften and deform.”, just like I experienced. As many of the parts I’m printing are on the deck [1:12 scale PT-Boat] and would be exposed to direct sunlight, I’ve decided that I should suspend printing any additional parts in PLA and instead use ABS. This creates a different problem, when ABS is heated up (to extrude through the 3D printer nozzle) it outgasses fumes which are unpleasant to most users. So, because my printer is located inside our living area, I need to come up...Continue Reading
Posted by 1Ironhorse | Jun 03, 2018 @ 04:02 PM | 4,857 Views
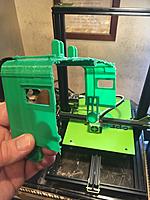
Greetings my friends; it’s been a while since I posted. Finished the forward turret print. Turned out ok, walls were a little thin, but usable. Tried to print some other parts, but the printer wasn’t doing so well. Adjusted build plate leveling and tried again, fail! Once again adjusted level and that print failed. Started another print and this one also failed and the extruded PLA material stuck to the nozzle/heat sink. Long story...nozzle was plugged so changed the nozzle and adjusted build plate level. Now it’s printing beautifully.
Posted by 1Ironhorse | May 25, 2018 @ 07:53 PM | 4,393 Views
May 25, 2018 (1 min 33 sec)

Posted by 1Ironhorse | May 24, 2018 @ 04:03 PM | 4,348 Views
Greeting my friends! I took some time and removed all of the support material from the aft turret. I also used my Dremel tool with a fine sanding drum to clean off any remaining support material. Looks pretty good. I'm pleased with the results and the depression rails.

I've started the forward turret print this morning. Initially Octoprint says 2.5 days. The forward turret also has some of the cockpit and chartroom walls attached. That's why I think it will take about 3.5 days, Monday morning around 7:00am.

Photos are on my iPhone, so will take a few minutes to get them added.
Posted by 1Ironhorse | May 23, 2018 @ 12:43 PM | 5,765 Views
Hello there friends. The Aft turret print finished up sometime early this morning. There is no steps (Y-Axis Shift) on the finished print. I took the entire turret with the depression rails and printed it as one complete part. I'm very pleased with the results, especially the depression rails. Yes, there is a lot of support material that has to be removed, but it printed out well.

With the adjustment to the printer I made (increasing the reference voltage on each axis and the extruder stepper motors drivers and replacement and securement of the Bowden tube) I think that the finished prints are better than before.

I've got to add the pictures from my iPhone, so will do that as quickly as I can.
Posted by 1Ironhorse | May 21, 2018 @ 05:56 PM | 4,511 Views
Greetings!! Printing is going along just fine. 24:00 hours into the print and still 2 days to go.
Posted by 1Ironhorse | May 20, 2018 @ 09:51 PM | 4,958 Views
I receied the Bowden Tube Fittings and installed one. I then printed out a Bowden Tube Fitting Clip that takes up the space between the fitting body and the release ring, it keeps the tube from shifting back and forth in the fitting. I attempeted to print out the rest of the Dayroom, but it failed twice, once by having Y-Axis shift, and the second time by pushing the support material away and also had Y-Axis shift. Y-Axis shift was first noted in my May 08, 2018 post when I noted it on the torpedo aft section print. I didn't know what it was at that point and I had not really seen it since. Long story short, I check with Thingieverse blog and discovered that the Tevo Tornado has a larger stepper motor on the Y-Axis (which makes sense since it is the motor that has to move the carrage). What was needed was to increase the reference voltage of the Y-Axis motor diver circuit from 0.8 volts to 1.25V. That seems to have fixed the Y-Axis Shift problem, but the next issue I ended up with was the Z-Axis "Home" switch got moved and drove the print nozzel into the build plate. So after a lot of adjusting the build plate, I think I have it properly placed. I had a lot of issues with prints using the White PLA, so I swithed to Green and have been getting good results since. Might just be my perception and before I got all the adjustments right. In any case, the prints are coming out much better now.

I've printed out the remainder of the Dayroom (in Green PLA)...Continue Reading
Posted by 1Ironhorse | May 16, 2018 @ 12:40 PM | 4,856 Views
Started the continuation of the Dayroom print, but it failed sometime overnight. The collet broke and the Bowden tube was free from the extruder motor. It spewed out filament and made the printer look like a spaghetti factory! Oh well...I just have to wait for the new parts to come in.

Probably won't be posting for a week or so. However, this gives me a chance to clean up the parts I've already printed.

Till next time...
Posted by 1Ironhorse | May 15, 2018 @ 08:57 PM | 5,068 Views
OK, after a lot of Google searches and checking 3D printing blogs, I found what was going on. There is a part called the Bowden tube that is the guide tube for the filament between the extruder motor and the extruder nozzel. In my case, the Bowden tube fitting on the exruder motor housing was allowing the tube to slip back and forth as the extruder motor ran forward to push material through the nozzel and backward to retract the material as the nozzel is moved to another location without laying down material. It eventually jammed the filament in the tube and the extruder driver wheel sawed the filament in two.

So, there is this blog/website called "thingiverse" where other 3D printing enthusiast put things out there for others to print. I found a Bowen Tube collet fitting for my printer so I rigged up my printer so that I could print out the collet. Just worked long enough to get the job done.

As for the dayroom, I made a new CAD model of just the last 2.75 inches of the dayroom that didn't get printed. There will be some duplication of the print, but I will cut them off to match and glue them together (famous last words! Or "The best made plans of mice and men.").

I'm running some short duration test prints now, but should start the dayroom print this evening.
Posted by 1Ironhorse | May 13, 2018 @ 05:58 PM | 4,392 Views
I checked the print about noon today and found that the PLA filiment had broken at the extruder motor and the print head was continuing to go through the motions. Dissapointment. Now I need to trouble shoot the printer to find out why it cut the filiment. I'll also have to do a redesign on the dayroom to print only the portion that remains to be printed. I'll choose a rib and cut the excess off of the now compleate print and glue/bond the new print on to it. That will probably be a 2 day print to finish up.

I'll need to remove all the support material and clean up the print to determine where I'll cut the dayroom and create a new print from.
Posted by 1Ironhorse | May 12, 2018 @ 10:03 PM | 4,556 Views
Saturday 04/12/2018 9:00 pm
Print time: 133:30hours
Print time left: 19 hours
206.6 MB of 235.6 MB
87% data printed

At 9:47pm the print height is 270.4mm (10.65 inches).
Print Time: 134:19:19
Print Time Left: 18 hours
Printed: 207.9MB / 235.6MB
88% data printed
no picture

I measured the CAD model and the print height should be 12.3 Inches (312.4 mm)

Print height rate-of-change is starting to ramp up as there is less data to print on each layer.
I'm estimating that it will be done printing about 1:00pm Sunday afternoon (04/12/2018) Happy Mother's Day!
Posted by 1Ironhorse | May 12, 2018 @ 10:34 AM | 4,261 Views
I didn’t have a solid network connection last night, so didn’t post hour 108:34. So a combined posting:

Friday 04/11/2018 8:04 pm
Print time: 108:34 hours
Print time left: 2 days
166.7 MB of 235.6 MB
70.7% data printed
208.6 mm


Saturday 04/12/2018 10:09 am
Print time: 122:38:57 hours
Print time left: 1 days
187.9 MB of 235.6 MB
79% data printed
241.5 mm printed

I estimated that the height of the complete print would be 246.4 mm. I’m currently at 241.5 mm so my estimate is wrong.
Posted by 1Ironhorse | May 11, 2018 @ 10:38 AM | 4,699 Views
Friday 5/11/2018 8:00am
Print Time: 96:30:19
Print time left: 2.5 days
146.7 MB of 235.6 MB printed
62% data printed
182.7 mm of 246.4 mm printed
74.1% height printed.
Posted by 1Ironhorse | May 10, 2018 @ 09:42 PM | 4,812 Views
Thursday 9:15pm
Print Time: 85:45 hours
Print Time Left: 3 days
Printed 129.0 MB of 235.6 MB
54% Complete
159.6 mm of 246.4 mm printed (64.8% height)
Posted by 1Ironhorse | May 10, 2018 @ 09:35 AM | 5,122 Views
Thursday 8:17am
Print Time: 72:47:46
Print Time Left: 3.5 days
Data size 108.9 MB of 235.6 MB
(46% complete)
132.6 mm of 246.4 mm printed (53.8% height)