birdofprey's blog View Details
Posted by birdofprey | Oct 26, 2015 @ 11:27 PM | 8,900 Views
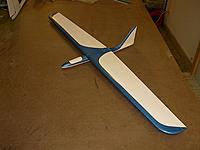
Below are some pics and the first flight video of my Locust Twin UAV. In the video there is no autopilot stabilization. This was simply to establish the inherent stability of the design. The video and pics are nearly a decade old (December 2005) and have been lost for a very long time. Recent efforts have allowed me to recover the video footage that I believed was lost. Please note that this is footage of the first flight and it's quite boring. I also landed far to fast and the uneven ground caused a rather ugly bounce at the end of the slide... No damage but it was unpleasant. This is a composite airframe built largely of fiberglass and Kevlar. It can hand launch and is also modular with the ability to add additional wing panels that can extend the span from 5 feet as depicted to as large as 9 feet. This is not a sport aircraft and is intended for those that have a need for far greater performance than foam can offer.
Youtube link
Locust Twin UAV/UAS (7 min 56 sec)

Posted by birdofprey | Oct 08, 2013 @ 01:47 PM | 10,917 Views
A number of unmanned aircraft projects have begun to take a large portion of my time. So, my updates may be a bit limited. As I progress with these projects I will post pictures and info if the customers approve. Some of these projects utilize sensitive components and other proprietary design features that may limit my ability to share details, so I will apologize up front for that.


PCW UPDATE:

I have finally completed a redesign of the PCW. It is now in Version 3.
I have done away with the kit form of the PCW, and now all PCW's will be provided as a Receiver Ready fully built aircraft with a 1300mA 35C 7.4V LiPO and brushless in-runner motor. All up flying weight of 6 ounces and a typical aerobatic flight time of 30-60 minutes. Only quality components are used in the build. This is the best performing and flying version of the very popular PCW yet!
You can have this new version of the PCW for $170.00 +S&H. E-mail me at justin@edgerc.com or call 785-324-1526.

Thank you,

Justin
Posted by birdofprey | Aug 27, 2013 @ 12:24 AM | 10,448 Views
A recent project for my 2 littlest babies, Corben (5) and Savannah (4). Goes about 30 miles on a charge, and weighs in at 300 pounds. We call it the "Space Shuttle Earth Rover." The little ones rode it in our annual community day parade, and had a great time.


Justin
justin@edgerc.com
Posted by birdofprey | Jun 21, 2013 @ 06:17 PM | 15,793 Views
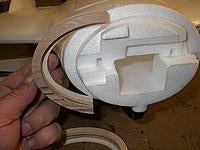
Below are pictures of the Prototype (unpainted and painted) RV Jet conversion kit that I have developed at the request of an RCGroups member that is an FPV fanatic. The conversion is very easy to do and only takes only a mater of minuets to complete with simple and basic tools and a bit of CA Glue. The mounting rings are CNC cut.

I have designed this to allow most any motor of reasonable size to fit, and is designed to fit a 2-inch diameter spinner.

Additional pictures of the painted nose and videos of the test flights will be posted soon. (Pictures of a painted version have now been added) The instructions for installation are under each photo.

If you are interested in one of these conversion kits please e-mail me and I will send one out to you.
Please feel free to ask questions.

Justin Ammon
justin@edgerc.com

Edit:

Below is raw footage of a bungee launch, and a hand launch of the RV Jet using the tractor motor conversion kit. So far the best results come from a bungee launch, or a power off had launch. As I wrote about earlier (see previous post labeled "testing update") a power on hand launch results in a hard pitch up to vertical and a stall. Launching power off into a glide and then adding power gets the bird into normal flight with no problems.

I am sorry about the odd noise in the video, it comes from the auto focus, and drives me nuts.

http://www.edgerc.com/RVJet%201%20test%20flight.mp4...Continue Reading
Posted by birdofprey | Jun 14, 2013 @ 11:17 PM | 10,747 Views
Just something to ponder...
Posted by birdofprey | May 27, 2013 @ 10:38 PM | 13,047 Views
Pictured below is the newest version of the Category-1 (Cat-1) Hurricane composite slope wing. It is 48-inches in span, and only 18 inches in length.

The High Aspect Ratio wing is only 12mm thick at the root so it presents very little frontal area, and is ultra low drag. The wings are currently composite bagged construction and are Full Carbon with 2 full layers of Fiberglass and a 3rd layer at the root. The elevons use a Kevlar Living Hinge. The wings are 2 piece and can use the stock carbon joiners, or the forward joiner can be replaced with steel.

The fuselage is hollow molded Fiberglass (Kevlar optional) and is 2.4 friendly. The wings bolt on with 2 wing bolts. Assembly and disassembly takes only about 1 minute, and the whole airframe packs in only a 24 inch long space.

Installation of electronics takes a typical builder about 1 hour or less. No need to spend many hours of labor and a lot of $$$ in additional materials to get this in the air.

I am considering doing a production Electric Power version if there is enough interest. We will call it the Cat-1 Electrical Storm.

The MPH/Watt ratio will be far higher than ANY EPP/EPO wing could ever do, and no need to spend mega $$$ on power systems and insane hours in the build process. If you need a wing that bounces, this is not for you. Talented and experienced pilots only.

The airframes pictured below are already sold, and I will produce new slope versions and make them available when they are ready to...Continue Reading
Posted by birdofprey | May 27, 2013 @ 06:11 PM | 11,736 Views
Lots of Storm Chaser crews out in force around here right now, including the TIV. Looks like a wild night of storms is brewing for our area.

Justin
justin@edgerc.com
Posted by birdofprey | Apr 19, 2013 @ 05:40 PM | 11,497 Views
Here are some pictures (more to follow) of the original Cat-3 Hurricane Prototype Unlimited Slope Racer. We have been flying this airframe for about 8 years now, but it has never looked this good. It has an extreme composite skin lay-up that has seen some crazy high-speed impacts and crashes, yet has not been severely damaged. However, it did look really bad, as we never put much effort into the paint or other cosmetics.

My son Steven has flown this plane over the last 2 years in the Mid-West Slope Challenge as an Unlimited racer, but this will be the first year with everything relating to the structure and setup at or better than 100%. He is excited and looking forward to it again this year.

Steven is 6 feet tall for a size reference in the photos.

This is a 4-servo wing with rather complex programing that allows for very easy flying and exceptional stability.

Questions and comments welcome.

Justin Ammon
www.EdgeRC.com
justin@edgerc.com
Posted by birdofprey | Apr 11, 2013 @ 01:15 PM | 12,072 Views
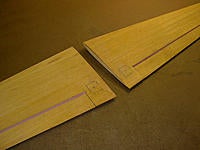
Here are a set of PSS wings that an RCG member needed for a Tucano Composite PSS sloper.

They are 56-inches in span and are a heavy duty composite structure.

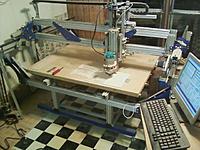
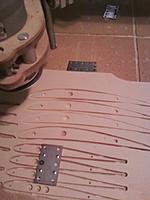
I started with some very nice Foamular 600 CNC cut (in house) RG14 cores.
I added to that a set of RG14 plywood root ribs (also CNC cut in house).

Plywood 1.25 inch square blocks were in-set in the cores for wing bolt blocks.

I added a Kevlar leading edge to the cores, as well as Kevlar along the aileron hinge line for a "Live Hinge". I also added wide Carbon Fiber (uni-carbon) caps for the spars top and bottom.

The skin is Obechi, but under the skin is a layer of bias cut 4 ounce Fiber Glass. I bagged this to the cores allowing the skins to meet at the leading edge of the wing.

After removing the wings from the bag, I sanded the Obechi skins, and then glassed the outer surfaces with another layer of 4 ounce bias glass again. I sanded the glass surface smooth once cured.

I then marked the ailerons on the top and bottom surfaces. On the bottom I marked the gap that would be needed for surface movement. Next, I removed the material from the gap that was marked out on the bottom, and then I scored the upper surface hinge line with a set of files until I went through both glass layers and the Obechi and made it to the Kevlar I had added for the Live Hinges.

I then used a saw to free the ailerons at the root and tip so they could move. I flexed the ailerons along the hinge to insure proper movement.

I finished the build by marking the wing bolt block locations on the bottom of the wing. The customer will be priming and painting to match his fuselage and installing his own torque rod system for the ailerons and joining the wing halves.

Sorry, no build pictures, but finished product images are below.
Custom wings for Any application are available. Send an e-mail to justin@edgerc.com and we can work something out.
Justin Ammon
justin@edgerc.com
Posted by birdofprey | Mar 26, 2013 @ 11:26 PM | 11,867 Views
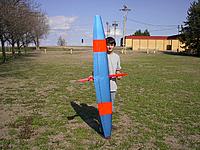
This is not a molded wing, but it is a full Carbon bagged DS wing version of a Tropical storm. Raw carbon bottom wing skins, and flourescent fuselage and upper wing skins. My youngest holding it. She was VERY excited to be allowed to hold the Tropical Storm for the photos.

I hope the new owner enjoys their custom DS-TS.

Justin
www.EdgeRC.com
justin@edgerc.com
Posted by birdofprey | Mar 25, 2013 @ 09:23 AM | 11,552 Views
So, my 12yo son Darren sits down at the computer yesterday afternoon and having never seen Rhino CAD before or ever having shown any interest in CAD at all, figures out how to design, with proper root and tip foils, and accurate measurements, and a redesigned wing-tip, a Tropical Storm. He manages to learn Rhino well enough to fully design a set of wings for the Tropical storm that are as perfect as I could dream of in about 3 hours. Not bad for zero experience. After that, we worked together and did the Cat-1 Hurricane with 2-piece wings and joiner rods. He taught me how to do it. I have little to no patience for learning software.

With no modifications I will be using his work to produce a set of molds for the aircraft.

I could not be more proud!

The original Tropical Storm and Cat-1 can be seen at www.EdgeRC.com.

Sorry, but had to brag.

Justin
justin@edgerc.com
Posted by birdofprey | Jan 19, 2013 @ 10:24 PM | 24,235 Views
It's time now for a bit of fun. Well, I think it's fun. I am installing an RVOSD from Range Video and a Horizon HD V2 video cam in my Monitor UAV airframe. I am also using RF gear from Ready Made RC (RMRC) for the wireless video. I have this airframe listed for sale, but I have many requests for on-board video with and without OSD data, so I figure what the heck, I'll toss the gear in and do it.

I have no affiliation with any of the equipment suppliers except for the airframe (me), so no bias as far as pushing the products. I know there is plenty of good quality gear out there, and I encourage everyone to use what they like.

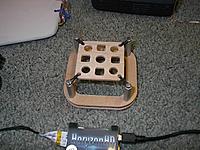
I started with the rewire of a few components, making adapters and I also put together an anti-vibration mount that is built to hold the OSD on top of it, or I can invert the mount and place the OSD inside of it and have room for the airspeed sensor I installed on top to clear.

For bench testing, and as an emergency back up monitor, I am using a very old Sony Video Watchman. It no-longer works to record, but it does not blue-screen. It is pre-digital TV. To small to fly regularly with but in the event of a video monitor failure it just might save my rear. Picture is really good, but the OSD text is too small to read without strain. I have a Magnavox LCD HD TV that is about 10 years old that also does not blue-screen once it has seen a signal to start with.

This is a discussion, so please feel free to jump in with questions, comments, ideas, and most anything that could be useful or interesting.

For more info on the airframe I am using you can look at one of my previous blog entries, or you can go to www.EdgeRC.com for info.

Justin
justin@edgerc.com
Posted by birdofprey | Dec 28, 2012 @ 04:38 PM | 15,592 Views
This is the build of a replacement center wing section for an F3B NYX composite sailplane. Although the original is hollow molded, this will be a hybrid-composite/wood over foam structure. CNC router and CNC foam cutters will be used for creation of the primary components.

I will use some methods that others might find odd or simply different than what might be considered 'normal'.

This is being done for another RCG member. He sent the remaining airframe and the salvaged spar and flaps from the original section of wing. The spar had been broken in the center, and I intend to re-use it in the new panel. The bagged wing method will be strong enough without the spar, but because it also has the tip joiner boxes, I have decided to re-use it, and after repair, it will simply add to the overall strength of the new section.

Feel free to follow along. Comments welcome. I do realize that there might be 'better' ways to do some things, but I do have my reasons for the way I am doing this project. I am also working on several other projects at the same time, and keeping a log slows everything down a lot.

Please forgive the low quality images. I have intentionally set the quality low so I don't have to process any images, and can post them directly to RCG without excessive image file size.

Here we go.

Edit: If anyone needs CNC foam cores cut, I will supply root and tip CNC cut matching ribs with every set as standard. No extra charge, and no more tracing the foam cores and cutting and sanding to get a good match. Multi-panel wing sets (like a 3 piece wing) would get a set of 6 ribs total. 2 for the center section, and a root and tip rib to cap the outer panels as well.

I can also do Composite Bagged wings or Obechee, balsa, ply or nearly any other combo you might want or need. Let me know if I can help you with your project. justin@edgerc.com
Posted by birdofprey | Dec 17, 2012 @ 01:39 AM | 14,094 Views
Pictured below is the latest version of a UAV design I have developed over a number of years. This aircraft is full composite construction with a full carbon and glass center section (actually double and triple carbon), several layers of glass, and live Kevlar hinged flaps. The outer panels are all glass with carbon leading edge and spar caps. The full flying tail is Obechee and glass sheeted. The fuselage, tail boom and vertical fin are hollow molded with the boom tail done in carbon and glass and the fuselage is 100% glass to be 2.4 friendly.

This aircraft is perfect for use as a serious UAV, or for the FPV pilot that wants the real thing, not a modified toy or foamy. With the 20 AH 11.1V pack installed flight times of up to 3-4 hours can be achieved. This aircraft is RTF as an RC aircraft and no auto-pilot or guidance system is included. However, I am more than happy to install one of your choice if you prefer.

The flaps are extremely effective and really help with launch and landing. This aircraft is exceptionally efficient and has the characteristics of a light high performance sailplane, but can carry a very heavy load. As you can see, there is a very large payload bay under the CG, and it measures 8x6x4 inches. The motor and ESC are both contained in the motor pod to keep them away from sensitive electronics.

I built this aircraft to be very durable, as well as very easy to use. The single largest piece is the wing center section. At only 30...Continue Reading
Posted by birdofprey | Nov 27, 2012 @ 05:36 PM | 13,200 Views
Just some of the UAV/FPV and ODR wing parts being cut on the CNC Router. Nothing major, just helps make much more accurate and higher quality parts. www.EdgeRC.com
Posted by birdofprey | Nov 15, 2012 @ 02:53 AM | 13,430 Views
Pictured below are 4 Tornado One Design Racer fuselages that are ready for immediate shipment.
2 fuselages are Fiberglass/Carbon Fiber with no paint.
1 fuselage is Fiberglass/Carbon Fiber done with red epoxy and no paint.
1 fuselage is Kevlar/Carbon Fiber/Fiberglass and is yellow with no paint.

Also pictured is the Tornado ODR flown by my son Darren in 2011 at the Mid-West Slope Challenge where he competed with the adults and took 2nd place at only 10 years of age. His fuselage is the same as those that are ready for shipment, but was done in full Carbon Fiber. We removed the tail pylon to accommodate a V-Tail. It is an easy modification for those that wish to do it.

Some items to note about the current Tornado fuselage design include:
1-No canopy or slip-on nose cone for strength and simplicity. Simply install your battery wrapped in foam into the nose via the opening you will cut in the wing saddle area.
2-The elevator servo is normally installed near the rear of the wing saddle area and the receiver placed where convenient. Aileron servos (2) are installed in the wings.
3-The tail pylon is intended to be universal for any type of configuration you may want. We have mounted every type of tail to it and as pictured below, even cut it off for a lower profile install.

Order at www.edgerc.com
Posted by birdofprey | Nov 14, 2012 @ 12:24 AM | 13,525 Views
Composite (One Design Racer) Slope ODR fuselages will be available as of 11-14-12. AKA the Tornado ODR. My son Darren flew one of these to 2nd place at the 2011 Mid-West Slope Challenge at only 10 years of age. There was no youth class. Pictures and info to follow in a day or two.

Justin
Posted by birdofprey | Dec 11, 2009 @ 01:59 AM | 14,562 Views
...