Scott Todd's blog View Details
Posted by Scott Todd | Nov 27, 2023 @ 08:25 AM | 6,588 Views
March 2023

I was provided four Vengeance 280's by Hyperion-World for evaluation. They are a bit dated but they still have plenty of stock and we wanted to see if they are still viable. I received the DIY, LTE, PNP2 and STD ones. They are all the same except for what they come with in the way of cameras and video transmitters. The details on each one can be found on the website. I also played with the ViewOptixHD goggles by ALLeRC.com. I'm NOT an FPV guy so bare with me. I was also provided some Hyperion batteries, Hyperion 7 channel receivers, and Hyperion 8 channel PPM only receivers. They all worked well and passed all my short range tests.

Contrary to the website, the new 2.0 boards only have 2 flight modes. Stabilized and Angle. I installed a version of Cleanflight 1.2.4 as indicated on a sticker on the outside of the boxes. I didn't have any problem connecting or changing things but struggled testing other flight modes. The summary applies to all 4 of them. I kept track of which was what. They all performed the same except one has a wonky flight controller and is not controllable in any flight mode. I didn't try to re-flash the firmware. The camera gimbal did react the same as the other 3.

As previously posted, the camera gimbal is now controlled by the flight mode switch. Of course I tried different transmitters, receivers, CleanFlight settings, etc. I could verify all the correct channel outputs and they were not mixed in any way. I got the same results from a 6...Continue Reading
Posted by Scott Todd | Jul 14, 2023 @ 04:36 PM | 25,757 Views
Before I get too old, I thought I would pseudo document my 40 year journey of building flyable Space Shuttles. Feel free to comment or ask questions but if you quote my entire posts, I'll delete them. It's just plain annoying. Quoting sentences or parts is fine. This incredible journey has taken me around the country flying Space Shuttles at High Schools, Colleges, Kennedy Space Center, on National news for CNN, at Walt Disney World, and in a Football Stadium.

Luther Hux published an article in Model Aviation in 1981 about his 1:72 scale orbiter. You can google it and find the original article. I was instantly enamored and knew I would build it one day. A few years later, as a Freshmen in Engineering school (1983), I decided it was time. I made a pretty faithful creation of Luther's model from plans obtained from Model Aviation. On its first flight, the receiver quit and it crashed. I re-built it and flew it probably 20 times from an Ugly stick. Someone else was flying it one day and it went in pretty hard. It had taken a beating so I retired it. I lived in the the Dorms so keeping old models was not in the cards. Shuttle1 was gone and I don't have any pictures of it.

Around 1986 I decided it was time for Shuttle2. It was basically Luthers design with lighter equipment. It worked well and I flew it about 10 times. My college girlfriend's Dad worked at the Space Center and asked me to come fly it for his bosses. So a local club member and I took it to KSC and flew on...Continue Reading
Posted by Scott Todd | Jan 30, 2021 @ 12:00 PM | 11,961 Views
I have a thing for Early Futaba catalogs A member reached out about some some copies so I thought I would post here since you can't attach to PM's. If you have any I don't post here, PLEASE share.
Posted by Scott Todd | Oct 11, 2019 @ 09:08 PM | 12,821 Views
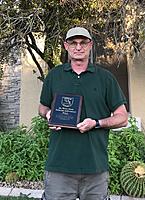
"I'm happy to let you know that the Vintage Radio Control Society Technical Committee has selected you as the 2019 winner of the Dr. Walter Good Technical Achievement award for your work in vintage radio conversions. "

Mike Desest
President, Vintage Radio Control Society


And my response...


Mike,

I was totally surprised and blown away by the award! I didn't think anyone really paid attention to my ramblings on the internet

My family is out of town this week and my dog doesn't take good photos so I'll have to get back to you on that. I'll try to get help this week but next week for sure.

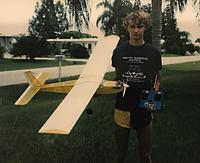
I should put a little background in my RCG blog. If you are interested, I started building models around 5. Here is my first Control Line model in 1973. I was 10. Its a Baby Ringmaster. My Dad made me do it all myself. My first RC model was an Airtronics S-Tee. Here it is in 1978 after my first 'crash'. You can see the Royal serves askew. And to finish the embarrassment, here is my first truly successful RC model in the summer of 1982. It was a Carl Goldberg Eaglet with my original Royal Radio. Its interesting to note that Royal was my first conversion. I flew it this year at Torrey Pines for the Katie Martin Tribute.

I fulfilled the requirements for an AS degree in Electronics while attending Community College and High School at the same time. I put myself thru College earning a Bachelor Degree in Aerospace Engineering. My graduate studies were in Mechanical Engineering. I'm a Lifetime AMA member, EAA Technical Counselor and Flight Advisor. I hold an FAA Repairman's Certificate and am a Current Flight Instructor. I've also included a photo of my 'full size' models. A Kitfox and scratch built wooden Biplane. Both are current and airworthy.

Please thank the Committee for me. It truly is an honor.

Scott Todd
Posted by Scott Todd | Aug 05, 2018 @ 10:59 PM | 12,335 Views
I hear it all the time at the field. Mostly old guys, complain there are too many switches on their radio. They don't know what they all do and usually don't care. Of course on new radios they can be assigned to whatever you want. It wasn't always the case. Lets look a little deeper at this.

I try to tell new people to set a standard and then memorize where they are. Lots of couch practice can keep you out of trouble. For example, on a new airplane, you take off for that nervous maiden and suddenly you realize there is too much elevator throw. Well of course its out of trim and you are in a near panic. Then you can't remember what switch you made Elevator Rates. Doah!!!

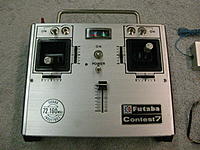
Standardize! Pick one and learn it. Lets go back a few years. We are going to generally follow Futaba as they were one of the early adopters and really led the Industry thru the RC explosion of the 80's when equipment became more affordable. The Contest 7 is the only radio listed in the 1979 Futaba catalog with rates. It was a big deal and Pattern Flyers quickly flocked to it.

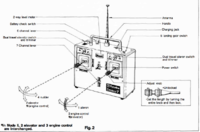
As noted in this shot from the manual, the left front switch was "Dual travel elevator" and the right was "Dual travel aileron". Many fliers coming from Reeds adopted Model 1 where the Ailerons were on the right stick and the Elevator was on the left. Most Asian fliers still use this. So it made sense to put the rate switches there. Every photo I have ever seen of a Contest 7 has the slider on the right and the gear on the left. Maybe the manual was an early release. Who knows...
Posted by Scott Todd | Aug 05, 2018 @ 09:23 PM | 12,404 Views
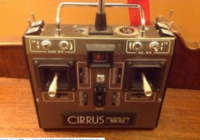
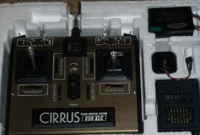
Many of the older 40+ radios like Kraft, EK, Orbit, Futaba are corroded from old batteries. The Futaba ones are not as bad as the US ones but quite often the caps and transistors go bad too. Even if they work now, its questionable how long they will continue. Manufacturers all used different centering pulses to so that can cause issues if switching radios. Also, some need a signal inverter to get the PPM stream correct. Although many of the new modules like the FrSky ones can handle both.

But there is just something cool about those old metal cases. Many like the Krafts and Futaba's really changed our Hobby. They are still out there. They are all over eBay and in peoples collections. Should be just toss them? NO! Even if you are not an electronics technician, your average modeler can still restore/save one and be the cool kid at the field flying a 40-50 year old vintage radio. We are going to stick to conversions more than repairs. By that, we are going to usually rip out the old electronics and replace them with a modern RF module and an Arduino acting as the encoder. We'll go over cleaning too but most people can figure that part out.

The Arduino replaces the old encoder. Its one little simple board that is modern and reliable. The Sketch (program) can be easily changed to customize it for whatever features you want that were not available on the original.

So by gutting a 40 year old Kraft, or whatever, you can thoroughly clean it and make it look nearly like new. They...Continue Reading
Posted by Scott Todd | Aug 05, 2018 @ 08:38 PM | 12,142 Views
When I started playing with Arduinos, I looked for all the stuff I could find and watched a ton of YouTube video tutorials. I had some questions related to radio encoders and it was often hard to find the answers. Well here are some lessons learned...

Phil says you shouldn't' use the bootloader. That is a little program already installed on the Arduino that helps other programs get loaded. I don't know all the details but suffice it to say, you don't want it. The way around it is to use an ISP programmer. Google it. Well I bought a few and struggled to get them to work. I use a Mac and I dont't have a plot of patience with computers. Then I found out you could use another Arduino. This worked well so I stuck to it. I have gone back to the ISP or FTDI programmers I bought and I always struggle to find the right drivers to get them to work. Well here is the Arduino method...

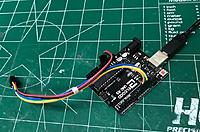
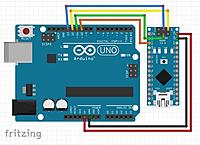
Hopefully you have or will have a simple Arduino dev kit. There are several on Amazon for less than $20 and some as low as $15 that include a knock-off Arduino. Well they are open source so they're really not kock offs. Anyways, just buy one. You can use the LEDs and resistors on your conversion. You can use the jumper wires to make an adapter like shown in the photo below. Just tape all the headers together to make it easy to plug into your Nano or Pro Mini. Oh yeah, buy some Nano's or Pro Minis. There are links in the first post of my Vintage thread.
Posted by Scott Todd | Aug 02, 2018 @ 11:18 PM | 13,662 Views
I think most of you will recognize these. My room mate in college had one. It worked well and never gave him any trouble. It was made by Futaba thru the mid 80's and used the same basic case as the Boat 3EGP I presented in the other thread of my blog.

While they were good radios, age has not been well to them. The plastic parts have become brittle and its nearly impossible to find a nice one. The gimbal covers/faces almost always have corners broke off and the side plate screw tabs are almost always broke. The side plates are easier to fix than the gimbal covers.

The photos are from various websites and auction houses. Its just not practical to credit all of them. if I post your photo and you don't like it, let me know and I'll take it down.

The later variants were called the 900-FM for obvious reasons. They also made a 4 and 6 channel version but I don't know how many variants it was offered in.

The photos are all captioned but you may have to click on them to read it.
Posted by Scott Todd | Jul 28, 2018 @ 08:25 PM | 19,752 Views
This is an attempt to document me restoring, refurbishing, updating, and flying vintage radios. I have started with the 70's and 80's. Pretty much anything proportional before computer radios.

I found the Arduino encoders and was fascinated. I bought some Arduinos, downloaded every encoder sketch I could find, and started playing. I was intrigued with Paul Luby's work in the UK. His sketches (code) were simple and easy to follow. Phil Green ran a UK website called singlechannel.co.uk. He is a lifelong programmer and started messing with Arduinos. He had built some single channel encoders using PIC controllers so he knew his stuff. His single channel encoders actually encoded more channels (usually 3) so he could use modern receivers and servos but fly a vintage transmitter with a single Tone button. It was genius. He started following Paul's work and then applied his expereience to an Arduino based encoder and tested it on a Vintage Kraft transmitter. He posted videos, a nice PDF how-to document, and the code to use in an Arduino. Then he found and posted instructions to use some off-the-shelf breakout boards to make building a transmitter really easy.

So that is where I started. I almost exclusively use Phil's code, a derivative of Paul's, on a few different Arduino board. As I have become more familiar with the software and what I want vintage radios to do, I have started modifying the code. For example, I converted a Futaba 6JN. It had a basic mixer and separate...Continue Reading