Nek's blog View Details
Posted by Nek | Apr 18, 2015 @ 11:36 PM | 56,553 Views
WIP - Trying to keep it up to date to latest CF (Cleanflight) version.

This new blog entry is mostly what I had already posted in my previous ZMR250 build log. This is the blog post you will want to check for the wiring of the different components.

I decided to separate each part of the setup into different blog posts for easier editing and attachment management

Anyways here we go, this will be a CF 1.9.0 setup on a MassiveRC Acro Naze32 Blackbox edition.

I will be using the very standard FrSky D4R-II. I am waiting on newer board with more UART to switch to the newer SBUS/SPORT version. I did modify an X4R, which involved desoldering tiny sma resistors, fun stuff That was before I realized I would be short on UART on a Naze32 if I wanted to run an OSD and LED... I will work on it some more on the bench as having a digital Rx signal and 16CH would be nice

At first I figured an OSD would be useless for FPV racing. I still think so, but the Micro MinimOSD running ScarabOSD (MWOSD) with PID setting in the OSD menu got me sold on installing one on my racer. Plus CF can setup a switch to turn it off during races.

So let's get into the setup!

Start by downloading the latest Cleanflight Configurator, you will need Google Chrome installed on your computer.

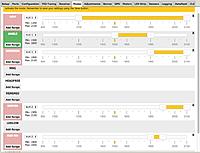
Flash the latest version of CF on your board, v1.8.1 at the time of this screenshot. This guide is up to date on v1.9.0


Click the Load Firmware [Online] button, then Flash Firmware

Once you get...Continue Reading
Posted by Nek | Mar 26, 2015 @ 09:34 PM | 29,763 Views
WIP

Wow, it's been a while since the old make your own arduino MWC shield and wooden tri copter. I can't believe how far the hobby has gone in just a few years. From re-flashing plane ESC to full blown out multirotor KISS/BearHugs !!!

Seeing all the fun in 250 class FPV racing I decided to jump back on the band wagon and as usual went for a cheap frame and what I think is a sensible build. No waste

I'll start with the parts list, I'll try to be super complete with it so it can help friends build their own and make sure they have all the right tools for the job!
  1. Frame:

    - ZMR250.
    * * * * * MRM V1 kit - $38

    - Frame spacers. Thingiverse link
    * * * * * MRM Moray spacer kit - $11.50

    - Tilted motor mounts. Thingiverse link

    - Frame skids. Thingiverse link

    - KISS ESC Tray. Thingiverse link

    - D4R-II antenna holder. Thingiverse link or use the zip ties with heat shrink trick.

    Total cost: $50 to $60

  2. Power:

    - 12-20A ESC.
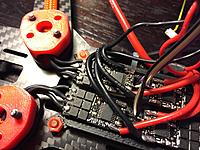
    * * * * * Flyduino KISS ESC 2-4S 18A v1.1 X4 - 80 € (Really good and light ESC, make sure you read the thread on them and inspect them for solder balls)
    * * * * * sn20A ESC X4 - 60 $
    * * * * Rotorgeeks 12A BLHeli ESC V4 - Quadpack w/ USB flash tool and extra heat shrink - $72.50 (If you want to go for more 'traditional' ESC)

    - Motors.
    * * * * * Rotorgeeks Cobra 2204 1960kv - $84 (These motors offer great flexibility from 5030 props on 3S all the way to 6045 4S speed machine)

    - Props.
    Get some 5030, 5045 blunt nose, 6045
...Continue Reading
Posted by Nek | Sep 08, 2011 @ 04:02 AM | 21,131 Views
Hang tight for the wall of text and grab some

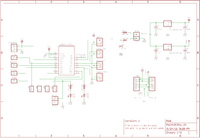
My plan is to have a solid EAGLE CAD schematics base for my MultiWii connections. Most commercial shields are very complete but most of the time too complete or lacks one little something.
I also wanted to have a shield specific to each of my projects so I wanted a way to make my own. Started looking into DIY PCB howtos and will link the ones I found the most helpful here:
- Draw the Schematic: http://www.instructables.com/id/Draw...CadSoft-EAGLE/

- Hobbyist DIY PCB design rules: http://www.instructables.com/id/Make...CAD-tools-by-/

- From schematic to PCB: http://www.instructables.com/id/Turn...-PCB/?ALLSTEPS

- DIY PCBs: http://fullnet.com/~tomg/gooteepc.htm#1
I would really appreciate any feedback as most of this is information from posts here and there and not much is practical experience yet


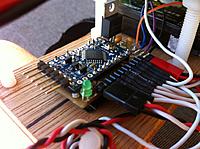
1- Arduino Pro Mini 5v 16MHz Pin Out information:

Most of this is from berkely's blog and info glanced here and there. I am a complete noob when it comes to electronics and I am learning along

D2: THROTTLE or PPM SUM signal. For the Y6 and Hexa you need to use two of the RX channels pins (D5 and D6) to connect more motors. So you need an RX that has PPM SUM enabled. This means all RX outputs/inputs are on a single pin. On the shield it is also better to use this connection to feed the RX it's 5V from the same regulated source that powers the pro mini. So a 3 pin connector is needed here on the shield. The...Continue Reading
Posted by Nek | Aug 23, 2011 @ 03:14 PM | 20,286 Views
Hello everyone!!!

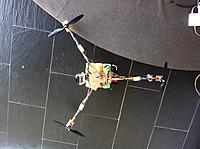
Wanted to share my current tricopter (also Y6) design. I am on my third big crash and nothing broke on the frame yet! (30ft+ dead drops...)

It is all made from 6mm Plywood, 12mm wood rods and 6mm diameter nylon threaded rod cut to size.

This is how it looks from the top:


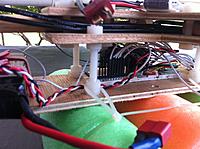
On this picture you can see the two top frame layers. They are screwed together with the nylon rods and nuts and the pressure holds the booms tight, but loose enough to give in case of a crash. The top plate only has holes for the boom holding rods, the bottom plate is cut a different shape to have holes for the lower plate support

You can see how the booms are held on this one:

...Continue Reading