-
 Views: 74
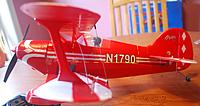
01 Brand new Pitts just out of the box. -
 Views: 75
02 Yellow lines indicate where upper fuselage is to be cut to gain access to Pitts brick inside. Cut lines are the same on both sides of fuselage. Fore and aft vertical sections of fuselage have been glued, and X-Acto knife will have to cut through foa -
 Views: 70
03 Horizontal cut lines indicate where fuselage sections are simply held in place with tape which is easily cut with X-Acto knife. -
 Views: 70
04 Closer side view. -
 Views: 85
05 Note horizontal cut line only needs to cut tape. -
 Views: 80
06 Vertical cut lines must cut through foam a bit since glue was used here. Vertical section in front of cockpit is thicker and a bit trickier to cut through foam. Take your time and the section will come out quite nicely. -
 Views: 82
07 Removal of upper fuselage section affords access to brick inside. -
 Views: 105
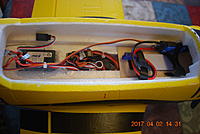
08 Pitts brick, and elevator and rudder servos can be seen.
Comments (4)
Add Comment
-
 Views: 230
The Flyzone Seawind is a big plane to me with its nearly five foot wingspan. -
 Views: 310
With canopy up, cabin has two sets of seats attached by magnets . Canopy and seats must be removed to work in cabin space. Servo wires can be seen coming out top-rear of SAFE receiver which is under seats. -
 Views: 324
Cabin from control panel to rear where flaps servo can be seen. -
 Views: 254
Apprentice SAFE receiver is hot glued in place as are both receiver antennas. Nose gear and water rudder servo is on left. Elevator and rudder servos on right are shown after their positions were switched and arms changed 180 degrees. -
 Views: 221
Changing elevator and rudder servo positions required pushrod and sleeves to be realigned with crossover of same. Pushrods and sleeves are held in place with hot glue as seen in pic. -
 Views: 328
Pushrods and sleeves crossover can be clearly seen in this pic. -
 Views: 232
Wires for ailerons and wingtip lights can be seen going out to each wing. -
 Views: 212
A longer arm was installed on flaps servo to gain more throw on flaps. Getting pushrods in place and adjustment is enough to get one to swear off ever removing wing again. Not a lot of room in there to work.
-
 Views: 215
Eleven Hobby T-28 Trojan does not require any changes to control surfaces direction. -
 Views: 272
View inside fuselage with Apprentice SAFE receiver on left with pin ports pointed toward rear of plane. ESC seen in upper right has been relocated inside fuselage and hot glued in place. SAFE receiver is also hot glued in place. -
 Views: 262
ESC hot glued against port side of fuselage. This allows more room for air to pass through motor area, center fuselage, and out rear. -
 Views: 240
Closer view of ESC and battery tray. -
 Views: 241
View of canopy bottom with about 1/8 inch removed where battery touched. -
 Views: 206
Closer view of area where foam was removed.
-
 Views: 199
Original stock configuration of Eleven Hobby T-28 Trojan propeller assembly. -
 Views: 231
Stock propeller assembly consisting of prop, prop adapter with six-sided nut milled in same, two halves of prop hub, and hub nut spinner. -
 Views: 318
Two halves of prop hub showing six-sided nut receiver intended to fit over six-sided prop adapter nut. -
 Views: 204
Back of prop with hub in place. Note six-sided nut receiver molded into hub. -
 Views: 277
Stock prop adapter with six-sided nut milled in same. -
 Views: 207
Quarter view of same with three bolts attaching same to motor. -
 Views: 291
E-flite assembly including prop adapter, two halves of hub, and aluminum hub nut spinner. -
 Views: 144
E-flite four-blade prop adapter assembly including adapter, two halves of hub, and solid aluminum hub nut spinner.
-
 Views: 194
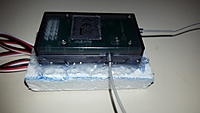
Apprentice SAFE receiver mounted on 1/2 inch foam platform. Top of receiver faces foam, and when foam platform is affixed to bottom of fuselage, SAFE receiver will be face up. -
 Views: 248
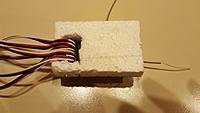
View of receiver and foam platform from opposite side. Note that all wires from receiver bend in the 1/2 inch space and are free to connect once foam platform is hot glued in place in the fuselage. -
 Views: 223
Close view of hot glue around receiver sides. This holds receiver solidly to the foam platform. -
 Views: 265
Close view from other side and wires from receiver are seen clearly bending 90 degrees and ready to connect to servos and throttle. -
 Views: 230
Foam platform and receiver hot glued to bottom of fuselage. Note that top of receiver is facing the bottom of the fuselage. All wires are connected, bundled, and bound with wire ties. -
 Views: 230
Wires are tucked in so hatch can be replaced. Two 6-inch extensions go from Bind Port up through to battery compartment to facilitate binding at that location. Receiver is rock solid in this mounting.


