edwen303's blog View Details
Posted by edwen303 | Sep 09, 2023 @ 08:17 PM | 8,834 Views
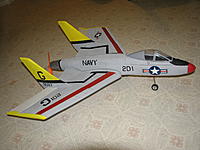
Both with ESC on low timing. Battery came down warm with ambient >80 F

The maiden flight:
FW Mig-29 maiden (3 min 56 sec)


Remaiden with thrust tube modification:
FW Mig-29 ThrustTube Mod (4 min 28 sec)
...Continue Reading
Posted by edwen303 | Sep 10, 2021 @ 12:35 PM | 46,724 Views
Project started one year ago in the summer, but finally made some progress on most parts and fitting.

Double layered Blue Cor foam sheet joined by Gorilla glue
Length 204 cm (ca. 1:30 scale)
Twin 64mm 12b fan on 6s
Twin 50A ESC
Three-piece elevon controlled by one servo

The final target weight for flying on 6s 4000mah is 2.5 kg, so the weight without battery should be around 1.9 kg.
Posted by edwen303 | Jul 06, 2021 @ 03:32 PM | 40,807 Views
C clips have been widely used in RC scale model airplanes for its convenience and less protruding profile, such as wheel retainer or axle retainer. Here is my way of removing and reinstalling C clip on oleo legs, with common tools for electric RC flying, precision screwdriver set and wire stripper, preferably magnetized to retain C clip. There are quite a few threads on RCG on this topic as well. Here is briefly how I did with C clip:

To remove C clip (Larger C clip requires stronger flathead screwdriver to push and wedge):
  • Use thin flathead screwdriver (such as precision type, roughly the same diameter as the C clip) to firmly push the open end of C clip. You will notice a tiny movement with C clip off the center of axle. This indicates the C clip is no longer holding the axle.
  • Then use the smallest flathead screwdriver you can find, with the corner of the tip, wedge in between the partially off centered C clip and the axle. A lightly magnetized driver is preferred to retain the C clip once it is popped out.

To reinstall the C clip, position the C clip against the axle with the opening of C clip facing the axle. Use those thin flathead screwdriver to push it in. Normally it is fairly easy to do so when the C clip is made of more flexible steel; when stiffer steel is used for larger C clip, I use the tip of wire stripper and carefully force the C clip into the axle. Precision pointy plier might also work with some practice.
Posted by edwen303 | Mar 15, 2020 @ 02:30 PM | 54,435 Views
This is the quick and rough description. Might detail the info once COVID19 panic passed, if I am still around
Here are the short video showing both Low voltage HK cluster and 12V LED ring:

The single 70mm Cougar is with HK orange color LED with resistor, 90mm F-18 with bifurcated exhaust running two LED rings from banggood or amazon.
EDF afterburner test. Part 1 (0 min 15 sec)


No more LED afterburner from vendors. Easy to make it yourself. Cost less than $5 if choose the listed item, less than 30 min work.

All you need are:
...Continue Reading
Posted by edwen303 | Aug 10, 2019 @ 10:06 PM | 44,427 Views
When airplane rests in still air, the weight of drop tank is the only force upon drop tank. In flight, the force of air on drop tank will become important, which is the friction between air and moving drop tank. The combined force will exceed the gravity force.

How much force on the drop tank in flight? I propose a simple test, use leaf blower to blow on the drop tank.

Most leaf blower works at around 150 mph, and diameter of nozzle is pretty close to the diameter of drop tank in most 90mm EDFs. So if the blower blows the air to the front end of drop tank at close distance, we can assume the air speed on the drop tank is somewhat smaller but close to 150 mph. Those has pitot tube can actually very easily measure the air speed from blower to the drop tank. The farther away nozzle from drop tank, the lower speed of airflow.
[LIST]
  • Secure a bamboo stick or 3mm piano wire on upright position. Secure the drop tank horizontally on the tip of bamboo stick/piano wire. This may actually be challenging to achieve but I will just leave it like that for future whoever interested to explore in experiment.
  • Turn on blower and point the airflow toward the drop tank in a headon manner (simulate the airflow toward drop tank in flight), keeping the drop tank in the center of airflow. If drop tank has stabilizer, it is easier to maintain drop tank at the center of airflow. The drop tank will be blown away from the upright position, causing the piano wire to bend. Measure the average
...Continue Reading
Posted by edwen303 | Aug 07, 2019 @ 10:25 AM | 44,178 Views
The light weight spackle collapses a little after drying. It is challenging to make the final finish perfectly match with original surface. Here is my approach:
Material list:
  • Polyurethane glue such as Gorilla glue (either brown or white, I normally use brown)
  • small plastic piece slightly larger than target area, make sure medium flexibility
  • masking tape
  • paper towel for cleaning up

1. apply small amount of moisted glue
2. place the plastic piece over the target area, make sure this piece is just a little larger than the target area
3. use masking tape keep the plastic piece on the surface, waiting for curing. Keep an eye on the expanding glue under the plastic piece, clean away any protruding glue along the edges.

If the new surface is still not perfect, then either repeat the above procedure or fill with light weight spackle.

If the area is not too big to fix, and the model can handle a little gained weight, just regular spackle will do the job, giving you smoother and tougher finish.
Posted by edwen303 | Jul 02, 2019 @ 01:02 AM | 46,146 Views
Hobbyking retracts: The followings are not full metal, inexpensive (<$10 per piece)

Great for planes ~ 1.5 kg flying weight
For models ~2.5 kg flying weight (FMS 1400mm warbirds and 90mm EDF):
Larger models (46 size - 60 size, 8-12 lb models): 5 mm shaft...Continue Reading
Posted by edwen303 | Aug 26, 2018 @ 07:51 PM | 45,604 Views
  • Use hand file to make saw teeth on the end of brass tube or cf tube. This is to act like cutting piece when used with hand drill inside the foam
  • Secure a brass tube or cf tube, the same way as holding a drill bit, in a power drill (an example: https://www.amazon.com/dp/B077FSNHX4...d-777fa7fb2507 )
  • Carefully pulsatingly place the tube with teeth into where you plan to add wingspar and drill slowly. Make sure the tube stay in the correct path inside the foam. You can add some pressure on the drill/tube to slightly adjust which direction the tube inside the foam. Even the hole is a little bit rough or too large, don't worry.
  • After the drilling, remove the foam debris from the drilling tube. Place the cf tube inside the wing to test the fit.
  • Gluing: Put on glove, apply Gorilla polyurethane (foaming) glue to the tube, use disposable piece to spread the glue on the cf tube, then spray some water on the glue and mix glue/water with disposable stick.
  • Insert the cf tube into the hole with twisting move all the way to the desired depth. Gorilla PU glue with water will soon foam and expand, so use masking tape to whereever the glue might "outgrow" to maintain the smooth surface once glue is cured and hardened. Gorilla glue is notorious for the messiness in terms of cleaning but it is my goto glue if working on foam models.

Posted by edwen303 | Aug 07, 2018 @ 10:00 PM | 45,467 Views
There are many Lipo battery vendors online or in store, not all of them are rated equally accurate.

Capacity:
Once I purchased a lipo from Amazon for its low price. The lipo arrived in good shape, voltages for each cell are consistent 3.80 V +/- 0.02 V. Then when I charged the battery to 4.20 V, my charger showed the charge it received was significantly below 50% of the rated capacity. For example, with a new 3s 2200mAh lipo, one would expect to charge 1100 mAh into the lipo from 3.80 V/cell (11.4 V total) to 4.20 V (12.6V). Anyhow, based on what I found out, this lipo has capacity that is much less than rated and I had to return the lipo as "significantly different from the description".

I fly mostly EDF, the maximal amp in the model is typically 20C of the capacity. So the current at full throttle will be ~100Amp when running a 5000mAh (aka 5 Ah) battery. The actual amperage in flight should be less than the static test. Suppose the average amp in flight is 50 Amp, the amount of discharge from 4.20 V to 3.80 V is 50% of capacity or 2.5 Ah. The flight time can be calculated as = Ah / A = 2.5 Ah x 60 min/50 A = 3.0 min

If at the same amp but a lipo of larger capacity is used, the longer flight time. For a 6000mAh lipo, the flight time = 3.0 Ah x 60 min/50 A = 3.6 min
If you find a lipo battery last very short amount of time, it is very likely your lipo has lower capacity than rated. To find out the true capacity of your lipo, put your lipo to storage voltage 3....Continue Reading
Posted by edwen303 | Aug 07, 2018 @ 09:25 PM | 45,207 Views
In addition to physical appearance of Lipo pack, there are several factors that affect the health of Lipo:
  • Storage voltage: If lipo will remain unused for more than two days, use your charger or drain your lipo to 3.80V per cell. This will make your lipo last longer time.
  • Charging: Never charge lipo above the suggested maximal charging current. Charging at 1C is always the safest. Example: maximal charging current for 3s 2200mah lipo is 2.2 Amp
  • Discharging current: Avoid continuously discharging at amperage higher than the rated C value. For a 3s 2200mah 30C battery, keep the maximal amp below 66Amp.
  • Overcharging: Charging lipo to voltage above 4.2 V per cell is damaging to the battery, can even cause fire. This happened to me
  • Overdischarging: Avoid discharging lipo to below 3.5 V per cell. Many chargers will not charge a lipo if the voltage is below 3.0 V. If the lipo was slowly discharged to low voltage (such as pilot forgot to unplug the lipo from ESC), it is possible to "revive" an overly discharged lipo by charging the lipo as Nickel-Metal or Ni-Cd battery. Ask an experienced RC modeler who knows well about the use of lipo to handle this.
  • Storage temperature: Research showed fully charged lipo loses the capacity faster at high temperature, so store your lipo at low temperature (like in the refrigerator or just room temperature, ~25 C or 75 F)
  • Discharging temperature: The internal resistance of Lipo affects the performance of your battery, the C rating. Low temperature increases the IR and reduces battery performance.
  • "Break-in" of Lipo battery: This is controversial topic but this will NOT hurt your battery health. For a new lipo battery, charge at 1 C to full, then discharge the battery to storage voltage 3.8 V at low current, such as 2C to 10C. Then repeat the charging/storage cycle again.

Posted by edwen303 | Jun 11, 2018 @ 11:50 PM | 45,814 Views
Some EDF models has intake and/cheater well above the underside of the planes, such as A-10 Warthog, F-117 Nighthawk, A-4 Skyhawk, He-162, BD-5, etc. If one wants to avoid the dreaded handlaunch of such rc model, it is possible to install wheels on the underside of the plane and make the takeoff from concrete.

Material:
  • short piano wire (size depending on the model weight). The diameter of the wire should be just a bit smaller than the diameter of wheel axial. Too small diameter of the wire might cause too much play of the wheel and difficult to keeping the model tracking straight during takeoff.
  • plastic wheels or foam wheels (again depending on the weight)
  • pieces of plastic (I prefer pieces from either milk bottle or detergent bottle, for light weight to heavy duty models)
  • plastic or metal washer (prop adaptors that comes with many plane propellors are good for spacing), this is optional

Procedure: for each wheel to be installed
  • Cut two rectangular shape pieces of plastic, sand with <100 grain sanding paper/block for later gluing. Make sure the plastic pieces slightly larger than the diameter of the wheel to be installed, so that wheel can freely move
  • Drill holes on the plastic pieces that fits the piano wire
  • Cut out hole in the fuse/wing that is slightly smaller than the rectangular plastic piece. Assuming we are working on the foam, the slightly larger plastic piece will fit tightly inside the hole. Make sure the hole large enough to fit the plastic/wheel assembly.
...Continue Reading
Posted by edwen303 | May 12, 2018 @ 01:21 PM | 45,619 Views
Bought a pair of this battery several years ago but never got a suitable plane or power system to use them. So they have been mostly sleeping in the fridge for the past years. At room temperature checked the internal resistance recently and they seems all excellent (< 2 milliohm per cell). Recently through another HK sale so got a 1500kv inrunner capable of over 100A on 6s-8s, so decided to make those 7s batteries ready.
After first charging/storage cycle, the first four cell reading are around 4.18-4.20 V but the rest three cells are only 4.00V. So I charged those undervolted cells as single cell, still the voltage will NOT stay 4.20V after charging cycle complete. So I ran storage again, was able to bring down the volts all to 3.80V/cell. "That is promising", I thought to myself.
So, another charging is done now, all cell reading at 4.20V.

Capacity: Also was able to put in 3000mah to the pack from 3.8V to 4.2V, so the actual capacity of the pack seems pretty good (definitely "5000mah" is an underrating). Most lipo packs from hobbyking are underrated, good for the customers. I bought lipo from banggood or amazon, all overrated and I had to return them.

Next discharge at lower amps ("break in") and recharge again.
Posted by edwen303 | Jan 07, 2013 @ 12:37 PM | 50,746 Views
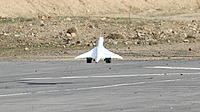
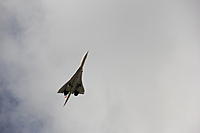
Hindthought about Concorde:

It would be nice to build a bigger, twin 64mm or twin 70mm EDF, larger scale, with retract and nose-dropping features. Of course, make her nose and/or tail detachable for transport.

She is fairly easy to fly even underpowered. I learned to turn her without losing too much altitude. It is better to lose some speed than to lose altitude. Airfoil should not be that complicated. Even flat airfoil should be fine, although I did carve some undercamber right behind the LE.

My build is a little too heavy so I add some power for landing. Well which manufactured EDF don't need power for landing? At least most of mine EDF need power to land anyway.

I use the nose from a foam glider as Concorde nose, all the rest mainly use Blue-cor, 6mm Depron with carbon rod reinforcement for only v-stab. Peel off the skin from the Blue-cor makes it easier to glue and bend.

The wing is mainly glued together from overlaid two sheets of Blue-cor, with three reinforcements across the wing. On top of this, I use one 3 feet long ~10mm diameter CF tube to reinforce the fuse. The full scale is so long that the passengers sitting at both ends of the plane can see the bending of the fuse when the plane was turning at speed. I use nichrome wires to join the CF tube and the CF strip. I used bamboo skewers to reinforce the front part of the wing, to save the cost.

The blue-cor sheets were prebent to feature the famous Concorde anhedral. I use a rod with ~2"...Continue Reading
Posted by edwen303 | May 27, 2012 @ 03:45 AM | 51,725 Views
A lot of twicking, a lot of fun exploring RC aerodynamics! This blog will be kept updated frequently, stay tuned.
Flight video of finished Concorde twin 55mm EDF:
RC Concorde SST EDF 55mm (3 min 27 sec)


Another flight video: 1:40 scale Concorde SST, test flight #3.
Concorde EDF Test flight (2 min 9 sec)
...Continue Reading