deadbird's blog View Details
Posted by deadbird | Sep 02, 2012 @ 04:40 PM | 9,047 Views
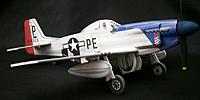
My new website selling the profile scale warbirds is now live. Please take a look and chat it up in the forums!!!

www.microaces.com
Posted by deadbird | Jul 19, 2012 @ 02:46 AM | 10,303 Views
Nearing the stage where I hope to realise a dream of producing and selling kits into the hobby market!

A very exciting time but it has been and still is a very stressful journey to get this far. I'm incredibly excited and yet also very nervous about whether this idea will work in the real world.

It's realistically taken 18 months of working most of my spare time (and some work time) to get to this point and I have learned a great deal - I think the best bit has been the fact that I can now illustrate aircraft, something I didnt know I was capable of.

I have been able to use my experiences in product design to keep things moving along and ensure the product and components have been well tested before releasing into the big bad world. We'll soon see if my experience in marketing and sales come to anything.

The website will be launching on the 1st September 2012 if most things go to plan.

If you have a Spektrum AR6400 or 6400L Rx lying around or ready to fall out of a battered old UM, these kits will provide a very exciting new home for the brick!...Continue Reading
Posted by deadbird | Apr 19, 2012 @ 05:02 AM | 10,316 Views
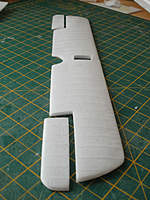
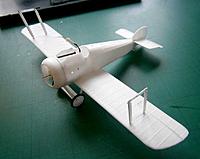
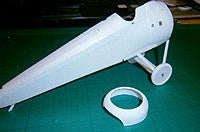
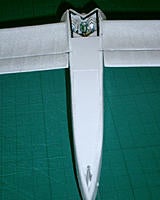
More bits done. Everything just tacked on for the photo. Need to paint before final assembly & top wing. Still more building to do - inner struts need shrouding and the plan is that the twin Vickers are doubling as a battery hatch.

Coming together though!
Posted by deadbird | Apr 17, 2012 @ 05:13 PM | 9,943 Views
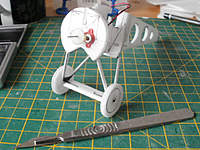
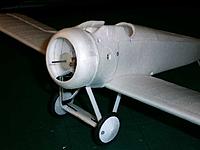
Just finished putting the wheels together. The black neoprene chord works a treat and I made wheel covers from paper.

Also started shrouding the CF rods making up the wing struts with 1mm depron squashe further to about .5mm thick and scored inside on the fold and glued with UHU por.

Cowling has just been put on to check the look!
Posted by deadbird | Apr 15, 2012 @ 08:36 AM | 9,804 Views
I havent had a chance to do any more to it but here are a few more pics. I Moulded the cowl out of Depron too - it took more than 10 attempts to do it. Why I didnt just make it out of styrene using a plug I dont know. It will no doubt get shredded by the prop the first time it noses over so I'll have to anyway!

The wheels need finishing too. I found some 3mm dia black neoprene chord (weighs nothing) that is ideal for the tyres so my shaped Depron tyres will have to go.

Jon
Posted by deadbird | Mar 21, 2012 @ 05:28 PM | 10,051 Views
A year since I last did anything to the Camel. Well that has changed - but not a lot. As I have been concentrating on a more 'commercial' idea I put the camel bits in a box and got it out now and again just to look at it for inspiration.

Well a few weekends ago I got a spurt on and started doing things to it but its back in it's box now, hopefully not for so long this time.
Posted by deadbird | Apr 04, 2011 @ 03:33 PM | 15,406 Views
I recently and with much regret, decided to put my first attempt of a micro Bf109 in moulded depron onto the shelf for the time being as I was having a hard time keeping it in the air. More down to my lack of flight experience with this type of bird than the plane itself I may add but I thought I should take a step back in one sense and try something a little more docile (I know - a camel isnt exactly the best choice with it's ultra short nose) while tackling a more complex build and pushing my depron manipulation skills further in the process.

Using the plaster mould method I used for the 109 I set about creating the moulds. This time however I had got hold of some 3mm Depron Aero - a lighter weight Depron if their could be such a thing & I wanted to test it out to see how it performed and see if more weight could be saved with little or no degredation of quality.

The other thing I was banking on was the expansion properties of Depron as the wings were 4.5mm at their thickest point so the depron would need to 'grow' between the male & female mould to produce a scale aerofoil.

I used a very hard plaster this time (Crystacast) with a liquid polymer added for extra strength. On advice gained in the forum chats I also washed the moulds in diluted epoxy resin before using them - UREEKA - I still have all of them and each is still in one piece. This made me a very happy man

It took a while to strike the right temperatures for the moulds and plenty of wax...Continue Reading
Posted by deadbird | Jan 24, 2011 @ 01:55 PM | 13,129 Views
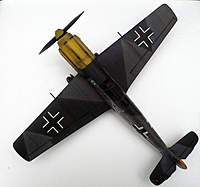
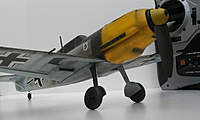
This build has seen a couple of firsts on my part. It was the first time I had completely scratch built any aeroplane, wood, plastic or Depron. Saying that, I originally started to build a Hurricane MkI from moulded Depron and even got to the test flight stages with it, but I quickly learned that scale aerofoils really don’t work to well at small scale. Too many crashes and not enough plaster moulds survived to make it worthwhile pursuing further so I decided on a fresh start and some new design ideas.

My second first was using an airbrush. On recommendation I put a Harder & Steenbeck Evolution at the top of my Santa list, and the big guy came up trumps. I knew if I wanted to end up with a model that came anywhere near resembling its full scale counterpart I’d need to learn how to wield one. An airbrush would also allow a thin, controlled layer of paint to be applied so keeping weight down. In fact the acrylics I used have also created a toughened exterior layer on the Depron too.

Here are the details of the specification. I'll post up more details of the build when I get some more time:

Model: Messerschmitt Bf109E-4N Kdr. JG26 A.Galland France Sept. 1940

Dimensions
Wingspan: 310mm
Length: 270mm

Weight
AUW: 22.2g

Materials
Fuselage: Moulded 3mm Depron (Plaster bucks)
Wings & ailerons: Moulded 2mm Depron, undercamber profile (Plaster bucks)
Horizontal stabs & elevatators: Moulded 2mm Depron (Plaster bucks)
Spinner & Wheels: Moulded 2 Part PU foam (Silicone bucks)
Exhausts & intakes: 1mm Depron cut, folded & glued
Removeable U/C: fine guage wire, carbon fibre tubing & 1mm Depron

RC Equipment
Prop: GWS 4 x 4 Microspeed
Motor: 6mm 4.5ohm motor + gearbox. 5.25:1 gear ratio
Rx & Servos: Parkzone PKZ 3351 for motor, elevator & aileron control
Battery: 3.7v 70mAh Single Cell
Control horns: 0.5mm plastic card
Control rods: fine guage wire
Posted by deadbird | Nov 15, 2010 @ 05:27 PM | 11,278 Views
Hi there,

I thought I would use this space to describe how I got here and what drove me to start doing what the rest of you are doing - discussing this fascinating hobby of RC.

Firstly I'll let you into a secret, I am no expert in radio controlled flight. In fact my first proper RC plane was bought for me in February of this year. I did ask for it for my birthday - thats my 40th birthday!

Some 30 years prior to this intro to RC aircraft I was very much into the kits of Airfix et al and my specialist subject was the warbirds of WWII. I had a room with 3 or 4 shelves worth of planes and a celling dripping with plastic classics from the war years. I spent a lot of time and attention on building and painting them even dabbling with airbrush techniques and weathering but that all came to a grinding halt when I realised my hobby wasnt cool with the fairer sex and I needed to learn how to drive a car, drink beer and play lots of manly sports.

It was only 5 or 6 years ago I started thinking how fantastic it would be to get back into the world of scale models but with the added twist of being able to encorporate a longing I had always had as a boy and entering the world of radio controlled flight. (Mid life crisis already?)

Unfortunately these thoughts closely coincided with me starting my own business so it wasnt the best time to try out two difficult ventures at the same time. Somehow I think I took the wrong choice - I would have saved a lot more money if all I had...Continue Reading