Sandancer's blog View Details
Posted by Sandancer | Mar 20, 2014 @ 11:08 PM | 56,903 Views
Up-Grading the FMS 1400mm V7-V8 P-51 "B" & "D"

I thought I would take the time here to share some ideas I've come up with to help enhance both the FMS 1400mm "B" & "D" P-51's from V7 thru the V8 models. Hopefully these mods will inspire others to come with their own ideas on improvements and upgrades to the P-51! Most of these ideas stem from the release of the Freewing 1400mm P-51 released late last year. I have found that there are several improvements available to the FMS P-51's using some of the Freewing parts.

Keep in mind, these are all mock ups, as I haven't begun to implement them on either of my own "Old Crow" P-51B or the BBD P-51D. I'm just throwing this out there for those who might be interested?


=================================

First off, my .50 Cal gun mod


P 51 50 Cal guns (1 min 18 sec)


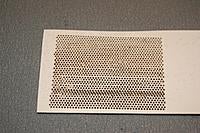
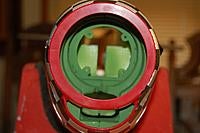
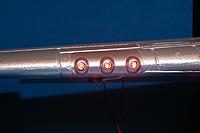
Because there is a spar running the length of the LE of the wind right behind the gun housings, I had to cut 5/8" lengths out of some K&S #3061 aluminum tubing. I then made a 1/4" notch for the LEDS to sit in. I re-bored the hole with a 5/32" bit so the 3mm Orange LEDs would fit snug in the tubes. I beveled the tubes to help reflect the light at the end of the barrels with a 45º 5-flute countersink, soldered the wires on with a JST 2-pin connector, and the basic components were done. I then drilled out the 1/4" holes in the gun housing for the barrels to fit. A...Continue Reading
Posted by Sandancer | Mar 08, 2014 @ 12:48 PM | 52,613 Views
My build of the Schottky Bus-Tie Circuit Module


While surfing around RCG awhile back, I came across an interesting thread authored by one of our "down under bros" Aus entitled "Simple Bus-Tie Circuit using Schottky Diodes".

To quote Aus "When using a separate Universal Battery Elimination Circuit (UBEC) to power your receiver and servos, the Electronic Speed Control (ESC) integrated BEC isn’t utilised. This simple bus-tie circuit allows you to connect the UBEC and the ESC’s integrated BEC so that in the event of the UBEC output voltage dropping below that of the ESC’s BEC, the ESC’s BEC will instantaneously take over. This provides a little extra peace of mind for little cost and only a few grams in weight."


I found this module very interesting so I decided to acquire the components necessary to build one of these little gizmos and see if it worked? Sure enough, it does, so I thought I would share this info with everyone.

There are several versions the guys on the thread built, but I really liked the simple, compacted one jj604 built utilizing LEDs, so that was the direction I took. To simplify my version I'll refer to it as my SBTCM (Schottky Bus Tie Circuit Module).

The components needed:

Schottky Rectifier Diode
Molex 6-Pin Header
*Optional* Zener Diode for LED
*Optional* 3mm Flat Top Green Leds
25mm Clear Heatshrink
Servo lead wire & connector

...Continue Reading
Posted by Sandancer | May 22, 2013 @ 05:57 PM | 100,305 Views
The FMS 4250 motors, various props/spinner

combos, & mods!


===========================

UP-DATE 3/04/2014:
As of April, 2013 FMS had changed motor manufactures!

UP-DATE 3/30/2014:
I've finished my new static tests on the PAEP 4250 540 & 580kv motors! Here is the new link: ~PAEP 4250 Dyno Tests w/Thrust Tester~

===================================


At this time there is very little info, but what I was informed of is this.......
~This is the new motor from PAEP that is now being offered in the latest versions of the FW-190.
~All specs (see data sheet below) have remained the same.
~It will still function with the FMS oem 65A ESC
~As with the G&C motors, max. voltage is still 18v (4S)
~These new motors are constructed of stronger materials.
~The 4250-500kv motor will be discontinued soon.


===========================

~UP-DATE 6/19/2013~ I have additional info on the new PAEP 4250-580kv motor.

...Continue Reading
Posted by Sandancer | Mar 27, 2013 @ 02:25 PM | 61,246 Views
The "OLD CROW's" Nerve System!


~Electronics~
RX: Futaba 2.4GHz R6008HS
ESC: FMS oem 65A
BEC: CC 10A
Motor: FMS oem G&C 4250-540kv
Nav Light controller: Lazertoyz Maxi Lite controller
LG E-Tracts: PZ-15091/514 w/metal trunnions
LG Sequencer: OSA MicroGear sequencer
Tail Wheel: FMS oem Tail Wheel assembly
~SERVOS~
Aileron: FMS oem 9g
Elevator: HiTec HS-82MG
Rudder: HK939MG
Flaps: FMS oem 9g Slo.Mo digital
Tail Wheel Steering: HXT900 9g
LG Inner Door: Turnigy TGY90SMG
Wing wiring harness: 16-pin headers


First off I would like to complement FMS for the new battery tray they have installed in the P-51B! Let's hope they do the same to all their latest versions where applicable!


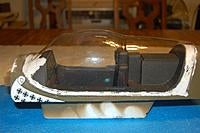
Once again, I found it necessary to change out the FMS oem elevator & rudder servos with a HiTec HS-82MG for the elevator, and one of these newer HK939MG for the rudder. What I can't figure out is the arrangement FMS has taken on these 2 servo placements? The rudder servo is arranged in such a manner where I found it difficult to reach the 1.5mm grub screw on the pushrod adjuster. So what I did to remedy the arrangement was to make a new socket in the tray for the HiTec moving it towards the outer edge, and arranging both servos so the arms pointed inward. Both pushrod adjusters are now easily accessible.

I found the FMS oem tail wheel steering servo, like the one on my BBD, wasn't centering properly, so I changed it out with a...Continue Reading
Posted by Sandancer | Mar 11, 2013 @ 03:14 PM | 64,161 Views
I got the "Old Crow" all lit up for the night skies!


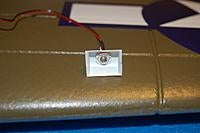
FMS has taken the steps to make their newer planes much easier to modify the Nav lights! I no longer need to drill holes in the wings to run leads!

P-51B Old Crow Nav Lights (1 min 40 sec)


*CAUTION* The LEDs I use for the following applications all have a forward voltage of between 3.5v-4.2v, therefore a 75ohm resistor is required for each lead on a 5v system!

To enhance the Nav light system on the Old Crow I added a tail beacon light on the rudder using a 3mm flat top LED. I cover how I went about doing this mod on the "FMS 1450mm P-51B: The Tail Feathers!" pg.

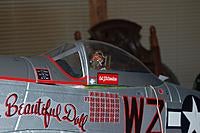
The next addition was a 5mm Round Top Diffused Red LED in the cockpit to simulate a dash panel reflection on the pilot. To do that I simply drilled a hole, actually I used a round file as a bit, as per Tom H's tip, a file makes a much cleaner hole in foam then a drill bit. I cut off a piece of plastic soda straw, glued it in the hole, and it serves as a great fixture for the 5mm LED. I like to run an extended lead so I have room to sit the cockpit on the wing while I'm accessing the interior of the cockpit. 32ga. red/black wire and a JST connector, and the cockpit LED is easy to plug into the Lazertoyz Multi Controller I like to use on all my newer planes.
*The Maxi Controller has it's own built in resistors, so no additional resistors are needed.*

One other item I added to retain a scale look to the...Continue Reading
Posted by Sandancer | Mar 08, 2013 @ 11:44 PM | 63,434 Views
This is the Old Crow's 1-piece wing mod!


Before I glue the two wing halves together I like to do all the mods on each wing beforehand.

First off I like to install the control horns and get the linkages adjusted. I then cycle the servos (aileron & flap) with the MT-1 to check their reliability, and loosen up the hinges a bit more.

I really like these digital slow-mo flap servos FMS is now installing! But the foam hinging is still inadequate. I re-hinged the flaps with the HK Super hinges and used medium gap filling CA as it's not as thin and runny as reg. CA.

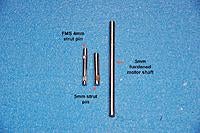
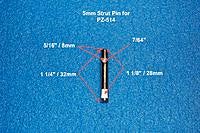
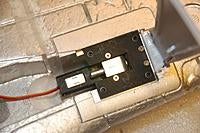
What I didn't like are the PZ-312s E-Tracts! As I did on my P-51D BBD, I dug into those plastic wing pockets and modified them to fit the PZ-514s. To fit the FMS struts to the PZ-514s I, once again, made a couple of 5mm pins (see thumbs for specs.). I disassembled the struts so I could drill the larger 5mm hole in the upper aluminum housing using a #8 bit. I once again made some aluminum mounting plates to fit the 514s to the 312s mounts in the plastic pockets. Because I don't trust those Chinese philips head screws, I used #4 x 1/2" socket head sheet metal screws to attach the 514s to the plane.

There was some discussion earlier today on the FMS 1450MM P-51B Mustang thread concerning the reliability of the V7.5 struts, so I decided to disassemble one of mine to see if FMS was still welding the lower units together? Sure enough, they are! I also discovered why FMS might be...Continue Reading
Posted by Sandancer | Mar 05, 2013 @ 02:34 AM | 64,481 Views
This is my Re-paint of the FMS P-51B from the Shangri-la to the Old Crow livery!


I have to say, this livery re-paint was more of a challenge then when I re-painted my Corsair to the "Marines Dream" livery!

Prepping this plane for paint was nothing like the Corsair I did a couple of years ago. All it took to remove the decals and paint on the Corsair was 120 lbs. of psi and a needle air gun. FMS has come a long ways with both their vinyl decals, and a much denser paint. I will fully agree with Todd/Aros, if you plan to re-paint using the same livery/decals, it might be a better choice to just leave the decals in place and paint over them. Because I was changing liveries I had no choice but to remove the Shangri-la decals. These newer FMS vinyl decals have a much stickier adhesion. I found that they lifted everything beneath them, the paint, and whatever sealant FMS applies to the EPO foam? Needless to say, I had some work ahead of me!

Okay, I got the plane stripped down, and now it was time for primer. One additional step I did before priming was to apply some Green Zinc Chromate #1734 in the LG & tailwheel bays, and engine compartment. After thoroughly wiping the surfaces down with Acetone to remove any & all residue, I proceeded to apply a couple of coats of gray primer with some light sanding in between. I used my HFT 4 oz. detailing spray gun to apply both the primer and later, the clear coat. It has a much wider spray pattern...Continue Reading
Posted by Sandancer | Feb 21, 2013 @ 11:53 PM | 66,894 Views
The P-51B "Old Crow's" re-furbished Cockpit with the Malcolm Hood Canopy!


I've taken another step towards my re-furbished build of the P-51B "Old Crow" built and flown by NASCAR legend Jack Roush!

To keep scale with Roush's "Old Crow" a new canopy would have to be installed, so from the advise of our friend Tom Hunt, I purchased the Malcolm Hood canopy for the E-Flite P-51B from Park Flyer Plastic. The PFP E-Flite Malcolm canopy was actually pulled from the mold Tom made back when he did his P-51D to B bash.

The Malcolm canopy is a perfect fit for this new FMS P-51B. After I carefully peeled the oem canopy off, trimmed the end and side pieces off the Malcolm, it was just a matter of laying the canopy on the cockpit and following the lines with a Sharpie. Very little plastic had to be removed from both the front and rear of the canopy, and I mean VERY little! There is about a 1/4" on both sides that has to be removed as well. On the cockpit itself, both corners of foam at the windshield had to be sanded down a bit to clearance the Malcolm and that was it.

Once the trimming was done and I had a perfect fit to the cockpit, it was time to up-grade the cockpit itself. The next step was to remove the seat back and dashboard decal. The black paint FMS uses in their cockpits isn't the greatest, so it didn't take me long to blow it all off with my needle blower and 120psi. Once the paint was removed, I wiped everything...Continue Reading
Posted by Sandancer | Feb 19, 2013 @ 05:12 PM | 65,739 Views
This is my Prop/Spinner & FMS G&C 4250-540kv set-up for the P-51B "Old Crow"!


I'm going to show how I set up the prop, spinner & 540 motor in preparation of my P-51B conversion to Bud Anderson's Old Crow that Jack Roush rebuilt back in 2001.

P 51B G&C 4250 540kv Dyno Test (4 min 21 sec)


I went thru my usual routine of weighing and balancing the blades, backing plate and spinner combo prior to the dyno run-up test.

As I did on the Big Beautiful Doll, I did Nick/v8Truckin's 1mm zip tie mod to increase the pitch to 10º +-. Because I didn't like the penetration the 17mm bolts had in the ny-locks I changed out the oem 3mm X 17mm philips head screws with 3mm X 20mm Hex head cap screws so I would insure I got adequate thread penetration thru the 3mm ny-locks.


Before I mounted the prop combo on the DuBro balancer, I needed to paint the yellow stripe on the spinner to coincide with the spinner on the Old Crow. The technique I used to accomplish that was to first mark border lines with a pencil where I wanted the stripe to be. Using a pic I had found of Jack's spinnner, I estimated about a 33% division between the red & yellow strips. Carefully following the pencil marks with 1/4" masking I then covered the remainder of the spinner with blue painters tape. Having the spinner mounted on a backing plate I took a 3/16" dowel to use as a pivot. That way I could spin it so I could apply the paint evenly. *Note*...Continue Reading
Posted by Sandancer | Feb 15, 2013 @ 01:44 AM | 65,081 Views
The FMS P-51B and her Tail Feathers!


I'm going to start out with the P-51B's rear end, as that's where I encountered most of my problems!

When I first cycled the tail wheel, I managed to get 2 cycles out of it before it went dead, and of course, it was in the up/closed position! This is the first time I've had one of these PZ-15094 mini E-Tracts fail on me, not to mention being concealed by a couple of bay doors. I disconnected the extension and ran the lead directly off my MT-1 multi-tester and still couldn't get it to react, so the next step was to figure a way to get the doors open so I could get in there and extract that little sucker?

Actually it's a pretty simple solution. There is a pin in each door hinge which also retains the torsion spring. By pushing the pins towards the rear of the plane I was able to release the doors and had full access to the tail wheel assembly. Fortunately, I already have a couple of those tail wheel assemblies so there's no problem replacing it, but I am sure that when I contact Philip, he'll replace it, no questions asked.

Now on to the second problem. When I went to test fitting the elevator to the fuse for the Un-Boxing review photo shoot, it wouldn't seat properly, there was a 1/8" gap between the two. When I tried to pull it back out it was stuck. When I finally got it to release, the plastic male piece that was attached to the elevator broke loose and remained in the plastic female piece in the...Continue Reading
Posted by Sandancer | Feb 12, 2013 @ 11:13 PM | 70,491 Views
This is my Un-Boxing and evaluation of the new FMS 1450mm P-51B Shangri-la!


As I reported on the FMS 1450mm V7.5 P-51D BBD, they have, once again, done their homework!

FMS has added a few new amenities to the "B" which I think most of us will like.
Most notable is the new sliding battery tray part #ST-110. Right now they don't list the slider rails as a part, but it won't be hard to come up with something that will work.
The radiator scoop is now open, but IMO I'm not so sure it will serve any function, as one of the vent holes is right behind it, and there really isn't anything in line for in-coming air to cool.
There is now a handy quick disconnecting wiring harness assembly for those of us who likes the 1-piece wing configuration.
The cockpit assembly now has both an entrance and 2 exits holes for ventilation, but I'm not sure the one magnet mounted in the rear will be enough to keep the cockpit locked in the fuse? As on the V7.5 "D", the pilot is full figured, and is held in place with 2 screws along with glue, but I found that the glue on mine didn't adhere to good, as he fell out as soon as I removed the screws.
*A note on the canopy*. There has been some discussion on the possibility of changing the canopy to the Malcolm hood utilizing the canopy off the 1400 Spitfire. Philip sent me one, and as Tom H stated, the Spitfire canopy is to small. The "B" canopy is 10 1/8"L X 4"W X 2 7/8"T.

With the...Continue Reading
Posted by Sandancer | Feb 12, 2013 @ 08:06 PM | 67,554 Views
This is my build of the FMS 1450mm V7.5 P-51D..... "Big Beautiful Doll"


When I was un-boxing this plane, I quickly realized that FMS had done their homework, and there wasn't going to be much needed to get her airborne!


FMS P-51D Big Beautiful Doll (8 min 30 sec)


Big Beautiful Doll's specs:

Wingspan: 1450mm/57"
Length: 1240mm/49"
Weight: 2050g/72.3oz.
CG: 110mm from LE
OEM Battery: 14.8v 2600mAh Optional batteries: 4S 4000mAh or 5S 4000mAh
ESC: 65A w/5A SBEC
Motor: G&C 4250-540kv

My electronic specs:

RX..........OrangeRx Futaba FASST Compatible 8Ch 2.4Ghz Receiver
Flight Stabilizer....RX3S OrangeRX 3-Axis Flight Stabilizer V2
BEC....CC 10A BEC
Sequencer....Micro Gear sequencer.
Lazertoyz Maxi Lite....Lazertoyz Maxi lite controller.
Motor.....G&C 4250-540kv
ESC......FMS OEM 65A
Aileron servos...FMS 9g servo #SU-123
Flap servo.........FMS 9g Digital servo #SU-124
Inner LG bay door servo.....Hextronik MG-14
Tail Wheel steering servo....HXT900 9g
Elevator servo...... Hitec HS-82MG Micro Metal Gear Servo
Rudder servo.......HK 929MG 9g

FMS suggested throws:

~~~~~~~High rates~~~~~~~~~~~~~~~~~~~Low rates~~~~~~~
Ailerons: 28mm/1" up & down....................17mm/0.7" up & down
Elevator: 40mm/1.6" up & down..................24mm/0.9" up & down
Rudder: 25mm/0.98" left & right................21mm/0.8&...Continue Reading
Posted by Sandancer | Feb 12, 2013 @ 01:11 PM | 66,380 Views
The Big Beautiful Doll's ~~Spinal Tap!~~


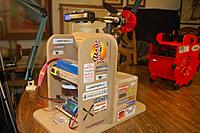
Let's face it, our scale WWII Warbirds are now equipped with a computerized control system. This is how I managed to get every thing to recognize each other.

UP-Date 3/19/2013: To expand my battery options in the BBD I enlarged the battery bay so I can fit my 5S 4000 lipos as well.

I utilized my hot knife at 75% heat and carefully melted the foam walls back about 3mm ea. It took me all of a couple of minutes to complete the mod. Now I can slide both my 4S 5000 & 5S 4000 lipos all the way forward to the stops.

I also changed out the inner Bay door servos with a set of Hextronik MG-14 metal gear servos.

The tail wheel steering servo was also changed out to a HXT900 9g. servo.

==================================

I'll start with the wings. I changed out the oem PZ-312s with a set of PZ-514s "FMS V7.5 P-51 BBD: The Landing Gear!", and then sequenced them with the bay doors using the Micro Gear sequencer.
The next step was controlling the Nav lights. Because I installed a tail beacon on the rudder, lights in the cockpit, and of course the landing lights "FMS V7.5 P-51 BBD: The Nav Lights!", I needed something to control them so I chose to use the Lazertoyz Maxi lite controller.

Once I had all the wing wiring figured out, I needed to devise a way to simplify the connection between the 1-piece wing configuration "FMS V7.5 P-51 BBD: The 1-Piece Wing!" and the controllers in...Continue Reading
Posted by Sandancer | Feb 09, 2013 @ 02:44 PM | 65,814 Views
The Big Beautiful Doll's Power Plant!


This is my run-up test and installation of the FMS/G&C 4250-540kv motor.

G&C 4250 540kv Test (4 min 11 sec)


As you could see in the vid, the G&C 4250-540kv produced 929W at 63A off of a 4S 5000 30C lipo. I also ran a test (no vid) using a 5S 4000 30C lipo and got 1220W at 72A, so with a 5S this 540 will eat up the oem 65A ESC in short time depending on flying style. I will probably move up to a 85A + ESC if I choose to run a 5S lipo.

Prior to re-installing the motor back in the plane, I took the time to do a little detailing in the engine compartment. Once again FMS has done a great job in making sure there is adequate ventilation thru the engine compartment, so there's very little, if anything to do! I just repainted it with MM Green Zinc Chromate , and that was it! Besides the nice wide open lower chin scoop, FMS has made the two side ventilation screens now functional. They are ducted into the engine compartment and help add to the ventilation.

I am also pleased with the new engine mount configuration as it appears the circular plastic mount is well secured in the foam. That and the motor X mount, the whole assembly appears to be rock solid. There were a couple of changes I did make thou.
1. There were 4mm nuts used as spacers on the 3mm philips head mounting screws. I felt this created to much spacing between the spinner and the cowl for my liking so I used a couple of flat washers instead.
2....Continue Reading
Posted by Sandancer | Feb 07, 2013 @ 03:49 PM | 67,378 Views
The Big Beautiful Doll's Navigation Lights!


FMS P-51D BBD_Nav Lights (3 min 55 sec)


Because I was going to add a few embellishments to the BBD's light system, I had to do some mods to the existing nav lights so I could use the Lazertoyz Maxi Lite controller. Observing the nav lights were working off a 5v input I knew there had to be a resistor somewhere inline? Sure enough, there were 75 ohm resistors embedded in the shrink wrap at the LEDs. The Maxi has built in resistors to handle 3v 5mm LEDs such as those FMS uses in their wing nav lights, so having two resistors on the same line would diminished the mcd output of the LED. After removing the resistors, re-soldering, and installing new shrink wrap, I re-installed both the red/port & green/starboard LEDs back in their respective housings. I have the nav light leads wired into the 16-pin harness and plugged into the "solid on" ch. 3 on the Maxi controller.

The next step was to install a beacon light in the rudder. I cover how I went about doing that on the "Tail Feathers" section. Because of the limited size I had to work with, I chose to use a 3mm flat top red LED with 10,000mcd / 115º output. I installed a JST connector on the 32ga. red/black silicon wire lead, and have it plugged into "double blink strobe" ch. 7 on the Maxi.

With the beacon light mod done, it was on to the cockpit illumination. I used two 5mm diffused red LEDs anchored on with a couple...Continue Reading
Posted by Sandancer | Feb 06, 2013 @ 12:00 AM | 67,127 Views
My BBD 1-Piece Wing Mod!


I'm going to illustrate how I go about making the wings a 1-piece unit.

The first thing I always do is eliminate those 3mm philips head anchor screws. On the BBD I chose to use (2) 6-32 X 2 1/2" hex head cap screws in the rear mounts, and (2) 6-32 X 2" in the front mounts. I had no problem tapping the rear mounts as they consist of a 3mm nut encased in a plastic anchor assembly embedded in the fuse. The front mounts, on the other hand, proved to be a bit of problem! They consisted of (2) 3mm T-nuts embedded in some kind of high density foam, not plastic....foam? Needless to say, when the 6-32 tap hit those T-nuts there wasn't much securing them in place so they let go. I ended up having to cut the whole anchor assembly out. I'm kinda happy I did, as I'm not sure how long that configuration would hold up?
My solution was a piece of 9/16" X 1/2" X 85mm UHMW plastic. I drilled and tapped the two 6-32 holes 75mm apart. I then drilled several holes in the plastic anchor for the glue to penetrate and bond to. After securing the plastic mount with epoxy, letting it set for 30 min., I dripped several drops of water in the seams and applied a generous amount of GG securing the whole repair with tape to help corral the GG expansion. Once everything was dry I applied a coat of Krylon Bright Silver and I was good to go!

Before I ever glue the two wing halves together, I like to make sure I have all the mods done...Continue Reading
Posted by Sandancer | Jan 14, 2013 @ 02:40 AM | 78,919 Views
The Big Beautiful Doll's ~Landing Gear~


UP-DATE 2/04/2013: I've finished my LG mod on the Big Beautiful Doll!

With the up-graded PZ-514s working in conjunction with the Micro Gear sequencer, my work on the BBD's LG is done!

P 51 BBD LG Test (0 min 58 sec)


UP-DATE 1/15/2013: I've U/L 3 videos showing how I up-grade both the PZ-514 & PZ-312 E-Tracts. I've also U/L some pics of my finished Landing Gear!


Much to my surprise FMS has installed the medium sized PZ-15090/PZ-312s in the V7.5 1400mm P-51! There's nothing wrong with the 312s, but I prefer the beefier PZ-15091/PZ-514s personally.


The struts are a nice touch. They're a working oleo 2-piece strut with an aluminum upper section housing the spring, and the lower steel section comprising of the spring compressor down to the wheel axle. The lower steel wired component is encased with a plastic housing along with the lower A-arm scissor. The upper scissor arm is also plastic and is clamped onto the upper section's base. For disassembly (I'll get into that later), you will need a PH0 phillips screw driver, as the A-arm assemblies are linked together with a very tiny phillips screw.

The tire/wheel combo is a vast improvement over those 2 3/4" slotted wheels we've seen on previous FMS planes. These new 3" wheels have a nice firm diamond tread rubber tire mounted on them, and the whole assembly is much more scale to the wheels we see on conventional warbirds. They...Continue Reading
Posted by Sandancer | Jan 10, 2013 @ 02:02 PM | 66,770 Views
The mods on the BBD's Tail Feathers!


There wasn't a lot that needed to be done on the BBD's tail feathers, but as my nature, I managed to find a few things to mod.

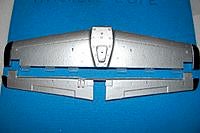
Because FMS has already taken the initiative to adequately install spars in both the elevator and two control surfaces, that mod was no longer needed.
They've also added a joiner between the two control surfaces, which most of us have been doing for a couple years now, which now eliminates the need for two control links running to the control horns.
Another kudo to FMS for these new control horns. They're much stronger, and with the correct screws included, not to mention the nice indexing, they are a breeze to install. They've even included the rubber retainer rings for the clevis as well!

During my re-hinging mod I did discover something new. Usually it's quite easy to slice thru the foam hinging, but on this occasion I found that there was some kind of gummy substance clogging up my knife? On closer inspection it appears that FMS has now added some kind of substance to the foam hinge surfaces to eliminate the proverbial dilapidation that occurs over time. Others have mentioned that FMS has recommended smearing their assembly glue over the hinging now, so I guess that might be what it is? In my case the glue, or whatever it is, was put on before the paint process, so I don't know how it would work over paint?
Having removed all the control surfaces, elevator & rudder, I proceeded...Continue Reading