argo-2's blog View Details
Posted by argo-2 | Nov 01, 2012 @ 05:34 AM | 10,413 Views
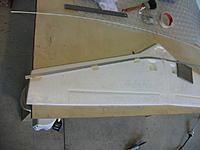
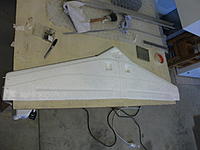
A pictorial of my recent Bat build follows:
Specs -

Bat variation: 'Superfreak'. Wing roots cut to make a straight TE (actually 15mm sweep back).
Span: 1370mm (54").
AUW: 790gms (28 Ounces).
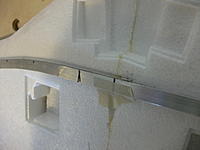
Reinforcing: 2 x 2mm fibreglass rods aft, 2 x 3mm FG rods forward, 8x0.8mm CF strip embedded into TE, Balsa TE/Hinge strips & FG tape/3M90 LE reinforcement.
Elevon material: Balsa.
Covering: Lamfilm then signwriter's vinyl (vinyl also acts as elevon hinges).
Batterys: 4 x AAA NiMH LSD 900mAH.
Added nose lead: 70gms + 70gms each side of battery pack.
Edit: Added another 62gms of lead to the beak to bring CG forward to 154mm.
Edit2: Now tuned after maiden to CG of 156mm.
Edit3: Still going back, now 159mm....Continue Reading
Posted by argo-2 | Jun 10, 2012 @ 04:23 AM | 8,559 Views
While building the Bigbird I needed something interesting to fly, enter the Durafly EDF Vampire.

Maidened today and what a great intro to EDF. Plus the EDF turbine sound very much adds to the whole experience.

As there is a bit of setup to do before flying I started a wiki (Wikia) here so everybody could add their bit (well that was the theory!).

Very much enjoying this plane!


Posted by argo-2 | Mar 10, 2012 @ 04:24 PM | 8,863 Views
Hi All

Apology to those that posted questions that I missed. There does not seem to be an easy way to see if a question has come up in an old blog-entry?

So please, if you would like a question answered - PM me as well as posting!

- Now if I could just make this entry a sticky -
Posted by argo-2 | Jan 27, 2012 @ 07:19 PM | 9,704 Views
When there is no wind, I'm using reverse-thrust landings often now when flying in my local park.

Managed to talk my son into using his new iPhone (Apple have put a nice camera in the 4S!) to vid a couple of landings. Here they are here (you can hit HD at the bottom if it doesn't come up automatically):

AXN Floater Jet landing with reverse-thrust motor - Vid#2 (1 min 4 sec)

Posted by argo-2 | Jan 27, 2012 @ 02:48 AM | 9,959 Views
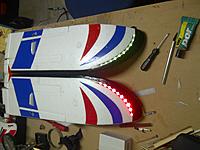
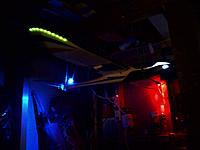
In the continuing quest to make my plane heavier I decided to add LED's for dusk flying.

I'm pretty pleased with the way it came out and went flying last night landing twice with the last landing 10 minutes before nightfall.

Certainly adds a new dimension to flying the FJ, but at least for the first few night flights does not do good things for the blood pressure

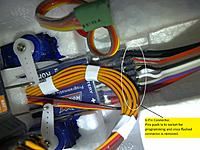
Explanation is with each photo. I ran wingtip LED wires into a slit just off the leading edge. I then changed the servo connectors to a nifty JST four-pole connector that has a latch, using one pole as the power for LEDs. Ground (negative) was commoned to the servo ground.

No vids yet, but here's photos of my LED install...
Posted by argo-2 | Dec 13, 2011 @ 02:54 AM | 12,781 Views
As can be seen from some of my Floater Jet (FJ) vids, my park flying area is just a bit challengingly short! Enter the idea of FJ reverse-thrust

I could have substituted in a RC car ESC, but that would have limited my throttle-stick throws to a half-forward & half-back, plus the BEC is pitifully low amperage. Then I found this forum: https://www.rcgroups.com/forums/show...hlight=reverse. This forum is a how-to for flashing Atmel8 AVR ESC's (TowerPro, BlueSeries/Mystery, Turnigy/HobbyWing, etc) to simonk's code. Its original intent was for Quadcopters ESC's as the new firmware (code) makes the ESC much smoother and responsive. Nek started the thread with simonk being the master-mind behind the code which was originally conceived and implemented by quax.

After much help I have succeeded in flashing a BlueSeries 12Amp which I pressed into service as a concept testbed. A vid of my testing is below and I have a nice new BlueSeries 30Amp ESC on its way to flash and try in my Floater Jet. Crazy times ahead!

I have programmed the ESC and 9X TX such that full-down throttle-stick is off/braked, with full-up full normal thrust (so perfectly normal so far). With the new ESC code, by adding in some throttle negative mix, via the three-position ID switch, the motor now runs backwards.

Here's a vid to show the idea. By the way the bandaid (we call them plasters) on my finger is not prop damage - its a burn from cooking a dinner. Bloody dangerous those kitchens and should...Continue Reading
Posted by argo-2 | Oct 04, 2011 @ 05:23 AM | 20,095 Views
If like me you upgraded from a HKT6A TX to the 9X you may want to give the 'ol T6A a new lease of life as a Trainer-box.

Here's how:
  • Open up the T6A, remove back cover and drill a jack-plug hole. Mount a phono jack-plug (if you want to remove RF during Trainer-Box mode, you will need the phono-jack to have a push-to-break switch incorporated).
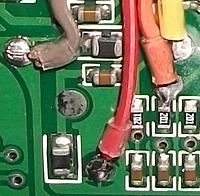
  • Run the jack-plug shaft connection to the ground of your T6A PCB (in the photo its the yellow wire). I soldered a wire onto the S-Video programming port's GND pin on the main PCB connector.
  • Run the jack-plug tip connection to the PPM pin of your T6A PCB (in the photo its the blue wire). I soldered a wire onto the S-Video programming port's PPM pin on the PCB connector.
  • Cut the RED wire that supplies the RF PCB with a GND connection. Connect the GND from the RF PCB (wire that you just cut), to the push-to-break switch on the phono-jack (green wire in the photos). Connect the other end of the push-to-break switch to the GND connection of the phono-jack shaft connection you made above.
See the attached schematics. What we are doing is using the T6A programming port PPM signal to feed to the Trainer-input of our 9X via a mono-cable (or stereo cable). It is 'isolated' from the PPM output of the T6A IC via R36 (4k2).

To shut off the RF when either using the T6a as a Trainer-box or as Simulator-Box we use the make-to-break switch integrated into the phono-jack. Normally this connects the RF PCB to GND. When a phono-plug is plugged in,...Continue Reading
Posted by argo-2 | Sep 20, 2011 @ 04:19 AM | 17,648 Views
This blog entry will be an illustration of my experiences modifying a LeadersHobby.com Fly Sky FS-THX9X Transmitter https://www.leaderhobby.com/product....=9394001220239.


This Transmitter is also available as the HobbyKing.com Turnigy 9X.
https://www.hobbyking.com/hobbyking/s...z_Turnigy.html


The mod's carried out are:

a) Install a port in the TX to allow an AVR Programmer to connect directly with the Atmel Microprocessor (uP)

b) Flash the TX's uP to an opensource operating system, either:
ER9X: http://code.google.com/p/er9x/
or
G'9X http://code.google.com/p/gruvin9x/

c) Install a HobbyKing LED backlight
https://www.hobbyking.com/hobbyking/s...dProduct=16720

d) Install a HobbyKing LiFe TX Battery
https://www.hobbyking.com/hobbyking/s...dProduct=17955

e) Install HobbyKing TurboThumbs gimbal control knobs
https://www.hobbyking.com/hobbyking/s...dProduct=15238

NOTE: If you came here looking for a way to flash your TX and this looks all to hard Then have a look here: http://www.smartieparts.com/shop/ind...roducts_id=331
No cutting and no soldering (if you have a V2 TX)! And very little friggin around with soldering irons etc.
Just wanted to let you know - its all part of the service


So now a Q&A around "why" (do this).
Here's a list I sent to my mate Aero Andy:

Q: Why the 9X TX?
A: For USD40 (LeaderHobby) it's a bloody good TX. Its just the operating software (OS) is not so good.

Q: Why new Firmware (FW - the operating system code - like Windows/Linux/...Continue Reading