springer's blog View Details
Posted by springer | Mar 09, 2023 @ 05:12 PM | 7,472 Views
In the ongoing discussion about using a switch to turn a mix on and off, i finally got my hands on a stock i6 that i could play with. While i don't think there is a way to turn a mix on/off with switch in the mix, i was able to change the mix by using the extra channels in a mix. In the example below, i assigned ch6 to swD in the extra channels page. Then in the mix page, set up a mix with ch6 as master and ch1 as slave. Then i set up a second mix with ch1 as master and ch4 as slave. So, when sw D is flipped down (toward me) ch6 goes from -100 to + 100. And the second mix is changed depending on the offset and the plus and minus mix values in the first mix. So one will have to play with those parameters in each mix to get the desired result. Since i don't know what end result is wanted, i left it at that.
Posted by springer | Feb 17, 2023 @ 09:56 PM | 7,056 Views
I figured out how to assign mixes to switches a while back, then upgraded my i6 to ERFly6 firmware. With the new firmware, it is easy, while I recall it was somewhat less so with the stock firmware and Flyplus, which I had upgraded to between original and current. I am showing the screen shots I took back then for reference to any guys who want to do this with a stock i6 or with Flyplus firmware.

In the case of the screen shots below, I wanted to have a trim adjustment for the elevator of my glider to have a power/climb setting (neutral), a normal soaring setting (something like 10%) and a light air setting (like +20%). So, if swC is up (as all must be at power up) I'm in climb position. For normal air when I cut motor, I switch to center position. For really light air, no wind good lift, I switch to down position. I found that the actual numbers on the mix and offsets have to be adjusted real time to watch and isure the elevator moves to the position I wanted. A bit fiddly, but I didn't find it too tough, actually seeing the real response seemed easier than inputting percent numbers and then checking.

So, just in case the text doesn't show, the first pic is the Aux channel screen. The column on right is where stuff is assigned, and one can select a switch, an internal telemetry item, or an external sensor if installed. The second screen is the display screen, and shows the ch6 if swC is center (0), third screen is down (-100), and fourth is up (+100). The last screen is the mix screen. It shows ch6 as master and ch2 as slave. You can see the various entries I had to find to get the elevator to go up 10% and 20%. In this case, the up mix moves the up position to neutral, offsetting the offset Then the center position is the "neutral" (10% up), while the down mix adjusts to the 20% up. It may sound wierd, but if you just plug the plane in and try it, it is pretty easy to see what needs to happen.
Posted by springer | Apr 08, 2018 @ 08:32 PM | 46,853 Views
The last year has been an "interesting" one, with kids family issues, health issues for wife, Model Plane Foam issues, etc, etc. So I have been building, but not posting any build threads (slacker!). I though it would be interesting and useful to document some of the planes of the year in pictures. Maybe it'll get me starting some build threads - I took pics as I went for most of these.

Hmm, guess I've been sort of busy anyway!
Posted by springer | Dec 09, 2016 @ 06:15 PM | 52,433 Views
I have been seeing guys do some astounding stuff with MPF (and Readiboard at FliteFest!) in larger size planes, so figured it was time to try one myself. In the best scratchbuilder tradition, I started with two sheets of MPF and cut diagonals that gave me what should have been an 8 foot wing. However I incorrectly set the angle of the tips (not parallel to the centerline) and once I sorted that our had a 7 ft span. I TLARed a symmetrical airfoil and did offsets to get the ribs in a constant taper across the half span. Decided to do something different from my usual solid wood spar and build up one. Used Quarter inch square section Pine, poplar or bass ( don't remember which) for top and bottom, tying the ribs to them at "appropriate locations". Then in a fit of creative passion, I decided to make shear walls for the spar out of some cardboard from packing of something. It is like a tablet back, about 1/16" thick. Glued pieces to each side of spar with gorilla glue. This made an amazingly stiff spar, and Probably makes the plane. Wrapped the MPF over the ribs as a skin, and cut out the pocket for motor/prop. Made pocket for battery in nose, Added a leading edge spar and shaped to the airfoil LE. It came together amazingly well, considering no plans of any type. Of course doing a simple wing helps! Build thread here: https://www.rcgroups.com/forums/show...g-MPF-and-wood
7FW android (1 min 43 sec)

Posted by springer | Sep 10, 2016 @ 11:35 AM | 54,180 Views
Guess it is time to come clean and let folks know that we are modelplanefoam.com!

If you aren't familiar with it, here's the link to the thread: https://www.rcgroups.com/forums/show...del+plane+foam
Posted by springer | Jun 03, 2016 @ 08:13 AM | 53,939 Views
Time for our annual sabbatical and pilgrimage to Daytona Beach. This year I only brought two planes, both BluBabys. The weather has been about as nice as it's ever been, winds nearly calm in morning, bright sun most all day, few storms blowing through. I have flown a couple packs off the deserted beach every morning. It's the perfect time, as only a few walkers spread out well, winds low, temps low, and beach smoothed by night out going tides. Here's a video of the 42" BB floating around. Videography by my bride, who gets a bit distracted by our granddaughter, but still gets good video!

Daytona 2016 (2 min 1 sec)

Posted by springer | May 27, 2015 @ 09:19 PM | 57,415 Views
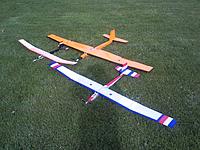
Well, it's now officially Spring (at least I hope so....) and thoughts turn to soaring. Just finished the MPF size of the OSG this last week and spent some quality time in thermals as well as learning how to fly the thing. I added ailerons to the center section of wing. was a bit concerned that they would be ineffective, but pleased that they work "just fine". I'm sure they would be more effective outboard, but for a sport glider, provide plenty of control to roll. I can navigate around the sky well with just ailerons and elevator, although there have been a few instances when adding in some rudder "finished" the turns. The wing has enough dihedral that I can also fly it RET. Gonna be a fun summer!
Posted by springer | Apr 09, 2015 @ 01:44 PM | 58,449 Views
Now that the indoor season is nearly over, I finally came up with the right setup to get a slow floaty indoor plane in a small size. I previously made the half sheet Aeronca Chief (OSA-hs), and flew it with a 10 gm motor, regular 3ch HK rx, and 3.7gm servos. using a 180mah 2s pack for juice. That setup is a "spritely flyer" and fun out side and in the larger venue of USA soccer arena, but a bit too fast to comfortably fly around our church gym. I was tempted to try a brick, but that would mean I would have to start getting Spektrum gear or a new module for my 9x for one plane. Then i saw that Banggood had a brick like RX , motor and motor gearbox/base from one of their little planes available as spares. The RX binds with the hobby king protcol 9x uses. I popped for a set:
http://www.banggood.com/WLtoys-F929-...-p-930768.html $9.99
http://www.banggood.com/WLtoys-F929-...-p-947009.html $1.98
http://www.banggood.com/WLtoys-F929-...-p-930767.html $4.29

Tiny parts to work with, but got them mounted. Still working out the best mounting for the motor/gearbox, but have it hot glued to the foam. It binds to my Tgy 9x ok, although it appears to not have the memory to keep the bind info once turned off, so must be rebound each time it's turned on. A minor hassle. I don't have any of the little 150mah 1s lipos at moment, so found a female micro jst connector in the junk drawer, and made a cable to connect a regular red JST connector and use a 600mah 1s lipo. Exceedingly long flight times!

This litle guy flys a treat! I dumbed down the tx to around 40% expo and 40% low rates (after flying a wild out of control maiden!) and she putters round at quarter throttle at what looks like little more than a walking pace. Perfect for motoring around the gym! Have to get some more for next indoor season!
Posted by springer | Mar 08, 2015 @ 08:44 PM | 58,837 Views
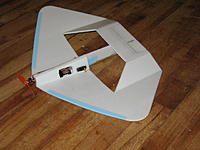
I flew the maiden flight of this indoor plane last wed at our church gym. It was copied of a picture that Rusty Mustard linked to. It's a kit called a manta ray, but looked like an easy scratch build from the pic, so I guessed at dimensions and built my own. It was a surprisingly good flyer, I had to play with rates, as the rudder (hidden under the elevator is small. But on high rates and with a more forward CG, she turned well and flew slowly. The only thing I think I need to do is reinforce the vertical piece that runs behind the "fuse" to keep the H stab in it's elevated location. it cracked at the joint to the fuse at bottom. Perhaps a skewer, CF rod or piece of the strapping along the bottom edge.
Posted by springer | Dec 11, 2014 @ 11:30 PM | 60,731 Views
I finally couldn't resist following antigravity's lead with an upscaled OSG. Didn't go quite as far as he (yet) but stopped at 8 foot span. I had sketchup-ed a plan for the large bird a while ago, and decided to build it from MPF (instead of the 4x8 board originally planned). It worked out pretty well, after I realized that I had not kept the proportions and the fuse was about 15" too short, which made her awfully pitch sensitive. Lengthened fuse and added ailerons and flaps and she's now quite the nice soarer. I have only had her out a few times, but she sure looks majestic against the sky. Not too fast with a TP 2410-08 motor and 10x8 folder on 3s 1800mah pack. She climbs leisurely but surely. floats on thermals well, and at that size I can get her way out to find them!

8ft span glider (5 min 54 sec)

Posted by springer | Nov 10, 2014 @ 11:31 PM | 59,900 Views
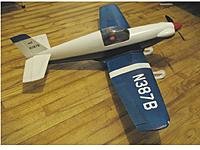
finally got around to painting the #17. I had a red solo cup shrunk cowl i made for an Ercoupe that never quite worked laying around, and found it fits the Cessna perfectly, so she just had to be red! I even found a full size in a similar color. Not original, I'm sure, but cool none the less! Still needs her N number which will be N335C (35.5" span). Now I need to get her out and fly to see if I messed up the CG with all that Polycrylic, coffee filters and paint. I was pleasantly surprised that the paint only added .3oz.

12/11/14 update: finally got the N number on her along with some trimlines. I think I'll quit.....
Posted by springer | Mar 30, 2014 @ 05:05 PM | 63,678 Views
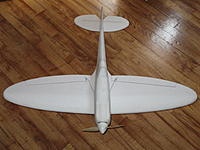
finished up the build log on this one today, 3-30-14. She's gonna be a fave flyer, I think if I can get some decent landing gear on her. She already while still "in-white" is a great flyer with four channels and a 3s pack. looks and feels like a warbird. It's time for some decoration. I'm covering her with the coffee filters and Polycrylic for paintability and dent resistance, when that's done, I will have to decide between the grey/green WW2 camo and something else post war. hmmm.......

Here's the log:
https://www.rcgroups.com/forums/show....php?t=2136045

4-2-14 update: Well, I decided, go with the blue and OD camo from later in the war when they were escorting bombers over the channel.
Posted by springer | Feb 13, 2014 @ 08:42 PM | 64,586 Views
I first saw this plane as a stick and tissue model plan in Model Aviation. Looked cute and I liked the bent wing shape, thought it would be a nice challenge to build that wing. Of course have to try and fit it onto a single sheet of foam (MPF this time). I built the model in Sketchup, and having the templates, got them laser cut. Man, it is really nice to be working with straight lines and smooth curves I didn't have to painfully create! Build went well, and I got her all ready to fly (made the mistake of paint first, my bad!) and had a fairly good first flight, but all subsequent ones resulted in some catastrophic failure, usually associated with tip stall or loss of orientation and subsequent spiral into ground. Very frustrating! Broke fuse in half several times, finally trashed the entire nose. Many tweaks, including changing thrust angle reducing wing incidence, adding more washout by heating and warping the wing (that was fun!). But the one single thing that made this gal work was increasing size of the horizontal tail! The original tail empennage was right off the threeview and just too small to maintain control. I added an inch to chord and 2 inches to span. Bam! now she flys just as predictable as one could ask, and I think the tail looks more "right" than when to scale. Oh, yeah, I swapped out the 40gram 1200kv motor for a 60 gram 1050 motor which really helps keep the speed up on landing.

The only thing I am still working out is getting a paint...Continue Reading
Posted by springer | Feb 13, 2014 @ 08:18 PM | 64,538 Views
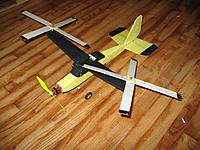
Started a thread on this one in the Scratchbuilt foamies forum, but figured it should take a place here on the blog as well. Several years ago, I downloaded the "plans" for the Mystery Tailless Bipe. they were two letter size sheets of a stick and tissue freeflight version of this somewhat wierd looking plane. Always wanted to make an rc version. Well, this cold snowy winter had got me thinking of indoor planes that will fly inside a gym, so I threw together a twenty two inch span version. Fascinating plane, I set it up with elevons, and balanced CG at 25% of the total wing area aft of Lead wing LE. The thing flys really well. Here's the thread: https://www.rcgroups.com/forums/show...hlight=mysteri

I can motor around the gym nicely, although it's not as maneuverable as all the nutballs that surround it, but fun anyway. The 5gm motor isn't exactly a powerhouse, but it gets it flying ok for a 5 minute flight.

Here's the vimeo vid:
Mystery Tailless Bipe recreated in 22" span Model Plane Foam (1 min 33 sec)

Posted by springer | Nov 25, 2013 @ 04:40 PM | 62,725 Views
Winter is here in SEMI with a vengeance! So time to get all the indoor flying things out again. I flew the OSR at our church gym and managed with careful throttle use to run a pack through her, but kept feeling that a bit less weight would help slower flight. So a couple days in the hanger produced that: OSR Lite! Haven't flown her yet, but hope to tomorrow. Here's what she came out like:

more info on last page of build thread: https://www.rcgroups.com/forums/show...1565081&page=2
Posted by springer | Oct 27, 2013 @ 02:17 PM | 62,816 Views
Been getting planes ready for the Horizon indoorfest, and discovered that several of my onesheeters were in need of work, so did some updating:

Also, the latest onesheeter type plane is the QSW Quarter sheet wing. (four fit on a single MPF sheet). Did a prototype that flew well, so decided to tweak the design a bit to get a nicer canopy and still fit the qtr sheet. build thread here: https://www.rcgroups.com/forums/show....php?t=2007587

OSB, OSM both got fixes but no cosmetic improvements.
Posted by springer | Jun 23, 2013 @ 08:59 AM | 64,158 Views
This one, the QuickSilver, seems to be "the plane that wouldn't die", or perhaps it's a problem with me that i won't "retire" them. After a recent flight of this venerable bird (Mar 2010!) I noticed a crack in the fuse that upon inspection was a crack nearly through the full cross section! To repair or replace? Aw what the heck, lets repair and refurb! Peeled off the coffee filters, glued up the cracks and reinforced a bit more in the battery access opening. Filled some dents with lightweight spackle. Recovered most of center fuse with fresh wbpu/filters. Fill, sand, repaint. Looks good, but something's missing. Say, i never gave her her ID number! Thanks to a friend with a crikit,she now has her official N number and name emblazoned on fuse.

I also tried a GWS 9050 3 blade prop, and she flys as nice as she looks.
Posted by springer | Jan 10, 2013 @ 09:45 PM | 67,023 Views
Today was a beautifull day to fly in South East Michigan. Winds under 4mph, temps above freezing and mostly clear sky - what could be better?

So had to take the Edge out for another photo shoot, remembering this time to set the cam at correct angle to actuallyl follow the plane, and to push the start button at the correct time.

Got three nice vids, this was the second one, mid pack. Some "tiny spot in the sky" parts but mostly you can see what the plane is doing.

OSE 1-10-13 (3 min 45 sec)