Jack Crossfire's blog View Details
Archive for November, 2006
Posted by Jack Crossfire | Nov 23, 2006 @ 10:28 PM | 9,351 Views
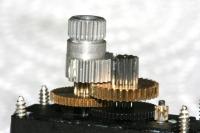
So both tail rotor front gears failed. Time to get new ones: 8 days. No more flying until December.

Made a list of parts most likely to break and ordered those, so hopefully we should get through December without any more bleeding. November flying cost: $228 November flight hours: 16

C U in December.
Posted by Jack Crossfire | Nov 23, 2006 @ 05:22 AM | 9,683 Views
3300mAh
6 min of landing platform operations with camera, LEDs
5mph wind
2A charge * 44 min / 6 min = 15A

4000mAh
24 min with LEDs only, voluntary cutoff
5mph wind
2A charge * 112min / 24 min = 10A

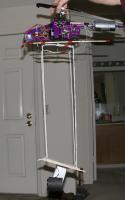
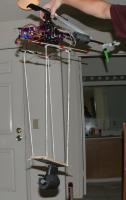
1 day crash free. The skid platform proved itself once again as Jack Crossfire guided a pylon mounted camera to its first and only landing of the day. The winds were kicking up for this landing. The temporary pylon with camera was swinging like crazy. The temporary platform was also swinging around. Unlike the cable suspended camera, the swinging was only sideways and controllable.

Took 5 minutes of attempts to bring it back down with the sideways oscillation. There was no arresting wire like previous platforms so one time Jack Crossfire flew right through the platform and had to come around again. Another attempt tipped over the platform and it had to be kicked back up while maintaining a hover. The camera's LCD got caught by the skid platform. Need to make sure nothing is sticking out the sides of the pylon. The final landing required backing up onto the platform after overshooting.

Seemed to take less power than previous camera platforms. Started having delusions about flying The Canon. We've definitely seen the skid platform and pylon mount have what it takes. A lot of it has to do with flying technique. Experience with rapid ascents and emergency descents has made us more comfortable with high power levels.
Posted by Jack Crossfire | Nov 22, 2006 @ 05:01 AM | 10,412 Views
11/20 flights:
3300mAh
25 min

4000mAh
landing operations

11/21 flights:
4000mAh
10min landing operations

3300mAh
25 min

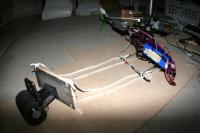
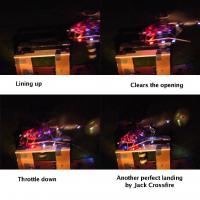
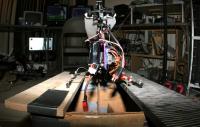
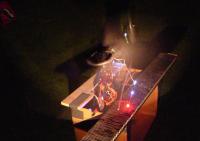
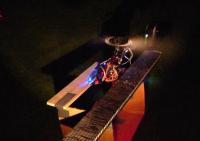
Was very successful with landing platform #5. Instead of weight optimization, the goal was to simulate a future payload manifest. The future manifest calls for mounting a camera on a rigid pylon and it requires the skid platform concept. This was the most successful test flight so far.

Took a very long time to line up and it was very precarious but 6 out of 6 landings succeeded. Takeoff 1 ended in a crash because the antenna was rattling against the payload.

Time to raise the landing platform out of ground effect and taper the opening. A weight-optimized system could work if the landing platform was on a crane, tracked the skids robotically, and grabbed them with some kind of claws.

For battery budgeting, the landing times were:

73sec
111sec
63sec
66sec
44sec
75sec

If you can't land within your battery budget, prepare 2 get immigrated and naturalized by U. Know. Who-ica.

The current draw for this payload was:
2A * 60min / 10min = 12A

It seemed to take almost as much as the camera table.

Finally, we have some space shuttle simulations. These showed how our copter could lift off vertically and land horizontally just like a space shuttle, but unlike a space shuttle we can hover over a single spot like a UFO.

Also tested emergency descents. Seems emergency descents are not possible from far away because...Continue Reading
Posted by Jack Crossfire | Nov 21, 2006 @ 02:34 AM | 9,954 Views
Today's test flight used landing platform #4. This time it was another simulated payload on the skid platforms but with one end open. Jack Crossfire would take off vertically and land like an airplane. Landed successfully 4 out of 5 times with this setup.

Two wires provided to help line up the approach were worthless. Landing was only possible by lining up with the opening, pushing forward, and cutting throttle when over the skid platforms. Failure to cut throttle in time resulted in one crash.

Stresses on the payload were too high to use this for camera mounting. The narrow opening allowed landing in any orientation without trapping the skids but made the lineup harder. It sure made for some spectacular flying.

Total flight time: 16 minutes.
Posted by Jack Crossfire | Nov 20, 2006 @ 03:27 AM | 9,630 Views
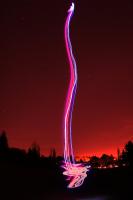
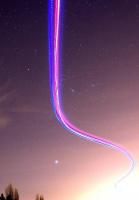
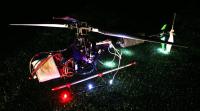
One last release from 11/20 involved stacking all 32 night flying exposures into one tapestry of R, W, B nihilism.
32 * 30 sec exposures
ISO 400, F2.8 Linear gradient applied to reveal more of the horizon.

So the goal today was increasing payload by decreasing landing gear, an experience which proved Jack Crossfire's mastery of test flying. For test flying, we are fortunate to live 0.15 miles from a flying field and from there to have 1/2" tall grass, 1" tall grass, and 2' tall grass within 200' of each other. Too bad it's only open at night.

The principle with these test flights was to hang a payload between the skids and thread it down the middle of an elevated landing platform. This required a vertical landing with minimal horizontal movement.

Test Flight #1:

9 minutes
no wind

Tried stock skids on elevated platform with no payload. Successful takeoff but couldn't land on the platform. Not enough margin to align the skids and too much horizontal movement to thread a payload. Skids kept jamming under the platform.

Test Flight #2:

11 minutes
5mph wind

Outriggers attached to skids on elevated platform with wider spacing. Much bigger margins. Landed successfully but with too much horizontal movement to thread a payload. Skids still jamming under the platform.

Test Flight #3:

12 minutes
no wind

Stock skids again but with simulated payload. The payload would theoretically lock to the platform first and keep us...Continue Reading
Posted by Jack Crossfire | Nov 19, 2006 @ 06:08 AM | 9,651 Views
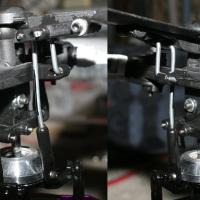
Was suprised 2 find after flight #2 yesterday that a complete bell/hiller rod assembly was missing. 2 are required for flight, but somehow it ejected
one and still flew. Probably failed because we tracked the blades without pliers. Could have stressed the ball joint.

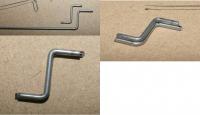
Instead of waiting 7 days for a new assembly from Indiana, fabricated one out of a 2-56 rod. Not very clean bends but good enough. Recommend avoid beheading by not doing this and only using official parts in your 1700rpm rotor.

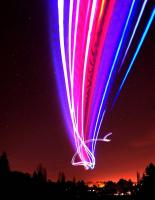
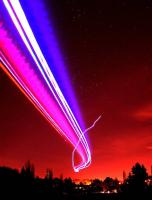
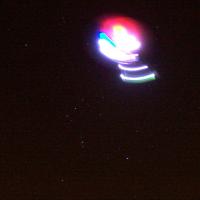
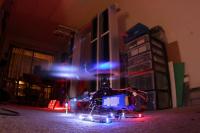
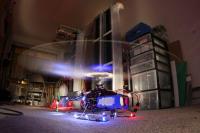
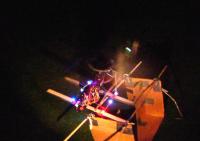
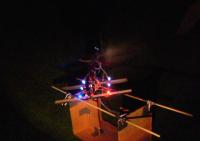
Did some 30 sec exposures of Orion with copter, resulting in some of the strangest combinations of red, white, and blue since 1776. Unfortunately to get the sky to look normal on the Canon, had to shift the reds slightly purple.

Got best results from low altitude passes, but doing nose-out passes required hovering behind the camera until shutter opening. Couldn't
hear the shutter because of the copter noise and couldn't see the hard drive LED coming on. Hovering downrange for nose-in passes had its own problems regarding pointing the nose in....Continue Reading
Posted by Jack Crossfire | Nov 18, 2006 @ 09:26 PM | 9,511 Views
To scare away kids who would otherwise chase after the flying machete, meet the Pelosicopter. The Pelosicopter is powered by Lincoln Polymer, the least efficient battery ever. Guaranteed to terrify the heartiest ground beef mannabe.

Still can't figure out what happened last night. Being in a larger space, managed some fast sideways flight and proved the tail rotor at this rotor speed doesn't have enough power to overcome weather vaning. Probably can't overcome upper level winds either.

27min in daylight
no LEDs
5mph wind
15 min with Lincoln Polymer
50A current draw. 43A spent on social security. 7A spent on motor.

33min in daylight
17min with LEDs
no wind
Posted by Jack Crossfire | Nov 18, 2006 @ 06:12 AM | 9,651 Views
Got another 2 flights without any wind. The first flight with the
camera table and no wind still had more roll oscillation than the 4
legged monster but was also lighter. Downwash in the camera's current
position was considerable so couldn't get any RPM values.

Reached the highest altitude so far with a camera, but need outriggers
and daylight to go any higher. Outriggers for insane altitude are the
next frontier.

Having 30 minutes of clear skies, decided to try for some high altitude
shots of the copter in front of Orion. Ended up very high and started
experiencing sudden clockwise yaw. Turned nose-in and hit forward
cyclic but somehow ended up heading downrange fast. Got too far away to
resolve red & blue.

It looked like red was on the right and blue was on the left but forward
cyclic wasn't making it come back. Rotated sideways. Banked left.
Banked right. Forward cyclic. Aft cyclic. Was red on the left or the
right? Rapidly heading for the $40,000,000 houses and the Porsche
Cheyannes. Had to descend. Seemed to descend faster and faster. More
power but still falling. Red was definitely on the right but no cyclic
effectiveness.

BMW Z4 at 12 oclock. Kill throttle. Crack. Welcome to the U. Know.
Where.. Red, white, and blue LEDs suck. In fact, red, white, and blue
sux.

Fortunately crashed 30ft inside the golf course, missing the trees by
only 5 ft. Loudest crash ever. 1 stipped ny-tie, broken antenna strut,
still...Continue Reading
Posted by Jack Crossfire | Nov 17, 2006 @ 03:56 AM | 9,647 Views
The futaba is definitely a servo that trims the pilot instead of the other way around. Getting used to sudden, uncontrollable yaw. Since it was cloudy, didn't fly in space but did spend much more time at high altitude thanks to LED assisted orientation and no wind.

Figure 8's are getting smoother and even managed long hovers with just cyclic control, letting the tail yaw wherever it wanted.

Forgot to mention the magorator died during the 11/15 flights. The magorator is the most powerful flashlight in the world, a 40,000 candlepower halogen powered by 5 11Ah cells. It can stay on for roughly 5 hours.

Only the power of the magorator could prove night flying was possible before burning up $15 on LEDs. Sadly no-one has had the imagination to mass produce such a flashlight.

3300mAh
25min
no...Continue Reading
Posted by Jack Crossfire | Nov 16, 2006 @ 02:52 PM | 13,439 Views
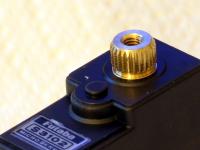
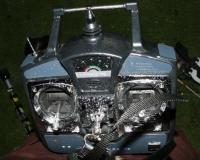
To reduce wear with the tail servo, got in the most expensive, most
durable micro servo in the world. That's right. The Futaba S3102.

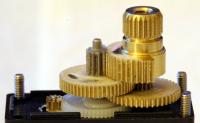
For the first time, we bring you detailed images of the inside of the
Futaba and a realistic assessment from someone whose not afraid to admit
failure in a purchase that costs more than most people make in a day.

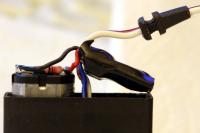
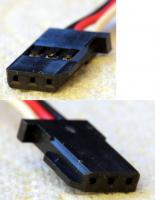
Firstly, the wire is so short you'll immediately replace the crazy
Futaba connector with a longer wire and a normal connector.

Its direction is opposite to the HS-81MG so the second thing you'll do
is reverse the transmitter direction. The third thing you'll do is
crash. The fourth thing you'll do is reverse the gyroscope.

So once trimmed, how does the Futaba do? It's absolutely horrible.
It's flat out, too slow to deal with any kind of wind. It frequently
and suddenly swings 90` left or right before the servo catches up.
Without any wind, it manages to hold a hover but you need to flog the
left stick to do any kind of turning. Sort of like driving a 57 Buick.
It turns when it wants to turn.

Still have HS-81MG's on the cyclic and what a difference. The cyclic
snaps into position while the tail tries to reform Japan. Forget about
S3102's for cyclic.

Suppose such a servo could be a good left hand excercise for pianists or
a way for Democrats to get even with Americans. Inside, its main gear
only has 180' of teeth so forget about retooling for robotics.

3300mAh
10mph wind
25 min to exhaustion

4000mAh
no wind
19 min to voluntary shutdown
Posted by Jack Crossfire | Nov 15, 2006 @ 02:50 PM | 9,664 Views
4000mAh
camera mount #6
8 minutes until voluntary shutdown
no wind

Took almost full power to get up with camera mount #6, a reversion to the 4 leg monster, but had 2 successful flights with perfect landings. This time the camera was right side up and the skids were placed directly on the balsa. The idea was to make the tightest coupling between camera and copter to try to reduce sympathetic oscillation.

Even though there wasn't any wind, the 4 legged monster seemed more stable than the camera table. The key seems to be minimizing the camera mount surface area impacted by rotor downwash in addition to maintaining a tight assembly. Unfortunately, still had considerable tail oscillation.

Got higher than last time, high enough to clearly see Chevron world headquarters and almost high enough to see Pleasanton. Without any clouds, there was no horizon to see.

Analysing camera audio of the 4 legged monster revealed a rotor speed of 1600-1700rpm during high altitude hovers. Takeoff occurred at 1600rpm. With the camera table, rotor speed was 1500-1600 in high altitude hover but the lack of calm wind made rotor speed during takeoff unknown.

The Lite Machine says if the rotor exceeds 2000rpm, rotor failure followed by Baghdad @ home follows. Very hot motor after 4 minutes of flying. 6` is probably the maximum blade pitch.

For the 4 legged monster we have the data to estimate the current draw.
8 minutes of flying including ground effect
75 minutes of 2A charging
-----------------------------
Current draw of at least 20A without ground effect.

With that out of the way, time to run out a fresh 3300mAh without the camera. Got it way up into Orion and Cepheus for some nose-in high altitude turns. Flew right between Sigma Orion and Zeta Orion, a gap so large compared to the copter they must be lightyears apart. Felt like flying a spaceship.

The RWB LED's are so effective with orientation and lighting the rotor at high altitude, the Magorator is now just a redundant safety margin.

3300mAh
25min to exhaustion
No wind
Posted by Jack Crossfire | Nov 14, 2006 @ 03:15 PM | 9,704 Views
Based on the recharge time, we have an approximate discharge rate for hauling camera, camera table, LEDs, and 4000mAh battery: 14 Amps The following discharge rates are based on flight times and rated capacity:

LEDs and 3300mAh battery: 7.9 Amps
LEDs and 4000mAh battery: 8 Amps
3300mAh battery: 7.333 Amps
4000mAh battery: 6.9 Amps

Definitely approximate due to the uneven wear on the batteries. Also there were a few 30A spikes in there.

So the video returned from our first night camera flight was useless but interesting. Looked like a lunar takeoff near the ground, with the shadow of a spaceship drifting away, and a night airline flight in the air. Complete blackness most of the time with an occasional cluster of lights and faint silhouette of the horizon, making you think there's a seriously skilled pilot flying the copter.

Camera mount #5 was nihilistic. The takeoff orientation required lifting off at normal throttle, then as soon as the cables tightened, gunning the throttle to lift the camera before losing control.

The first attempt, in high winds and drizzle, used a gradual throttle increase with aggressive corrections to keep the camera on the ground until the last inch of cable was tought. This resulted in completely tangled cables and a camera which couldn't be righted, but a perfect landing.

The second attempt involved gunning the throttle and letting the cables snap into position, in 20mph wind. This caused 18 seconds of completely...Continue Reading
Posted by Jack Crossfire | Nov 13, 2006 @ 02:41 AM | 9,633 Views
Camera mount #4 was probably the last attempt to use The Sanyo's tripod head. Made the camera table smaller and made a fillet to overcome the cockeyed lens. Making a balsa fillet to tilt the lens down was brutal.

With 5 more days of rain expected and no calm winds during the day time, tried to fly it at night just to see how stable it was. Ended up with 20mph wind at night but even with the wind it was obvious.

The Sanyo may be too heavy for The Corona to fly stable with it. The next possibilities are eliminating The Sanyo's battery and eliminating
the camera mount, but it doesn't look good for high definition from space.


After unhitching the camera table, did 24 min of flying before the rain started on the 3300mAh. The wind got calmer once the camera was off, of course.
Posted by Jack Crossfire | Nov 12, 2006 @ 04:26 AM | 9,345 Views
The answer is the brushes in the tail servo wore unevenly so the servo movement for left rudder was taking more power while the servo movement for right rudder was unaffected. Eventually the servo stalled when applying left rudder. This caused the H-bridge transistor for that direction to heat up and melt out of its soldering.

Got only 12 lousy hours out of that HS-81MG servo before burnout. Flying a machine which destroys itself to stay in the air feels a lot
like NASA. Spending $43 on metal gears for those servos was the dumbest thing since falling in love with Utahhans.

With the last HS-81MG installed got 2 nominal flights:

4000mAh
30min

3300mAh
24min
Posted by Jack Crossfire | Nov 11, 2006 @ 09:07 PM | 9,524 Views
So camera mount #3 was the simplest mount so far. A single balsa sheet with battery on one side and camera on the other. This resulted in the
most unstable flying so far. That made normal copter flying seem like balloon flying. The gyroscope was oscillating constantly. Cyclic was
all over the place. Yaw was highly decoupled from the camera mount.

That ended in another tail rotor failure. This time the camera kept going long enough to capture the death spiral. This time the set screws held but the tail servo failed. New servo: $20....Continue Reading
Posted by Jack Crossfire | Nov 11, 2006 @ 03:37 AM | 8,418 Views
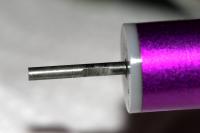
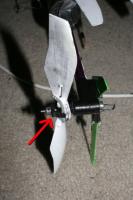
Ground a flat in the tail drive shaft. Much stiffer now, but if the tail ever jams it's going to grind up the shaft nicely. If we were Lite Machine, would swap this 1/16" shaft for a 3/32".

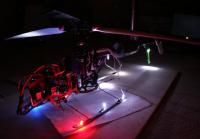
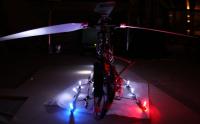
Also have some spinning rotor shots with the lighting. Contrary to the Canon's view, the blue LED seems 2 B fading. Every blue LED we've used has faded very quickly.

So 1 battery charge seems to be the psychological limit when flying every night, after which we start getting sloppy. With the 4000mAh broken in, it's giving 31 min of flying with the LEDs. Expanding the envelope of high altitude hovers, nose-in takeoffs, and nose-in controlled crashes. Starting to try nose-in
sideways operations. Nose-in without any wind is starting to feel more natural.

4000mAh
31 min of flying
No wind.
Posted by Jack Crossfire | Nov 10, 2006 @ 04:33 AM | 8,630 Views
3300mAh battery
250mA charge
25 min
5mph wind from the North
44` clear

Did more nose-in takeoffs & landings. During this charge, reproduced the tail rotor failure from Sunday and it wasn't because of foam padding jamming the tail rotor.

The tail rotor set screws tend to loosen themselves during high tail rotor loads, like lifting heavy objects, making rapid left turns, and high wind. Once loosened, increased tail rotor input causes less tail rotor output since the set screws have to push harder against the friction of the tail rotor mechanics.

The gyroscope fights the diminishing tail rotor output with more tail rotor input, which reduces the output still more.
Posted by Jack Crossfire | Nov 09, 2006 @ 02:34 PM | 8,687 Views
Replaced some white LEDs with red & blue to help orientation some more. This resulted in 2 battery charges.

4000mAh
30min
15mph wind

3300mAh
26min
20-30mph wind

The first battery was routine except for the blazing colors. The second battery was nihilistic. During nose-in takeoff operations the North wind picked up. Brought it around to point it into the wind when a Westerly gust hit it. Suddenly swung left 90`. Looked like the gyroscope entered a 90` oscillation from the wind. Then a powerful Northerly gust hit it and the next thing we saw was the nose 45` down and powering South.

Unfortunately couldn't get the orientation in time and decided instead of possibly stripping the main gear to kill the throttle. Unite with the state. 3 ny-ties stripped. Nothing broken and blade tracking still intact. Country seems softer since Tuesday. The ny-ties were still good enough to last the remainder of the charge. It landed right side up and the 3/4" foam protected the tail.

Just a matter of throttling back up and performing another nose-in
"takeoff". Winds continued blasting and had some unintended touch & goes. Attempts to take off nose-in resulted in unity between blade and state but nothing requiring human intervention. Managed to drain the battery just keeping it nose-out and into the wind.
Posted by Jack Crossfire | Nov 08, 2006 @ 02:54 PM | 7,770 Views
For the first time we have flight times with LED lighting enabled.

3300mAh: 24min

4000mAh: 30min

The conditions were drizzle and 15mph wind. Pretty horrific reduction compared to no LED lighting. The current
configuration is 10 LEDs combined with the magorator for double redundancy. Probably going to stick to this configuration since it makes high altitude flying much easier.

Also the antenna was placed in a never before used orientation. Still had a glitch.