skeeter honey's blog View Details
Posted by skeeter honey | Dec 23, 2020 @ 09:42 PM | 129,065 Views
It's been a while since I've been able to spend the time with my planes I'd like, but I have a 2 week vaycay and I'm itchin' to build.

Although I've got a LOT of planes in boxes yearning for love, I just couldn't help myself when I saw the opportunity to snag an old GWS A-4 kit from eBay for $35. Immediately I started picking out a livery from old photos and thinking about what to do for power since all the threads on this bird state that the stock motor is best used as a paperweight. I then started assembling pieces from my stash and ordering that which I lacked.

Soon the plane arrived. Still sealed in plastic! Never even opened...

Dry fit looked good, but I soon saw that this was a 2-seater and the livery I picked was for a 1 seater. After reading the old A-4 threads I realized that the normal conversion was juuuust out of my comfort/patience zone, so I devised another option. Don't know how it'll fare, but I think it could work. Bottom line, I'm filling in the back seat and trimming the canopy by a 1/3. Currently the foam is drying, but I'm really optimistic about it. Once dry and broken free I'll trim and spackle in the bubble holes before mounting and (more spackle) onto the canopy.

I also lined the intakes with fibergalass tape to smooth it out and add a little rigidity, then applying a little Navy insignia white paint like in the one I'm modeling. Like many folks I'm also going to put in a thrust tube, but can't stand foam white in the exhaust. So I painted it black since the Mylar tube I'm making will be transparent.
Posted by skeeter honey | Jul 12, 2020 @ 12:34 PM | 130,255 Views
Not too long ago I bougt a Timber off off a nice gentleman on RCG. The condition was amazing--very little in the way of cosmetic wear and everything worked properly. I flew the daylights out of it until one day I got a little too sporty.

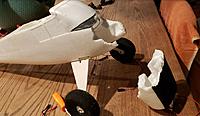
I had a crash that broke the nose off a couple weeks ago. I was betrayed by poor depth perception; I'm used to slightly smaller planes, so it was farther away than I'd realized. That extra distance was enough to hit a gable, break the nose and prop, and trap the plane on the roof as I struggled to find a way to safely get it down.

Thus began the repair and makeover. I wanted to get it in the air again and give it spiffy new livery. Lots of hot water, spackle and sanding, as well as replacing worn out gear springs and one of the brackets that hold it. Also, I broke the brittle lock mechanism and improvised with an elegant solution that works great. In the process I also added the leading edge slats so I could install port/starboard LED strips within them. It ended up looking pretty awesome and is not visible except from very specific angles, primarily aft, which is good since the stock lights are not ideal for that aspect.

This morning I re-maidened and found the flight characteristics to be VERY different with the slats. Definitely need more power and it feels like the right landing AoA is hard to achieve. Nonetheless, one of my workhorses is back in the game!...Continue Reading
Posted by skeeter honey | Jun 07, 2020 @ 11:17 AM | 128,422 Views
After a hiatus from posting blogs, I wanted to drop in a marker of my progress in video form. The intent is for this thread to be a timeline of my progression in the RC aviation world. These are posted chronologically. There will be edits, but motly additions.

Maiden crash of FlyFly F4U kit project (0 min 21 sec)


Eflite P-47 newbie enjoying quarantine (4 min 56 sec)
...Continue Reading
Posted by skeeter honey | Apr 04, 2020 @ 08:23 PM | 129,060 Views
About six months ago I bought my first kit: the GWS AT-6 (EPS version). They're still relatively abundant and inexpensive, so why not?

I've chipped away at it for all this time, often waiting for parts, usually waiting for corrections to my mistakes to dry/set/whatever. Throughout all of this I've messed around with other planes in order to figure out many of the skills I'll need to actually fly this thing. Now that I have all the pieces, to include Tx/Rx/battery/motor/ESC/etc., I've turned a corner inits completion and am nearing the maiden, which should be this month.

Why I insisted on flaps and retracts on my first build...well, it's probably because good planes with them are so relatively expensive and I wanted those features too bad to fly this thing without them. This has cost me time and money, and has led to several mistakes that have caused significant delays. Namely, using the wrong epoxy at one point, despite reading the threads on this plane that warned against it. I thought I was careful, but I wasn't. This led me to learn about Foam-Tac, which is a great product, but not as easy to use as others make it seem.

Other challenges come from my fear of the wings splitting apart, brown outs, bad soldering, or just bad flying. Alleviating these fears cause more delays.

Then the retracts themselves. I just couldn't get a set small enough to not protrude beyond the wing surface, so my solution is inelegantly permanent. A failure will be a problem to say the least.

So after no further ado, here are a few pics of the progress so far . I'm yet to paint the beige parts or any part of the wing, but I have primed everything and installed all the servos, most control fittings, and protective shields for underwing components.
Posted by skeeter honey | Mar 07, 2020 @ 09:33 PM | 133,691 Views
Nothing like RC aviation to remind us just how much of a novice we really are. After becoming comfortable with a number of cheap, beginner friendly planes, I started to build some kits. Although my success with them has been limited, it usually is because I haven't mastered tuning, or I miss the mark in planning the build in a weight/CG kind of way.

But after a string of successes, and many threads' and videos' worth of influence, I decided to see what the EDF jet thing was all about. Sure, I'm a beginner, but it isn't THAT hard, is it?

So I scoured the internet for a cheap EDF jet kit to try out, hitting the usual suspects for such things. I almost got the Value Hobby F-4 Phantom II kit, but realized I needed a more conventional wing style for my first jet. I'm not that great at programming (mixing, starting off right on rates, trim), which steered me to the Sky Angel A-6 intruder. A few clicks and a few bucks to Porcupine RC, and I was ready to dip my toes in the water.

While I waited out the dozen or so days for it to arrive from the land of COVID-19, I read everything I could about it. It didn't take long to realize that maybe I'd bitten off a bit too much for my first EDF plane. There are few videos out there, and most are crashes. Of the threads out there, I read a lot of complaints, particularly as it related to the pre-installed fan. To remedy this, I ordered an FMS 50mm EDF from Banggood along with a 1000 mAh 35c battery.

Once everything arrived, I...Continue Reading
Posted by skeeter honey | Feb 02, 2020 @ 12:39 PM | 129,722 Views
While waiting for a few more items to complete my Corsair, I ordered an AirCore Zero airframe from one of the great folks on this site and diverted my attention toward making that flyable. It's a real shame that the Power Cores were/are so hard to come by, but it does mean that there are a lot of inexpensive bodies out there.

First impressions were very good. It's a great-looking plane and the large compartment lid makes it really well-suited to permanently install servos and the like.

The first step was to figure out how to make the ailerons work. Since they're large and next to impossible to run on independent servos, I decided to go with one 9g servo, inverted above the ends of the control rods. I'd have to figure out mounting that later. Unlike the rudder and elevator control rods, these are metal., so they can be bent a bit to suit this application. I cut off the magnets at the ends of the rods, curved them slightly, and used a T-arm on the servo with adjustable pushrod connectors. Lining them up to make the ailerons line up evenly was a pain (I lightly taped the ailerons in place to do this), but when it was done it turned out pretty well. Since the bottom of the compartment is a bit narrow, I did have to carve out some foam to give the control arms clearance when actuated.

Mounting the servo was even more tricky. First, I cut out all the cross-beams and guides from the plastic skeleton in the fuse. Then, I situated the servo so that the ailerons...Continue Reading
Posted by skeeter honey | Jan 26, 2020 @ 12:28 PM | 134,326 Views
Being relative new to this hobby, I haven't really become accustomed to dropping a few hundred bucks on decent birds that I'll get to fly a couple dozen times (at best) before turning them into piles of garbage. So instead of a locked-in BNF plane for $250, I decided to spend just as much (not really) piecemeal on some kits, starting with something small and relatively easy and working up to a NIB GWS ME-262 kit I have collecting dust.

Finding cheap, decent ARFs doesn't seem as easy as it used to be, or so old threads here would have me believe, but I did find that one can get an old EPO FlyFly ARF kit on the Value Hobby site for only $20.

So why not? I ordered it and it arrived in no time. After checking the contents, it looked like everything was there.

I was immediately impressed (but what do I know) with the quality of the kit. Pieces fit together very nicely (manufacturing nubs notwithstanding), and it's much tougher than I was expecting. The only complaint right out of the gate was that the main gear is not F4U gear, but it'll do. The tail gear is very true to the original, and I have plans for that. Also, the left wingtip by the aileron was slightly bent, but I poured hot water on it and it popped right back into place without the surface distortion you get on EPS.