michaelghammer's blog View Details
Posted by michaelghammer | Jun 08, 2012 @ 02:36 AM | 7,361 Views
Hi All

The nature of the CNC Foam Cutter design dictates a raised work area. So I made a plywood box with the help of my CNC Router. The box contains the stepper driver board (cheap TB6560 type from Ebay), stepper motors powersupply (second hand from old thermo label printer) and hot wire power supply (home made). All wires exit two rather large holes and can be tucked back in when not in use. Holes also act as carrying handles.

When cutting foam fuselages you most likely need sections of different length. So you end up cutting foam blocks to the correct length, rotating, aligning and then cutting shape. A lot of time is "wasted" rotating and aligning. Not a big deal if your fuselage consists of 4 segments, but if you´re making a complex scale fuse you might have 20 segments or more...

So I made a removable 90 degree rotating top for the box. Built in plastic rollers (plastic beads from my daughters stash) reduce the friction of the top. A grid pattern of holes and matching pins help align the foam block. Works like a charm

- Michael Hammer
Posted by michaelghammer | Jun 07, 2012 @ 03:12 AM | 11,915 Views
Hi All

The version 1 CNC Foam Cutter showed me that it was possible to build a low budget machine and still make parts with acceptable precision. But the machine was a bit of an eyesore and several issues needed to be adressed in order to improve performance and ease of use. So I decided to spend some money on improvements, and basically ended up redesigning the whole machine.

List of things I wanted to improve:

Looks!!! 6.5mm birch plywood all over.
8mm threaded rods on all axis´
Ball bearing supports on all threaded rod ends
Replace flexible fuel line connectors with new solid ones
Rotate horizontal axis drawer slides
Remove half of the vertical drawer slides
Move vertical axis stepper motor closer to tower center of gravity
Make some kind of lock for wire to keep it fixed
Removable towers
Work area box for electronics with a "manual 5 axis" More on that in a future Blog entry
Faster and easier setup

This time I used my CNC to cut the parts. You could easily cut the parts (except the connectors and the nut fixture parts) with "analog" tools.

I ended up with an open box like structure for the horizontal axis with a ball bearing at the end. This time the drawer slides were mounted on the side because they are designed to work that way and hence work much better than on the version 1. Connectors were cut from bamboo plywood. I had a sample of bamboo lying around and it worked great for the connectors. Fantastic wood or maybe I should say grass...Continue Reading
Posted by michaelghammer | Jun 06, 2012 @ 01:14 AM | 9,970 Views
Hi All

After the succes with my CNC Router build I started thinking about building a 4 axis CNC Foam Cutter. The CNC Router originally started as a low budget build with small second hand stepper motors, threaded rods and rods from old printers. But I ended up buying big Nema 23 steppers, ballscrews, linear bearings and Gecko 540 stepper driver etc. I don´t regret spending a lot of money on the CNC Router. It works great and will last for the rest of my life. BUT the idea of making a CNC machine with free second hand parts was still there. So I decided to build a quick and dirty Proff of Concept CNC Foam Cutter " without spending a single $ (well "kroner" in my case, as I live in Denmark).

Parts list:
4 Nema 23 steppers salvaged from old thermo label printers.
8 drawer slides. Surplus from server racks
2 8mm threaded rods + nuts
2 6mm threaded rods + nuts
Flexible fuel line as connectors
Wood. Planks and plywood I had lying around.
Screws for wood

The whole thing came together rather quickly as the photos reveal. I opted to mount the vertical axis stepper motor at the bottom of the axis in order to avoid having too much weight at the top of the tower and risking toppling over. The wire was mounted in a bow and rested in a groove as shown in the photo.

In spite of the crude design I was pleasantly surprised by how well the machine performed and the precision of the cuts. Of course the threaded rods with the ends flapping freely didn´t make things move fast - on the contrary But a Foam Cutter should only use cut feeds of 100 - 200mm/min. So all in all the machine cost me nothing and cuts with sufficient precision.

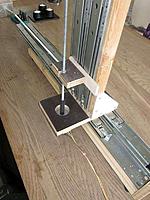
More to follow on my version 2 of the CNC Foam Cutter

- Michael Hammer
Posted by michaelghammer | Jun 04, 2012 @ 04:03 AM | 7,764 Views
Hi all

I just wanted to show you what happend to my Mig-9 model which I initially built for the Scale Build Off II. The original build thread can be found here

The model never really flew as planned. Bad duct design made it underpowered and on top of that the fuselage wasn´t built completely straight. So the model was quickly put aside and forgotten... Well not entirely forgotten. This winter I decided to repair the damages (built new depron wings) and finished the model as a static decorations for my sons room.

The silver paint (spray can) almost killed the model one more time!!! Even though the plane had been prepared with several coats of primer, the silver paint cracked like dried mud as soon as it started to dry!!! And at the wings the silver paint attacked the depron foam even though I had secured it with several coats of WPU and primer. It was VERY frustrating to watch the silver paint wreck havoc on the plane...

I almost threw the model in the bin, but decided to wait for the paint to dry and then check the damage. With a bit of sanding and another coat of paint things started to look better, but still a long way from what I had hoped for. But my wife convinced me that no one would care, especially not my 3 year old son. So I added canopy framing, some red trim color and some markings.

In the end it turned out better than I had feared. The plane is connected to a door which makes it change flight altitude depending on the position of the door. So the Mig-9 flies a little bit every time someone enters the room through that door.

Personally I enjoy looking at the lines of the Mig-9 and plan on making a bigger version with my new CNC Foam cutter and DevFusFoam + Profili 2 Pro software. I just need a house and a workshop. But that´s a completely different build project...

Cheers

- Michael Hammer