Gedexas's blog View Details
Posted by Gedexas | May 28, 2012 @ 01:10 PM | 6,353 Views
I will start this build with the radio gear, simply because I have to center the servos before they go in the frame.

First some soldering, my ESC needs a Deans plug. I'm using Exceed-RC proton 30A (looks to be one of many HobbyWing clones) and it comes with some variation of banana plugs (Pic #1). Last time I ordered a similar ESC it came with 12awg battery wires, for some reason this time I'm seeing a 16awg wires on this one, hopefully they will not melt when I fly. It has been a while since I soldered wires that thin to a ESC, this time I have the pleasure of keeping my fingerprints intact. This is also a good time to solder the BEC wires if you plan to use a BEC.

After soldering is done, I keep my fingers crossed and plug in the ESC to a Turnigy programming card, hopefully I'm right about this ESC being a HobbyWing clone and the card will not burn. Without any further suspense I can say that the card worked perfectly. Set the brake to off, very soft start, and a high LiPo cutoff voltage. Be aware that this ESC gets quite hot, so that external BEC might be a good idea after all.

For this Heli I use a DX6i, but everything I do applies to any other radio that is compatible with helis, of course the menus will not be the same, but you have a user's manual for that.

Now I can plug the receiver and center the servos. Firstly I create a new model in my radio, then change model type to heli, bind to the receiver, then plug all of the servos into the rudder channel,...Continue Reading
Posted by Gedexas | Jan 03, 2012 @ 07:55 PM | 8,578 Views
I already have one of these and I like it so much that I decided to get another one.

Two things that need attention right away are belt tension and swash leveling. The belt was so tight on this one - the rollers were spread apart and angled. It is a matter of time before the belt rolls off of them and I pirouette to the ground.

Adjusting the belt on this heli requires the removal of the fuselage, I'm also planning to use the DX6i with it, so I will be taking the whole thing apart.

The fuselage is held on by the front skid mount, two canopy grommets and the tail box. First I removed the tail and carefully pushed the belt inside the tube - crimping the belt will probably weaken the threads in it.

Then I loosened the front skid mounts and pulled the front portion of the fuselage apart.

The canopy standoffs are two pieces threaded together, a 1.5mm hex takes care of that.

Next thing to go is the head assembly, removing it will make the rest of the process much simpler. All you do to take the head off is pop the servo-swash links, unscrew the antirotation pin and remove the jesus bolt.

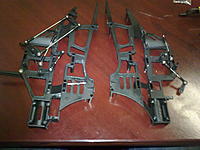
Next, loosen the screws holding servos, remove servos, loosen screws holding the frame halves together, remove main gear with one way bearing (don't forget to lube it when reassembling), and split the frame. Don't bend the belt at any acute angles.

When I took my first HBK4 apart, I noticed that the belt rollers don't line up with the main belt pulley, as I mentioned above,...Continue Reading
Posted by Gedexas | Dec 10, 2011 @ 06:52 PM | 8,043 Views
Finally, the parts I ordered last week showed up.

I started with taking the frame apart, this was pretty easy. Previously I had glued the bearings to the main shaft, so that was a bit of a PITA, but nothing a little flame won't fix.

One major problem preventing me from flying right now: E-Sky redesigned the canopy mounts so they hold the swash anti-rotation bracket in place. I will also need to drill/poke new holes in the old canopy, since I'm cheap and I like the look of the old canopy better. Good thing it's winter.

The part I forgot to order: Part No: 002802 - Esky Canopy Shoring

I have done a test hover with the new setup, in my (very subjective) opinion it flies much better. Cyclic response shows the most improvement, while collective is only marginally better.
Posted by Gedexas | Dec 03, 2011 @ 04:55 PM | 7,382 Views
I have noticed that my Belt CP V2 does not fly as well as my Honey Bee King4. The problem is with cyclic inputs being delayed and inaccurate, I decided it's the CP V2's linkage system that's the problem. I tried adjusting it as best as I can and taking out the slop, but it does not seem to be as good as I would like it.

The Belt CPX has a direct-to-swash CCPM system, and after doing some research, I have compiled a shopping list to "upgrade" the CPv2 to CPX. This is what I bought:

1.Part No: 002810 - Esky Anti-washout Set Of Swashplate.
2.Part No: 002805 - Esky Servo Pushrod Set Part No: 002805 - Esky.
Servo Pushrod Set.
3.Part No: 002804 - Esky Main Frame Set.
4.Part No: 002803 - Esky Pushrod Set.
5.Part No: 002801 - Esky Main Rotor Head Set.
6.(This is extra, it's not a part of the standard CPX package) Xtreme Fiber Blade for Belt CP V2 (Blue).

I'm not sure if this is all I need, so when the parts come in, I'll post a build/upgrade with the adventures/problems I encounter.
Posted by Gedexas | Nov 27, 2011 @ 04:55 PM | 7,808 Views
Both, the Belt CP v2 and the HBK4 have the exact same main rotor heads, so this will be short.

For this you will need two M5.5 sockets, a set of Allen drivers (1.5, 2.0, 2.5 & 3.0 mm). Some paper towels, spindle grease and a few other bits.


These are the offending dampers, I'll order harder ones next, but these should hold another 40 flights or so.


After removing blades, disconnect blade grip links, then unbolt and carefully remove the feathering shaft, don't spill the pieces all over the place. The parts in the picture below are placed in the order they are mounted. Before putting it all back, clean the old grease and slap on some new stuff. The inner thrust bearing halves fit less snugly on the feathering shaft, the bearing races go cupped side in.

...Continue Reading