Posted by RCMC |
Jun 23, 2018 @ 06:35 PM | 9,054 Views
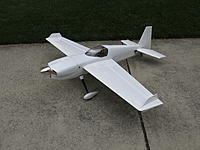
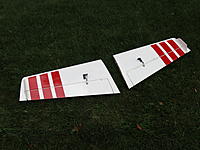
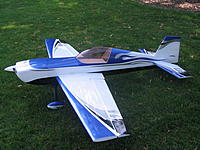
This plane is the 3D Hobby Shop 75" Edge 540. I'm partial to white planes so I took the orange color scheme and stripped the covering off right out of the box and recovered it in UltraCote White.
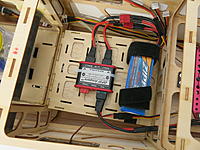
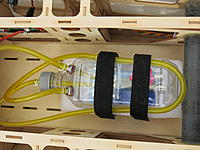
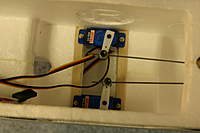
The plane has a new DLE-35RA motor and Hitec 7954 servos all around. The elevator and rudder servos are equipped with SWB arms. It has a Tech Aero cutoff switch and an Emcotec switch from Esprit Model in Florida. It also has a Xoar 21x8 prop inside a Tru-Turn 3.5" Spinner.
The motor cowling and canopy were painted in a local auto body shop and the paint looks like a car finish.
This plane has not been flown as of June 23, 2018
This plane was sold on May 18, 2022
Posted by RCMC |
Jul 07, 2017 @ 12:44 PM | 15,455 Views
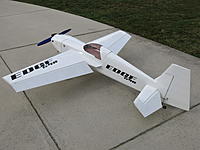
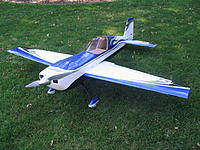
I got this plane a while back and it turned out to be a real "head turner." The Edge is equipped with a DA-70 Twin and MKS-777 servos all around.
The plane is new in every respect and has been flown twice to check the CG. It is for sale to a serious flyer.
Note:Sold September 15, 2018
Posted by RCMC |
Oct 20, 2011 @ 08:50 PM | 19,312 Views
My last complete restore project was this 68" Velox by 3D Hobby Shop for Noll (Horton) Smith. It crashed a few months ago and with the opening of the new 3D Hobby Shop in Pennsylvania Noll was pretty tied up and couldn't find a whole lot of time for plane repairs. It was my pleasure to get the parts I needed and restore the Velox. I hope it flies well.
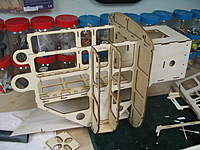
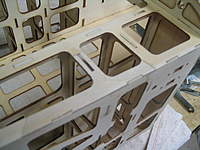
Most of the damage was to the motor box and the surrounding woodwork. The receiver tray and the fuse side were fairly well damaged and the fabrication of new parts was required. With replacing the motor box most of the bulkheads and the longerons in that area on the bottom of the plane need to be repaired as well.
All the Ultrakote covering is easy to get from Horizon Hobby and the only real chore is cutting the rounded shape that form the color scheme. The way I matched the curved top colors was to trace them off on tracing paper that you can get from any drafting supply store and then transfer them onto a manila file folder. Then cut out the shape you want as straight as you can with scissors. Use these shapes as a template to draw on a hard piece of 1/4" plywood; then rough cut them out with a band saw. These shapes are smoothed out on a 12" disc sander. This process is a lot easier than you might think. You gently hold the wood in place on the sander and sand until you don't feel any bumps from the rough cut with the band saw. I make two wood patterns for each shape so that there are no inside curves
...Continue Reading
Posted by RCMC |
Sep 14, 2011 @ 10:33 PM | 20,064 Views
Noll Smith asked me to restore this red 55" Extra SHP by 3D Hobby Shop. At first you might wonder if it is worth the time to repair such an older model and one that has been discontinued. But in this case it is well worth the time and effort since Noll has a brand new, in the box, plane of the same color that he picked up along the way.
Second, the only damage to the plane was centered on the fuse. The plane was cut in half in an incident with a power line. There was a slight wringle in one of the ailerons that was repaired with some CA and a small patch on the underside. The only work on the elevators was completed with a heat gun. All the other components were in good shape.
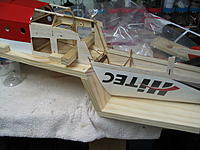
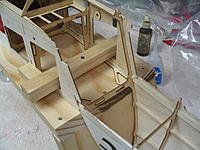
The biggest problem with this repair was how to connect the fuse halves back together and keep everything straight and true. When looking at the front and back sections of the fuse it isn't readily apparent what the proper angle of the turtle deck would be in relation to the flat below the hatch. You can match the turtle deck angle with the hatch but it was better having the new fuse available to use to build a jig for the exact shape of the plane.
I built the jig to get the best fit before gluing fuse halves. The pictures are much better than words to see how this was done. The hardest part of the restore was the new bulkheads at the break. Many of the broken parts were discarded prior to me getting the plane. Hint: save all the little peices after a crash.
Finishing and covering
...Continue Reading
Posted by RCMC |
May 13, 2011 @ 03:44 PM | 19,168 Views
Well, I was finally able to break into the large plane catagory with the latest addition to my fleet; the 3D Hobby Shop 87" Extra. Many thanks to Noll Smith who brought it back from the Toledo Show a few months back.
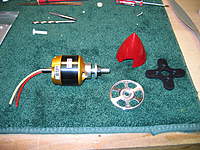
The plane is going electric with pretty much the recommended gear from the 3D Hobby Shop website. I'm using a Hacker 60-18L in a Mad Dog RC motor mount, Castle Creations HV110 ESC with a Castle Pro BEC. The servos all around are Hitec 7955's, prop is a 24x12 APC inside a Tru-Turn 3.5in aluminum spinner.
I hope to maiden the plane next week before the Silent Knights Soaring Society's 3D Fly-In to be held on Saturday May 21, 2011.
Posted by RCMC |
Jan 16, 2011 @ 06:58 PM | 22,735 Views
I had the privilege to complete a repair for one of RC Groups finer pilots this past October. Chris Thorpe asked me to restore a 3D Hobby Shop 89" Slick that he got from Ben Fisher at the Heart of Ohio Huckfest over the weekend of September 8th -12th. The plane was rather special with an all white covering scheme with blue and red stars and flames and sporting the King 50 logo. The plane had a serious crash near the end of the event and Chris got Ben to part with the "remains" for a good price.
Chris brought me the plane at the end of September along with a new motor box, cowl and canopy. I added new wheel pants later. The plane did a belly flop and removed the landing gear and most of the front of the plane from the landing gear plate forward. In addition, all of the bulkheads to the rear of the plane were broken making it necessary to replace the bottom stringer.
I never start repairs as soon as I get a project like this; I like to look at the plane for sometime and ponder the best starting location. After looking at the plane for awhile it was apparent that fuse sides are nothing more than a wedge shape from the firewall to the rear of the plane. When you come down to it a planes make is defined by the shape of the bottom, the turtledeck, canopy and cowling. Getting the fuse sides right was the first effort and everything else is built off that.
There was only one problem to overcome; I couldn't find a supply of 2mm plywood. Most of the
...Continue Reading
Posted by RCMC |
Jan 16, 2011 @ 03:11 PM | 20,882 Views
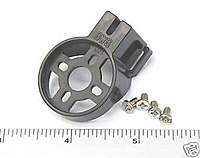
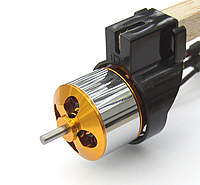
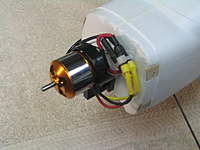
I have made a modification to the parts list for the GWS E-Starter. We have changed the recommendation from the Hobby King motor and Stevens Aeromodel motor mount to Power Up 400 Sport motor and GWS Plastic Outrunner Mount for 10mm Stick. The motor is $3.00 more and the motor mount is about $4.50 less so the costs average out.
A flying friend John Rickert can be credited with this find and after building his plane with the new Heads Up RC motor I'm happy to make the switch. I should point out that there is nothing wrong with the original selection for the Hobby King motor but I strongly recommend the switch to the GWS motor mount. This mount is small, compact and, I would guess, indestructible.
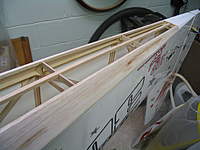
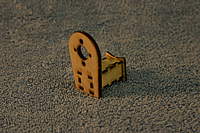
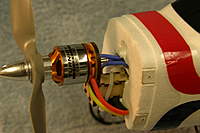
The new motor is installed exactly the same as the original with the 10mm stick in the bottom slot of the E-Starter fuse. The motor will line up nicely near the middle of the planes motor cowling. The only change that was made to the GWS mount was a small slot was cut in the rim of the mount for the wires to clear. This mount was designed for a 28mm motor and the rim fits close to the bottom of the motor and I didn't want to jam them in tight to the motor's base.
Posted by RCMC |
Oct 25, 2010 @ 10:23 AM | 20,252 Views
I noticed that there were several views on the pictures of the E-Starter. If anyone has any questions, please do not hesitate to make a comment or contact me.
RCMC
Posted by RCMC |
Oct 23, 2010 @ 03:25 AM | 21,102 Views
For the human being teaching is inevitable, it canít be avoided. Whether we are teaching young children the early lessons of life, sharing faith or showing ourselves to be of bad report it is all teaching through observation by others. We need to become more aware that what we do, think, or say (even in the privacy of our own homes) states who we are and has an affect on the principles we espouse. In short, what you believe is what you will teach.
Teaching well isnít easy; it takes time, commitment, resources, and usually consists of a substantial amount of failure. I believe that failure is what we fear the most about teaching, but there is a more insidious factor we might considerÖpassing along what we know can cut into our power or status. Many people donít want to be replaced but that too is inevitable! If you relate my thoughts to RC flying Iím in a wonderful position, I have no power or status to defend so this will allow me to concentrate on my failures. I am fortunate to have the mindset that looks forward to being replaced.
I have come to the conclusion that if we arenít passing on our hobby we are missing the best part of it. And although spring 2010 didnít start out on a mission to train new pilots it turned out that way in a hurry. We trained three interested people we met at the field and Jay, a flying buddy, trained a gentleman in Ocean City, Maryland. I am currently working with a teacher in my school district and we have a new fellow in the wings (no
...Continue Reading
Posted by RCMC |
Jun 26, 2010 @ 08:44 PM | 20,579 Views
Well 43 of the 47 planes are history in one form or another. I can get them down most of the time without banging something up. The flying is getting better, a little. Blenders, flat spins, knife edge spins and loops, and harriers are in my repertoire. Hovering is better over the last year and I'm able to hold it longer even when the bottom of the plane is towards me. Now I'm trying to get the rolling harrier down. My new goal. I guess my original goal of taking off and landing was a little short sighted.
So I'm down to three planes: a 3D Hobby Shop 51" Slick, a 70" Slick and a small foamy built by Noll Smith (Horton) for the fun of it. Attached is a picture of my small fleet. I want to keep it that way. I've come to the conclusion that I need to fly one design well before I move on and the Slicks are helping just fine. The 70" Slick is a dream to fly.
Posted by RCMC |
Jun 26, 2010 @ 07:18 PM | 20,911 Views
From 2004 to 2006 were the "Years of Carnage." One plane after another bit the dust and was in need of repair or replacement. After awhile repair became a categorical imperative. With my background in woodworking gained through my grandfather, an Englishman and cabinetmaker by trade, and receiving most of his tools after his death; I had to "Keep the British End Up" as it were. I'm not sure what he would think of my hobby since his hobby and vocation was furniture making, and woodworking on a grand scale. However, most all woodworking is problem solving with the proper tools. So I like to think he would be proud.
I joined RC Groups in January of 2006 and began reading about all the different possibilities around RC flying. I stumbled on a request from a Army sergeant in Fort Rucker, Alabama to build 2 planes for him. He wanted two Lark X's built, one with electric and one with glow. I made contact with him and agreed to build the electric version since I hadn't built a glow plane since the 1970's. I found out later that I was building a plane for the RC Groups "rock star" Laine Stahr (lmopar). Laine and I have become friends over the years and we finally met are SEFF in 2009.
Laine sent me the Lark X and the build was on. The planes were bought from Esprit Model in Florida where Laine got a deal for buying two. The kit was manufactured in Eastern Europe somewhere and I guess the letters ARF mean more there than they do here. The Lark had
...Continue Reading
Posted by RCMC |
Jun 26, 2010 @ 12:19 PM | 20,610 Views
Now that I look back on it; getting back into model flying at age 55 was destined to be limiting in some respects. Reflexes and eyesight tend to be on the downward slope; but at that age if your career is going well money seems to be less of a problem than when you are younger and supporting a family. Well the family is grown and gone so I will put up with the reflexes and eye issues. Really, there is no other path when you realize that your original goal of flying around and landing was so shallow; you have to get the next plane .
I had pretty much exhausted the talents of the Sig Kadet. It had its share of crashes and actually was replaced, in kind, once. It was a great plane for me to learn on and I got lots of stick time at the local high school within a short walk through the backyard of the house across the street. I was there this morning (June 26, 2010). The second plane was a Great Planes Super Sportster EP 48". The plane came with a 550 brushed motor and a ni-cad pack that must have weighed 7 lbs. I changed out the motor to an in runner and switched to lipos. The plane was faster than I was prepared for and didn't last to long. The next of its kind lasted much longer and I sold it off to some fellow down south.
Let the buying begin was the plan of the day. I tried many different planes and the style of plane was leading towards 3D. The nice thing about 3D is that you can fly low and close so that lessened the eyesight issues. There were many planes that were above my talents but as long as I could pay to replace them I kept buying. Expensive but fun.
Posted by RCMC |
Jun 26, 2010 @ 04:46 AM | 20,590 Views
In, (I'm not really sure of the year now that I think about it) 2004 I got back into the hobby with a Sig Kadet EP and the Ikarus Aerofly flight simulator. I decided that the best way to proceed with learning to fly was to first try the simulator and teach myself to land. Afterall, isn't that what its all about? For some unknown reason over the years I've gained a better awareness of how planes fly and how the control surfaces make a plane move. It seemed easier, for the most part, that the flying would be the easy but the landing would be the hard part.
I got the simulator working and for the first several weeks worked on just taking the plane off, flying in a circle and landing. My normal routine was 50-75 take-offs and landings at each session which was usually 4 nights a week. During that time I was building and modifing the Sig Kadet to receive a better motor. I got a small Multiplex inrunner and speed control and I was off and running. The maiden flight turned out to be the same pattern that I was flying on the simulator since that is all my thumbs had learned. I actually took off, flew in a circle and landed the plane. I did break the landing gear off but that was due to the tall grass on the field I choose for the maiden. The landing was perfect with just a bit of flair at the end but the grass did me in. I was pleased since my original goal was met. Take off, fly around and land. I could die happy.
Low and behold I was to find out that RC Flying doesn't work that way.
Posted by RCMC |
Jun 18, 2010 @ 08:42 PM | 20,680 Views
After the planes went by the wayside I got into the water. I bought my first sailboat in 1976, a Chrysler 22 sloop. Great little boat that my wife and I sailed all over the Chesapeake Bay. It had a small head and galley and was good for two people. It had a swing keel so it was good downwind. Since we had a place at the top of the bay we could, most times, sail downwind headed North. We kept that boat for a few years and traded in for Seidelman 24, a quarter ton racer with all the goodies. Designed for the Chesapeake Bay short chop it was fast and could out point and out run many 30 footers.
Her name was SLY and she was green, black and white.
When I wasn't sailing the Seidelman I was racing 1 Ton boats out of Sassafra River and Annapolis, MD or J24's out of Havre de Grace, MD. I did the 1980 Mid Winter Nationals in Florida; what a great week. When my daughter came along in 1979 it was time to think about something that would keep me closer to home.
Usher in the American Model Yachting Association in 1982 and very competitive and expensive model boats that are raced all over the US and world. I got fairly successful at this game and traveled from Rhode Island to Florida and New Jersey to California. So much for staying closer to home. At least the travel wasn't as often as big boat sailing. In 1988 I was on the US Team that sailed in the World's in Berlin, Germany. I finished a respectable 25th out of 189 competitors. In 1991 I became the vice-president of the AMYA
...Continue Reading
Posted by RCMC |
Jun 18, 2010 @ 04:30 PM | 20,746 Views
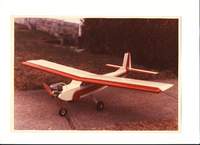
Well the control line planes didn't last too much longer and friends were calling for me to get into radio control. I remember my first radio was an MRC brand and nice for the time. It was digital proportional so I didn't have to brave all the older technology like pulse or radios that were as big as a "Bread Box" (but alas, most of you don't know what a bread box is either). I'm old, but not that old. Attached are pictures of two planes that I built in the early 70's. I'm sure both were Sig kits since that seemed to be the favorite back then. Goldberg was on the scene then and dozens of others that I can't remember.
The sad part of the story is that neither of these planes were ever flown my me. I sold them off and got out of the hobby for many years due to never being able to find a good instructor. I remember trying to link up with an instructor with good intentions but if it wasn't his time or mine that got in the way it was flying field difficulties or the weather. I sold off everything in late 1974 and went sailing.
Posted by RCMC |
Jun 18, 2010 @ 03:55 PM | 20,667 Views
This is my first all wood construction control line plane.
Posted by RCMC |
Jun 17, 2010 @ 05:01 PM | 21,092 Views
I started with flying models in 1970 and like many people with cheap Cox control line planes. Like any other hobby it was destined to head into larger planes. I found an old balsa model in a now defunct hobby store on Wilmington, DE called Vandevers Hobby Center. I can't remember its name but it was an interesting model because it had two half, molded, balsa fuselage sections that were cut out for the shape of the wings and then glued on the planes centerline. What a fun project putting that together was! In those days we didn't have CA, we had a tan colored wood glue similar to Elmer's. I built the wing on a board with every rib pinned to hold them in place and then you waited...for the stuff to dry.
Covering was also interesting in those days; heat shrink films were just coming on the scene and many of us were still covering with silk and dope. I can tell you that you didn't make any points with your wife if you did this work in the house. The dope smell got into everything and seems to dwell for weeks.
 Views: 364
  Views: 335
  Views: 361
  Views: 345
  Views: 334
  Views: 356
  Views: 327
  Views: 343
  Views: 402
  Views: 365
  Views: 386
  Views: 345
  Views: 386
  Views: 350
  Views: 362
  Views: 358
  Views: 483
  Views: 474
  Views: 462
  Views: 455
  Views: 457
  Views: 448
  Views: 410
  Views: 471
  Views: 313
  Views: 292
  Views: 340
  Views: 273
  Views: 258
  Views: 264
  Views: 231
  Views: 269
  Views: 288
  Views: 278
  Views: 377
  Views: 324
  Views: 327
  Views: 253
  Views: 631
  Views: 291
  Views: 323
  Views: 304