Dan.Cummins's blog View Details
Posted by Dan.Cummins | May 06, 2019 @ 09:42 PM | 6,746 Views
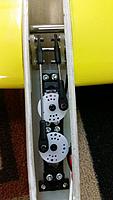
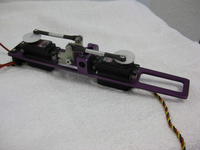
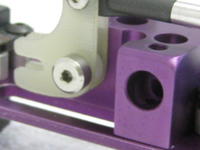
I undated the KST DS145 Shrike tray so that I could get longer servo arms on the servos to get those crazy throws I like on my Shrike. To allow for bigger servo arms, I moved the servos outboard to get the servos further apart (arms are set inward)

Enjoy!

DC
Posted by Dan.Cummins | Apr 07, 2019 @ 04:29 PM | 12,682 Views
For the BD5 builders out there, here is a blank tray for your 2019 BD5 Group Build.

I print the PDF 100% scale and use a light spray of 3M77 to adhere it temporarily to my G10 or thin ply. You can use acetone to remove the paper from the G10 after you have cut out your part.

RCG would not let me upload a DXF, so the dxf of the tray blank is attached in a zip file.

Enjoy!

DC
Posted by Dan.Cummins | Mar 16, 2018 @ 11:55 PM | 22,606 Views
Had a request for some Heinkel servo trays.......so here are a couple layouts you can use. Print 1:1 (full scale), mist with 3M77, paste to 2mm G10 or ply, and cut/sand to the lines.

Enjoy!

DC
Posted by Dan.Cummins | Jul 16, 2017 @ 08:23 PM | 25,135 Views
All,

A friend wanted to building a CSD B17 that we did the group build with a couple of years ago. He used HS5485HB servos from Hitec. Note not all standard sized servos are the same size

We layed out a servo tray template that you can use on your B17 or any PSS plan that you want to use these servos mounted in a T-configuration.

The switch template is designed to allow you to drill three 1/4" holes to get the bulk of the material out, and then finish up with a small file.

Just print the attached PDF at full scale. The tray is 114.3" (4.5") and 83mm wide.....check to make sure you printed it full scale!

Check it out. I would love to hear from you if you use the template for your project!

Cheers!

DC
Posted by Dan.Cummins | May 08, 2017 @ 11:28 PM | 25,389 Views
All:

I have recreated the ISR CG calculator in MS Excel format.

Enjoy!

DC

PS: Here is the original ISR Web calculator on Randell's blog:

https://redirect.viglink.com/?format...%2Fcgcalc.html
Posted by Dan.Cummins | Jan 06, 2017 @ 06:27 PM | 25,173 Views
Attached is a servo tray template for a MACH 1 servo tray.

Tray is specifically designed for a HITEC HS485 servo + a standard switch.

The switch hole template is designed so that you can drill out the 0.25" x 0.50" rectangular hole mostly by drilling out with a 0.25" drill bit.....thus, the template has three doughnut shapes that will help you drill out the switch hole.

Print the template full size, no scaling, and do not check the Fit-To-Page checkbox when you print it out.

Cut out with your Dremel tool, and sand until the lines disappear.

Enjoy!

DC
Posted by Dan.Cummins | Jan 06, 2017 @ 06:19 PM | 26,368 Views
This is the servo tray template for the 2017 PSS Tucano Group build.

With the generous contribution of milling machine time from Ward Hagaman, we manufactured G10 servo trays for the group build.

For those who would like to cut their own, or use this servo layout for another project, I have attached the pdf template. I have added both the sideways elevator fwd and the T-Configuration templates.

Cut out with your Dremel tool, and sand until the lines disappear.

Servo tray is specifically designed for KST DS145 servos that are available from Aloft Hobbies.

Enjoy!

DC
Posted by Dan.Cummins | Nov 01, 2014 @ 03:26 PM | 28,290 Views
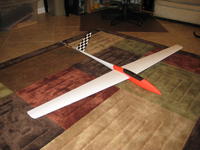
Here are a couple post maiden pictures of the new light(er) version of the Sirrocco. AUW of 30 oz. Wingspan is "62". Wings are balsa skinned with basswood LE's. Wingrod is 5/16" drill rod. Used N52 magnets on the end of the wing tubes to hold on the wings. VTail is removable......used 1/8" carbon rod for tail mount. Tails are balsa. Covering is ultracote.

It uses HS225's mounted in a G10 servo tray.
Posted by Dan.Cummins | Feb 10, 2014 @ 11:40 AM | 28,835 Views
Attached describes the process for trimming servo covers for a molded plane so that they fit perfectly everytime.

Enjoy!

R,

DC
Posted by Dan.Cummins | Jan 20, 2011 @ 01:07 AM | 34,912 Views
SUMMARY: Basic story is that some local San Diego slopers were looking for a quick and dirty way to obtain better wet seams with out being a proctologist, rocket scientist, a millionaire, or some sort of mechanical genius.

Goal is to find a bladder material that is readily available and can be inflated without elongating in the mold. If the bladder elongates, all that material that you so carefully laid into your mold just got moved around. So after a bunch of trial and error, Throne and AJ found that you could use a bicycle inner tube IF you prestretch the inner tube such that when inflated, it doesn't elongate.

Technique works best on closed molds, but can be used on existing molds with canopy openings.....but at much lower pressure...which works fine for most applications. Inner tube will conform 100% to inside of mold at relatively low pressures (as little 5 to 7 psi is plenty for most applications.....more pressure is better up to a point). Minimum tail boom diameter is limited to the width of your deflated (into a ribbon) inner tube. For a 5/8" bung hole, I use a 1.125 to 1.250 ten speed inner tube. I have given up trying to use used inner tubes, new ones are cheap and pop less frequently. Limitation of standard butyl rubber inner tubes is that they are limited to about 3X diameter inflation. Ward Hagaman is planning to do some testing using some Latex inner tubes that are 3X the cost but have a potential of 7X diameter burst inflation. Last goal...Continue Reading
Posted by Dan.Cummins | Jun 24, 2010 @ 01:19 AM | 32,897 Views
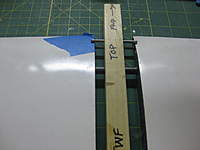
Here is a little tool that I made up from a verbal description of a tool that a legendary builder used to drill and/or align drive pins on his TWF wings.

Tool basically plugs into the wing tube, and uses the upper pin to set the location of the lower hole where you will drill your wing root for your TWF drive pin.

The way the tool works is simple. The wing rod and the drive pin need to be parallel in all directions. To make the tool, you simply use a drill press to drill two parallel holes at your particular spacing. Enlarge the aft hole to the diameter of your wingrod. Then drill your upper pin such that it will rest on the top skin of the wing when the drive pin hole is in the correct location top to bottom on you wing root.
Posted by Dan.Cummins | Jun 17, 2010 @ 11:40 PM | 32,910 Views
***G3 UPDATE ***

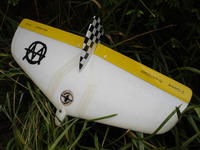
Here's a quick bench fly of the new tails and wings for the updated WTwF .

As an effort to continually develop improvements to the WTwF, I laid up some 60" wings and bagged some tails so I could do a little MOM racing at Blossom Valley.

Fuse is a shortened rebuild of the original.....I am calling this one WTwF SC for "short coupled". We are hoping that this one can pull through the corners even better than the original planform:

Wings: 60", AG04 @8.5%
Fuse: 35" vice 38" original
Tail: 8020 @7%

Tail is removable, and the wings have magnetic attachment on wing rod

****************

Here is a new 2M wing I laid up for the WH TWF. Came out pretty clean. For the next set I'll make the mylars about 3mm longer cordwise to make the LE exposure a little thinner.

Foil: Modified AG04
Root: 7"
Tip: 4.5"
Span: 2M (total, 38" per wing)
Sweep: 1.25"

Layup: 3.2 glass on bias, 4.1 Uni 2" strip, 3.2 glass bias.

LE: Kevlar, Uni, 5.7 Carbon Cloth

Tips: Extra 1.5" strip top/bottom for burlyness.
Posted by Dan.Cummins | May 31, 2010 @ 12:35 PM | 33,797 Views
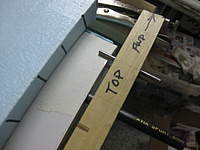
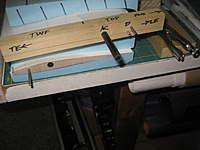
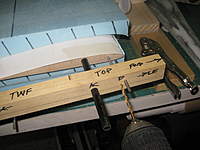
Wing tube drill jig
I need to drill some wing tube holes for some TWF wings, and I need to dial in as much dihedral as I can get between the top skin and bottom skin over 5 or 6 inch wing tube....so I made up this little wing tube drill jig.

It allows me to set the root entry point (wing in the bed), and then the maximum dihedral (wing out of the bed, extend drill tube until it just touches the bottom bed).

Materials used for Wing Tube Drill Jig:

- 3/8" brass tube (for 11/32 wing tube for 5/16 wing rod)
- Two 1/4"-20 brass button head machine screws + nuts + washers
- 8"chunk of 1X3 poplar
- Two chunks of a wood yard stick

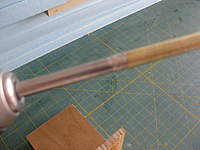
Materials used for Sub-Rib Drill:

- 1/2" Copper Pipe Repair Coupler
- 1/4" Piano wire for handle
Posted by Dan.Cummins | Dec 27, 2009 @ 01:39 AM | 36,748 Views
**** UPDATE ****

Post maiden tuning has resulted in a a CG location at 36% MAC (61mm) in order to achieve good dive test, inverted flight test, and axial roll results. A heck of a lot further back than I would have thought, but that's where it flies best. New version R1 updated the camber compensation from 1mm per % camber to 1.5mm per % camber.

************************************************** ************************************************** ******************************

I wanted to document my TWF wing build progress/process, and encourage more RCG and SD builders to go for it, and build a TWF for themselves.

After some thought, I realized that the tried and true build process documented by Sleddriver (Jay Decker) on slopeflyer.com (http://www.slopeflyer.com/soaring/ol....com-site.html) is difficult to improve on, so I won't. Jay's process is well documented, and produces a solid TWF wing.

What I did find, is there is not one single source for calculating the wing tube location for a TWF. The process is straight forward once you know what to calculate.

The wing tube should be located on the aerodynamic center (AC) of the your wing. The AC is the aerodynamic neutral point of the wing. Adam from Wyowindworks illustrates what AC is nicely in these three graphics in the ZMAX build thread:

https://static.rcgroups.net/forums/a...g?d=1245880955

https://static.rcgroups.net/forums/a...g?d=1245880969

https://static.rcgroups.net/forums/a...g?d=...Continue Reading
Posted by Dan.Cummins | Sep 17, 2009 @ 03:29 PM | 33,847 Views
Built this Wevo to have removable wings for maximum pack ability and used double bias tape on the wings and wing attach edges for durability.

Flown it twice....once and ultra light winds, and then again yesterday in 35+mph winds.......seems to do pretty good.....35mph wind are not a ton of fun with something this light.....hoping for lighter air today.

AUW= 14.5 oz
Straping tape on LE and wing butts
Elevons = Glass w/1.4 + Ultracote
Tail = Ultracote
Battery pack = 4 cell AAA Enyloop
Rx= Hitec Neutron 6S w/antenna 100% in fuse
RCCam Lost Model Alarm
Standard Hitec switch w/mini deans charge plug
Posted by Dan.Cummins | Aug 30, 2009 @ 01:19 PM | 33,702 Views
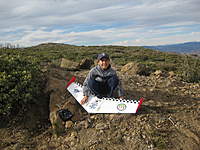
UPDATE 03 JAN 2010: Cameron made his first solo flight today at Mt. Laguna. Conditions were light, and the lift band was out a ways, but he flew about 45 minutes, and greased his first landing!

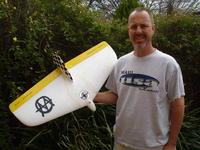
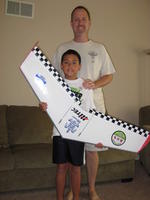
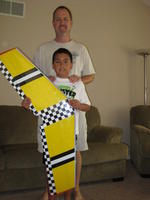
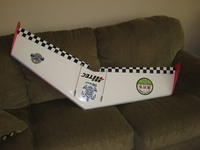
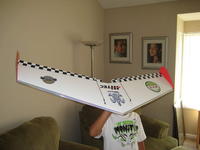
My 10 year old son is showing some interest in slope flying, so we cut and built this wing. He doesn't have the attention span for long builds, so he was only a part time helper after the spackle and sanding phase.

MAIDEN REPORT: Wing flew well at Parker Mountain on Saturday. Wing performed EXCELLENT! Winds were light, but it still got it going about 78 mph on the backside, and flew on the front side til dark! Fast wing, great inverted performance, great recovery (Thanks Pismo).

CG = 175mm
AUW = 26 oz
Nose weight needed to balance = 2 oz

Build Specs:

Airfoil Alain Zutter - Modified
Wing Material = 1.3 EPP
1 carbon tube spar full span on the high point of the wing
Basswood drag spar
Balsa elevons, glass with 1.4 oz glass, covered with Ultracote
Double bias strapping tape parallel to TE
Double bia strapping tape on the LE
Ultracote covering
Twirler tape on LE covered by clear packing tape
Elevons attached with Blend Derm tape.
Standard Hitec servos (HS-311)
5 Cell RX pack (Enyloop AA)
RX= Electron 6
Standard Hitec switch
RC Cam DIY LMA
Deans mini FM plug flush mounted for charging batteries
2mm coroplast custom winglets attached with #8 binding post screw/post
Tips have 32nd ply gooped in place to help attach winglets.
Control Rods = 2mm carbon rod with 2-56 adapter on servo end, nylon Dubro clevis on elevon end
Throws = 5mm pitch ; 10mm roll
TX setup with 50% exponential to keep it flyable with lots of roll when you want it!
Posted by Dan.Cummins | Aug 16, 2009 @ 11:41 PM | 34,231 Views
This is a Wingeron that I am working on. The Fuse and the Wing Block are Ward Hagaman's handy work, I just took the liberty to anodize aluminum bits to toughen up a little and make em look pretty.

*** UPDATE ***

New wings. 60" RG14 mod (DD) Root and SD7003 Tip. 4.1 Uni, 3.2 glass on bias, 1.4 veil. Basswood tips. Painted in the mylars.

The V-Tails are removable. The tails are just 1/8" light balsa with two layers of .75 glass on the bias...

Canopy is held on via windshield wiper blade metal ribs with a notch bent into it to catch the front lip of the canopy opening.

SPECS:

Root Wing = 7" - DD928416
Tip Wing = 5" - SD7003
Sweep = 0.875
Wingspan = 60"
Dihedral = yes a little

Root Tail = 4.5"
Tip Tail = 1.75"
sweep tail = 2.75"
*Next up larger tail surfaces

Tail moment = 24"

Incidence = 0-0

AUW 37 w/new wings 0 ounces of lead in the nose.

CG (tuned) = 36% MAC
Posted by Dan.Cummins | May 22, 2009 @ 10:54 PM | 33,993 Views
Ready for the 2009 PSS Fest. Bringing my 2009 ME109 and my 2007 P40.

Everyone says that it was cranking up there today (Friday).....should be a great fest!

P40

Posted by Dan.Cummins | Jan 11, 2009 @ 08:11 PM | 34,281 Views
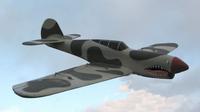
This is the P40 I build for the 2007 PSS Festival. For 2008 I had to put on a new nose to remedy a electrical issue that had been plaguing the P40. I have had lots of fun flying this plane this winter in big air.

Here are a couple of pic from today up at Mt Laguna during east Santa Anna winds (sustained 25-35 mph). In those lift conditions, this plane has the roll rate like a propeller!
Posted by Dan.Cummins | Sep 20, 2008 @ 07:10 PM | 37,319 Views
******UPDATE: Link to low res video.......:

https://www.rcgroups.com/forums/show...6#post10640537

More flying today (Friday) at Nakalele. Wind came up nicely. Got to fly with Brian C and his Bluto. Got in some great super high pumps coordinated with the Bluto and FA side by side......doesn't get much better.

Logged a couple of hours of flying at Nakalele on Wednesday. Wind came up to +/- 20 mph, and the FA really came alive. Found that you need every bit of roll authority that you can muster...I may even go down one more hole on the elevon control horns to get more roll. Inverted flight needed just a slight nudge of fwd stick. Added another 7g of nose weight to alleviate tucking on dives....I think we got it right now.

*******

FA has been maidened and is ready for some BIG AIR.

Purpose build to be ultra packable. All electronics are burried in the wing. Fuse only contains ballast in the nose, and holds the tail. LMA has top & bottom buzzers

AUW =...Continue Reading