WizofWires's blog View Details
Posted by WizofWires | Mar 13, 2023 @ 12:10 PM | 4,685 Views
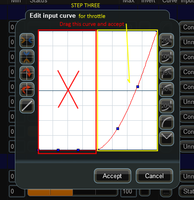
If you've played around with a racing video game, you've most likely become accustomed to having the throttle and brake controls on the same lever, joystick or trigger. Generally, you push forward to go and pull back to stop, or with the trigger, you squeeze to go and push-out to stop. Steering is not on the same control/stick whatsoever, and is only a concern in that you must slow-down to turn more sharply ("push or understeer"). Now that cars, trucks, motorhomes and other land vehicles are appearing in PhoenixRC, as well as numerous tracks, here's a simple control strategy that you won't even have to open your TX menu to apply! It involves moving the accelerator/brake control to the elevator/pitch lever, in the other hand. Number one, it's spring centered and returns to zero (the middle). Number two, it's intuitive, in that when you fly an aircraft and push the stick forward, it dives and speeds up and when you pull back, it will climb (thus slowing down). On my TX normal (fixed-wing) profile, the channel order is TAER, so I'll be moving throttle AND brake from #1 to #3, then using "curves" to split the stick (top-half throttle/bottom half brake). I will use BOTH "airbrake" and "wheel brake" at this time, though "airbrake" is more for future experimentation. Because PhoenixRC is so rich with aerodynamic functions, racing aero features like spoilers, airdams, splitters, diffusers and ground-effect bodies are all available, to make your car stick to the track like velcro! Follow the photo-steps to get your TX set-up for car racing. The latest versions of the RC10 can be downloaded HERE
Posted by WizofWires | Oct 25, 2021 @ 01:34 PM | 26,437 Views
Part One: Normal Faces Out

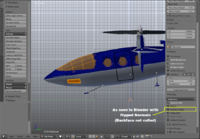
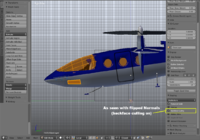
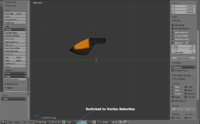
Objects seen in PhoenixRC are made up of points (vertices), lines between points (edges) and planes made from 3 or more edges (faces). An object has a group of faces on the side towards you and a group away from you. An object is "manifold" if the side facing away from you is enclosed fully within the object (considered water tight). Manifold Objects are easy, they have an outside face (normal normals) and an inside face (flip normals) sharing the same vertices and the rendering software can recreate these from logic. In designing our models, we very seldom get to have true Manifold pieces to project our 2 dimensional artwork (texture) onto. We tell the rendering software..."This surface is normal" or "this surface is flipped".

When the Canopy or Portals of our model are just grey texture that we have projected onto it, we don't care about the "see-through" state of the faces behind the texture. But in both Blender and Phoenix builder we are given controls to 1) make the surface (material) transparent by a percent entry and 2) make the face normal or flip. In this mini-how-to I will also show the control entry for "reflective" (mirror in Blender), since it is useful and right next door.

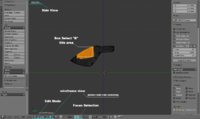
Part Two: Separate a Canopy

This portion deals with Blender techniques, getting this done before exporting the project to OBJ. And I will presume that the fuselage of the Model is roughly...Continue Reading
Posted by WizofWires | May 04, 2021 @ 03:05 PM | 7,330 Views
Harrier AV8B Longflight (5 min 23 sec)


When I found my PhoenixRC 4.0 disc in a box while cleaning, I nearly threw it out. It's a good thing I didn't!

I discovered a whole new world of great members who are still flying PhoenixRC and thriving. I tried downloading a model that I have wanted and broke out an old laptop to demo on. It has been "all aboard" since then.

Part One- Small EDF power for UMX-sized Jet Models.

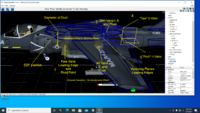
This Mini-HowTo is intended to describe my work-around for some "wish list" items that I find lacking in PhoenixRC. (There are more, but here's a start) I believe EDF jets were around by the time the original v3.0 was conceived, but were only lightly represented in updates (Habu, Habu2, A10 hand-launched). The only methods available for building your own, in Builder, were A) scale down a turbine or B) use a faux prop, and make a pusher. The creative team hadmore options, but the lonely user had to "trick the sim". I basically used the Habu2 (a scaled-down turbine) and disected it. Importing the .geo (geometry) file into builder with a much smaller preset wingspan, (0.372meters) to match the 30mm EDF powered UMX-Habu-S. I then punched in the position and sizes of the airfoils to match the model in Builder.

Why did I do this? ... Being equipped with a 3D printer and reading the 30mm EDF thread, right here on RCG, I had a bunch of beatifully designed ducts and Impellers that I wanted to make visible...Continue Reading