jmpdgs's blog View Details
Posted by jmpdgs | Mar 11, 2013 @ 02:17 PM | 14,671 Views

Content added : 04/14/13

I'm not going to get too detailed with this assembly being an ARF it's all pretty straight forward stuff, however I will detail a few of the modifications I'm implementing.

You can expect fowler flaps, servoless electronic retracts, strut mods necessary to accept the electronic retracts and my usual tail mounted control surface servo installation.

I'll be jumping around quite a bit, juggling this mod with two other mods and a scratch build so I'll be adding content in no particular order. As different parts of the record are organized pictures taken and/or videos shot I will post them in the area of the blog most relevant to the work being demonstrated. Hope that makes sense.

03/11/13 First up is this dry fit function video of the retract mod I did, main gear only in this video.


03/14/13 Fowler flaps were cut and added using a hinge of my own design. Video and pictures below.

A320 Flap Function (1 min 27 sec)
...Continue Reading
Posted by jmpdgs | Dec 23, 2012 @ 01:13 PM | 16,024 Views

Last Update : 02/17/13

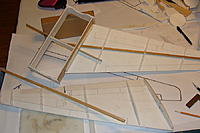
Okay, so here we go again. I've decided to try something I've never done before that being a scratch build. Forty-two years ago when I started up in the hobby, scratch builders were common place. You either bought a kit or drew up your own and in truth the plans were the only significant difference since a kit consisted mainly of a set of plans and a box of wood. If you were lucky, the wood might have a pattern printed on it but there was just no such thing as die-cut plans or if there were, I didn't know about them and never saw any. At that time I knew virtually nothing about drafting of design or flying for that matter so I began like many of my generation, building a high-winged trainer from a kit and progressing from there.

Fast forward forty some years and I know a bit more but still have never ventured into this venue until now and again, I do so more out of necessity than desire. Yes I want the model, and if it were available commercially I would likely buy the ARF and do my usual thing which is modify it to meet my requirements, but with Airliners as a rule that isn't yet an option. The choices are few, and although I do own a couple, the rest of what is out there I'm not feelin at the moment. So enough of the why.

Planning :

Surprisingly, hours of searching the net and my local library yielded very little in the way of blueprints for this first generation new kid. I guess it's short production run and the limited numbers made it...Continue Reading
Posted by jmpdgs | Oct 13, 2012 @ 08:30 PM | 21,066 Views
Last updated on 12/14/12:

I've been a big fan of the 262 for years and have built several GWS foamies with varying degrees of success over that period. When I saw that Dynam had released a 262 I immediately jumped on the first one I could find in stock. I quickly discovered that I wasn't the only one in line. Although it took me a while to get my hands on the plane this turned out to be a blessing instead of a curse. By the time it had arrived there were already a plethora of folks posting and boasting about what a wonderful flying model Dynam had created. In no time at all the knives, glue, spackel and paint emerged as folks began to modify and improve that which Dynam had created. The results have been spectacular as everything that could have been improved seems to have been by one enthusiast or another. Naturally I took full advantage of this and compiled a list of mods that I knew I wanted to implement. Below you'll see the list and the pictures of the progress I've made.

This post is ongoing and will be changing from time to time as I experiment with new mods and techniques on version II. Most of the updates will be in the form of pictures. Each photo will have details of what it depicts. Great models deserve a great journey and this ones been a blast so far. I hope you enjoy the ride. Feel free to PM me if you have questions about any of the mods.


* Version I & II - Sanded off all of the injector marks on the tail feathers and undersides of the wings
*...Continue Reading
Posted by jmpdgs | Oct 12, 2011 @ 08:34 PM | 13,076 Views
X-UAV manufactures this kit, but I purchased it from Hobbyking. It's been a very nice platform from which to start in my quest for something a bit more scale looking than the average foamy. There were a number of B-17's to choose from including the 83" HK Memphis Belle, a pair of 63"ers from Freewing, one from Starmax and this "MYSTERIOUS" one sold by HK. I was captivated by the paint scheme, it's size (only 63" which is much better for a VANLESS guy like me) and the bomb drop.

Half way through the detailing, I took her out and maidened her and she proved worthy of completion, so here she is about 90% done with only a few minor areas to address.
Posted by jmpdgs | Jan 06, 2011 @ 04:31 PM | 14,052 Views
I'm on my 3rd (yes that's right) SU-34, a testament to both how much I like the aircraft and how poorly I seem to fly it. During the interval between #'s 2 & 3 I changed from radios from a DX7 to a JR9303. I also decided to attempt "full implementation" of the 360º capabilities of the AC so I dropped in a seven channel RX.

The best laid plans it is said, often go awry and I began struggling with the various available radio programming suggestions. Both the one in the manual and those found in the RCG and HL forums all shared one commonality, none of them seemed to work for me, so after talking to Scott in Tech Support at Horizon for the better part of an hour, I decided to abandon what had been tried before and simply go with a completely new and what I hoped would prove to be a more intuitive approach. In truth, all of the programs I saw, including my own, are very similar. The main difference in this program is that it allows you to TURN OFF the majority of the thrust vectoring with a single switch. The exception to this (and it's advantage) is that some limited yaw movement remains, acting as a very effective rudder substitute.

The beauty of this setup is that the TV nozzles will act as a rudder when the TV switch is off and fall into full elevator/aileron assist mode when the TV is activated. Take offs and landings can now be done with the TV OFF without sacrificing the advantage of having a rudder (even though no rudders exist) which as anyone who...Continue Reading
Posted by jmpdgs | Dec 08, 2010 @ 08:46 PM | 14,376 Views
Last Updated 01/22/13


December 8th 2012

A few guys have asked about the relocation of the EDF units I've talked about so I thought I would elaborate just a little here.

When I find a model that has limited or no access to the EDF unit, which is true of many of the earlier EDF designs but few of the newer ones, I automatically go about figuring out how to remedy that situation. Changing motors, rotors and even shrouds is a common part of the tweeking process for me so I need virtually every part of the EPS to be readily accessible and easily modified.

I'm a big believer that almost anything can be made to fly given the right mix of power to wing area and the proper CG. Since I'm not a great craftsman, KISS methodology virtually always prevails when I bash a kit. I start by determining where the most suitable/accessible position for the EDF unit would be. Once I've made that decision I go about making whatever changes are necessary, to make that location work. If I'm moving a fan unit rearwards 4 inches (the shorter the distance from the impeller to the compressed thrust point the better), then I know that I'll need to make the necessary offsetting changes to the anterior weight placement in order to maintain the AC's optimum CG.

This first series of pictures shows an ME-262's nacelle/EDF unit modification. Note in the first picture there is NO EDF unit visible now.In order to preserve CG a battery compartment modification was necessary. I determine...Continue Reading
Posted by jmpdgs | Sep 16, 2010 @ 08:52 AM | 13,407 Views
EDFs - The Short List
My picks for Best Of The Best.

While the majority of these aircraft will fly exceptionally well on their stock setups, the Art-Tech Mig requires some major modifications (replace and re-locate the EDF unit with a Wicked 4k outrunner, remove the thrust tube, expand the battery tray and modify the cocpit) to really make the unit come alive.

__________________________________________________ __