Archive for September, 2010
-
 Views: 450
The C42 30mm x 8mm prop adapter on the left, and my 40mm x 8mm adapter on the right for the Turnigy SK 5055-580kv motor. -
 Views: 387
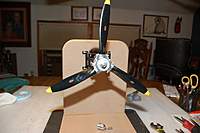
With my new 40mm prop adapter I have plenty of thread to secure the 3-Blade prop on the SK 5055-580kv motor. -
 Views: 404
I also tapped a 8/32" thread in the shaft for an optional VP 12C SS2412 Domed Spinner. -
 Views: 405
The 1 1/4" Domed Spinner I made to fit the 8mm prop adapter shaft. -
 Views: 379
The VarioPROP 12C SS 2412 Domed Spinner with the 8/32" SS Button head cap screw. -
 Views: 488
Another view of the VP 12C SS2412 Domed Spinner -
 Views: 273
The new G&C 4250-500kv motor w/8mm prop shaft for the 3-blade & the new 4-blade props. -
 Views: 332
The new FMS 4-Blade assembly.
Comments (2)
Add Comment
Sticky:
P-47 Jug: VarioPROP
Sticky:
P-47 Jug: Motor Mount Alignment
-
 Views: 394
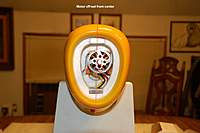
You can see how off-set the big 580 is. -
 Views: 311
Another example of the off-set. -
 Views: 318
This shows the new left side mounting holes. Note how off axis the 2 original holes were. Also you can see there wasn't enough room to move the right side holes to the left. -
 Views: 359
The new wider firewall mount I built to accept the existing 580 motor mount I had already had. -
 Views: 334
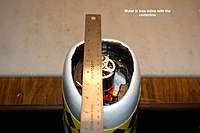
Motor is now in line with cowl opening. -
 Views: 351
Motor is now dead center. -
 Views: 370
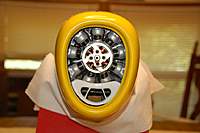
The motor now enabled me to center the radial in the engine compartment. -
 Views: 321
The prop is now squared to the cowling with adequate clearance. If I should need more a washer will do the trick.
Sticky:
P-47 Jug: Cowl Mod
-
 Views: 359
This just ain't right! -
 Views: 267
Trying to cover it up with the prop didn't make it any better! -
 Views: 239
The original foam backing I intended to use really started showing how severe the off-set really was. -
 Views: 272
This shows how off center the stocker G&C 600 is. -
 Views: 240
This shows how off-center everything looks with the 580. -
 Views: 277
A 3 1/2" replica just didn't fill the compartment enough. -
 Views: 283
The SK 580, because of it's size, would have required to much trimming off one side of the replica. -
 Views: 285
A 4 1/2" was to big so some valve covers had to take a hit.
Sticky:
P-47 Jug: The Landing Gear!
-
 Views: 654
-
 Views: 514
-
 Views: 270
*UP-DATE 2/13/2011* -
 Views: 293
*UP-DATE 2/13/2011* These are the 3/16" ply mounting plates. -
 Views: 288
*UP-DATE 2/13/2011* The 2 screws will remain in place although the plates themselves are epoxied in place. -
 Views: 322
*UP-DATE 2/13/2011* The Robart 2 3/4" Goodyears. -
 Views: 283
*UP-DATE 2/13/2011* The Robart 3" Goodyears. -
 Views: 264
*UP-DATE 2/13/2011* I had to do a bit more trimming to clear the A-arms.
Sticky:
P-47 Jug: The Wings
-
 Views: 458
The embedded plastic plate. -
 Views: 421
The access channel for the 2"+- screw -
 Views: 435
The location for the screw in the fuse. -
 Views: 475
In the process of doing the CF rod fuse support mod, the 4 wing clamps came off rather effortlessly. I reattached them with 2-ton epoxy, and I'm confident they aren't going anywhere now! -
 Views: 426
I used CF for my support plates, but with the relief already cut in the wing root, a section of 1/8"+ ply could serve the same purpose. -
 Views: 394
I installed a brass tube in the channel to take stress off the foam, plus it works great for a guide for the drill bit. -
 Views: 434
There is a recessed area in the wing root, so I used it's dimensions to determine the width of the CF plates. -
 Views: 426
Material has to be removed to clearance the FMS E-Tracts and struts. More info is posted on the Retract page.
Sticky:
P-47 Jug: WW II American Pilot
-
 Views: 248
The WW II American Pilot. -
 Views: 182
-
 Views: 191
-
 Views: 180
I will eventually tint the canopy. -
 Views: 101
*Up-Date 3/06/2011* -
 Views: 96
*Up-Date 3/06/2011* -
 Views: 105
*Up-Date 3/06/2011* -
 Views: 130
*Up-Date 3/06/2011* I painted the dash flat black, the interior with MM Interior Green, and the seat with MM Leather, with silver touch up on the trim.
-
 Views: 335
I made a couple of over-sized servo covers. -
 Views: 272
The pylons are screwed onto the covers from underneath. -
 Views: 272
If I choose to remove the pylons I simply unscrew the servo cover. -
 Views: 275
I haven't figured out what to do with the original bomb recess area in the wing? -
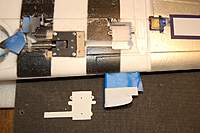 Views: 176
*UP-DATE 3/02/2011* The servo cover/pylon bracket ready for paint and installation. -
 Views: 207
*UP-DATE 3/02/2011* The final installation.
Sticky:
P-47 Jug: Nav Lights
-
 Views: 501
Wing tip Nav Lights installed. -
 Views: 273
I made cover lens. -
 Views: 667
Landing light housing and lens cover ready to be installed. -
 Views: 250
LED Landing Light and lens cover. -
 Views: 241
Good location as I have no intention of mounting the drop tank. -
 Views: 232
The Landing Light will work great for orientating the plane when in flight.

 ...
...
 ). These 13 x 9's actually measure 14" from tip to tip. The Dome Spinner is the #1201 aluminum spinner which attaches to the prop shaft with a 3mm countersink tap screw. Because the 580 prop shaft would have to be drilled and tapped to accept this screw, I decided to stick to my SAE standards and went with a 6/32" SS countersink button head set screw (I also have a lot of these in stock)!


