GallopingGhostlr's blog View Details
Posted by GallopingGhostlr | Mar 25, 2023 @ 03:46 AM | 4,467 Views
Another of my most recent engine acquisitions is a Fox .09 Rocket engine. It is a sideport engine, same technology as the 1963 A.C. Gilbert .074 and .11 Thunderheads. Just like the Cox reed valve engines, it can run right handed or left handed. I was amazed at the quality imparted in the casting of this engine, has to be handled personally to be appreciated. It is also very light, 3.1 oz. Has an integral tank that can be used. I estimate its capacity at around 7 cc.

It was not the most powerful, indeed a mild .09, said to put out 0.111 BHP at 14,000 RPM on 20% nitro fuel. Its optimal prop is around a 7x3. However, it is a bit more powerful than a Cox .049 Babe Bee, probably would be a decent power upgrade for an anemic .049 trainer.

I straightened the tank backplate with a set of needle nose pliers. It was slightly bent on one corner, where the previous owner used a 2-56 screw and nut to keep the back intact with engine. Some expressed concern over this arrangement when bulkhead mounting the engine. My 1976 Cox .049 R/C Bee had a similar back on the tank and it worked just fine. I will need to make a gasket if I use the integral fuel tank....Continue Reading
Posted by GallopingGhostlr | Mar 25, 2023 @ 03:34 AM | 3,990 Views
My latest engine acquisition is a Cox .15 Sportsman. I won it on an Internet auction. This is my first Cox .15 and I am excited, as it is Cox's largest reed valve engine. It looks similar to a Tee Dee with a rear venturi. I have a Hayes long mount AL-15, for which it fits.

It would be a good engine for my Midwest 33 inch wingspan Curtiss P-40 Warhawk profile C/L kit.
Posted by GallopingGhostlr | Dec 25, 2022 @ 05:51 AM | 8,046 Views
I have another Stallion .35, examining the exhaust port and rotating the prop, it has subport injection (SPI, the gap that reveals itself when piston is at TDC and the skirt exposes an air gap). Closer examination, the piston fence on top, characteristic of cross scavenge engines is installed toward the exhaust port, not the intake bypass port. The steel finned cylinder, piston and head have been installed 180 degrees out of sync by a previous owner. (I say previous, because the one I bought it from may have gotten it from an estate sale.) Otherwise, the engine is very clean, just needs minor exterior cleaning. The brass on the needle valve and spray bar assembly is relatively untarnished.

I start disassembling the engine's head screws and back plate. After screws are removed, I insert a pocket knife blade into the gaps, tapped with a light hammering, the head and back plate pop off. Using a flat tip screwdriver as a drift, I tap out the cylinder from the back by light tapping on the cylinder bottom skirt. It finally comes out.

The cylinder has a broken gasket, only a third is left. After scraping it off, I find it still has the original cylinder gasket in place. I make a new gasket out of a flap of a Ritz Crackers box. It has relatively thinner cardboard than other boxes. The head gasket is still usable. Now oriented properly, I reassemble the engine.

It has good compression and the drag of a new, unbroken in engine. I will need to replace the back plate gasket, because even after tightening the screws, it seeps the machine oil I used to lubricate the engine. Needle is missing the ratchet, I'll salvage one from one of my Testor McCoy .35 Red Head parts engines.

Apparently, a previous owner had reassembled the engine incorrectly. He may have tried to run it and failed. At $21.50 bid and $9.60 shipping, basically I have a new engine for break in. I am stoked.
Posted by GallopingGhostlr | Sep 05, 2018 @ 07:42 AM | 7,355 Views
I'm always on the lookout for good condition control line engines, especially in the .29 to .40 displacement for older technology cross scavenge engines of 30 to 70 years ago. Several months ago in June, I got from E-Bay what I thought was low time K&B .35 Stallion CL/FF venturi engine.

The seller mentioned the engine had occlusions that were typical of the original castings some 60 years ago. A poster in another forum pointed out that engine could have possibly been sand blasted recently. The great extent of the irregularities in the surface appeared to be caused by surface corrosion versus claimed occlusions. (Occlusions are basically trapped air bubbles or fleck impurities in the hot pour casting.)

Normally during bead or say walnut shell blasting, the manufacturer does this prior to assembly. Then cleans the crankcases of all dust prior to assembly. When I took a closer look to the engine, there was a small amount of residual aluminum flecks beneath the cylinder fins. The extra clean and bright aluminum exterior seemed to give credence that it had been carefully sand blasted. The screws on top, normally either finished in galvanized or black oxide appeared to be sand blasted. There was no evidence on the fins, so it is possible this area was masked during grit spray. The "new in box" finish just seemed to be too good to be true.

Two days ago, I started to disassemble the engine. Any sand or grit that got into the engine could only spell harm and...Continue Reading
Posted by GallopingGhostlr | Oct 01, 2014 @ 03:55 PM | 11,079 Views
Back in the 1950's, Sterling came up with a cute and unique sheet build biplane in the Liberty styling of the pre-World War II era, called the Hornet. It was designed to 18" wingspan with 1/16" sheet balsa wings, built up sheet fuselage, firewall drilled for a Cox .020 Pee Wee for free flight, for a Cox .049 Babe Bee for control line flight.

This model is a rarity. I picked one up on E-Bay about 5 years ago. It is one I always admired and wanted to build. It might have been something to compete against Joe Wagner's Dakota Bipe free flight of similar size. It also may have been a competitor to Top Flite's form and fly sheet balsa half-A CL warbird planes of the early 1960's. I built one in high school, a TF Mitsubishi Zero. It's full fuselage was neat, as it was preformed curved 1/16" sides at the factory, making it easy to assemble.

In this case, we are going to take this cute bipe and enlarge it to about double its size, suitable for a standard sport .15 engine. First, I'll have to template the parts as there was only build instructions, no plans.

There is some debate as to whether the wings should be built up or for simplicity accorded the original, use say Jedelsky slab wings similar to the Dave Thornburg's 1974 RCM Hornet Bipe. For proof of concept prior to a balsa build, I may construct one of Dollar Tree 3/16" poster foamboard to wring out the bugs. Nice thing about foam is its durability and ease of repair in crashes.

Decisions, decisions, decisions.
Posted by GallopingGhostlr | Feb 17, 2014 @ 04:12 AM | 14,631 Views
Several years ago, I bid and won an original Berkeley Impulse kit on E-Bay. I don't remember exactly how much I paid for it, but I think it was around $40 shipping included. The kit had some water stains on it. The plan was aged from heat. It appeared the kit had been stored in someone's attic for a while.

First, I reconnoitered the situation. I already had a good plan that I bought from Sig in the mid 1990's, when they were clearing out the remaining Berkeley plans they had in stock. It came with the original Berkeley plan envelope. As Kit P16-5 it sold for $1.00 US when Berkeley was still in business in the early 1960's. Of course I paid more for it from Sig, but it was still only a couple bucks.

First impressions of the kit .... it had a lot of die crunched pieces and plywood was the inferior quality Luan, not birch ply of later kits. Accuracy of die cutting left a little to be desired on larger pieces such as the fuselage halves. I started off by cutting out the wing and stabilizer ribs, fuselage sides and formers, then start assembly.

Fit and finish of the fuselage sides were rough. I trimmed as best as possible, but still fell short, ended up splicing a little back to make a solid fuselage side from two pieces. Then pieced together the buikheads. Also removed balsa from the center of the bulkheads to reduce weight. To make room for the fuel tank, I cut out the center of the landing gear mounting bulkhead with a hole saw. To prevent from splitting the Luan, I...Continue Reading
Posted by GallopingGhostlr | Nov 01, 2013 @ 02:44 PM | 10,840 Views
During our last move, the Flitecraft .40 J-3 Piper Cub ARF tail feathers got damaged badly enough to need replacement. I have fabricated replacements out of Borden 3/16" (5mm) thick poster foamboard. This foam board has both front and back covered with a light cardboard with foam in between, so it is rigid.

This ARF kit of a decade ago was partially completed with controls and radio installation remaining. An OS Max .40FP R/C is installed in the nose. The installation manual has since been long lost, but this is a simple model and straight forward enough to complete.

This plane has a 58" (1,473mm) wingspan and a 9-3/4" (248mm) chord giving it a wing area of 565 sq. inches (0.365 sq. m). Being heavier than current ARF's, it should be a fast flyer with good wind penetration.
Posted by GallopingGhostlr | Oct 21, 2013 @ 10:07 AM | 13,216 Views
About a month ago, I received this Great Planes Big Stik .60 from a modeler getting out of the hobby for a song. It had some crash damages that were partially repaired and without engine. Can't say what iteration or year this Big Stik came from. These are the repairs I did to clean it up and fix problems. Explanation is per Photo Number:
  1. Main Gear support broke due to lack of structural support. Only thing supporting lightening hole above is the 3/32 in. balsa side plank, which was mashed from a hard landing.
  2. 3/32 in. plywood shear panel has been installed from Fuselage Bulkhead #4 to support rear landing gear ply mount to nearest load bearing point, Bulkhead #5 at wing rear. Plywood extends to underside of ply servo mounting tray.
  3. 1/8 in. balsa spacer is added to support exterior fuselage side plank. Not shown, 3/8 in. sq. hardwood brace is mounted in notch between 1/4 in. ply landing gear mount and Bulkhead #4 for front landing gear support.
  4. Downloaded GP manual photo shows clunk tank neck filling ply engine bulkhead hole. 12 oz. tank neck is slightly larger due to tank stopper cover support lip, so undersized hole was ground larger to fit.
  5. 3/32 in. balsa planking has been added around main landing gear bottom and sides. 3/32 in. basswood floor has been provided from engine Bulkhead #1 to main landing gear front Bulkhed #3. This provides structural floor support for the radio receiver and battery. Original epoxied to floor balsa block rear tank support held tank in place.
...Continue Reading
Posted by GallopingGhostlr | Feb 11, 2013 @ 02:33 PM | 11,003 Views
An E-Bay buy, the engine suffered tool drawer paint chipping in its previous life as an used engine. Now, the head is all red, with what else? Testors paint.
Posted by GallopingGhostlr | Feb 10, 2013 @ 07:29 AM | 12,540 Views
I prefixed this blog with [b]cool]/b], which I'm sure may bore some not into vintage engines and sound damping solutions.

I needed mufflers for the vintage McCoy and Enya engines. The following is how I solved the problem.

Photos 1 & 2: I had a spare YS muffler. I modified it to fit this Testors McCoy .40 Series 21 CL Black Head. I fitted it by filling the muffler mount holes, cutting a stainless steel hose clamp mounted with 4-40 screws drilled and tapping into the mount ends.

Photo 3: I mounted a Tatone EM-4 Calumet .09-.19 Muffler to an Enya .19-VI TV engine. Since I lacked prop washer and nut, I improvised. I drilled out a fender washer to fit the prop shaft. Nut is a spare from my parts bin.

Photo 4: The Enya ran hot. Photo shows the problem, an overly restrictive baffling system and too small an expansion chamber area.

Photo 5: I ground away as much baffling as practical. It still ran hot.

Photo 6: Solution resulted in converting this Calumet muffler to a Tongue muffler for a Testors McCoy .19 Red Head CL engine for a control line airplane.
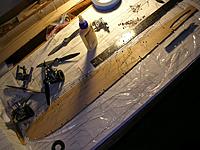
Photo 7: On this venerable Enya .09-III TV, I ground the other EM-4 Calumet's mount lip to clear the cylinder. Because the .09 is left hand exhaust required the muffler to be mounted upside down. The baffling system is very restrictive, leading to what I am told many an engine ruin due to overheating, which my testing proved. Further modifications are pending.

Photo 8: Solution for the Enya .19-VI TV is the Tatone .29-.40 Peace Pipe Muffler. It ran cool and powerful with this muffler.

There are ways to take sour apples and turn them into apple sauce.