Guz's blog View Details
Posted by Guz | Feb 21, 2012 @ 08:28 PM | 13,526 Views
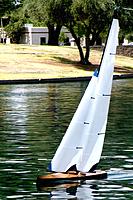
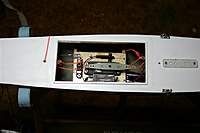
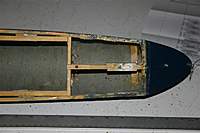
I got a new scanner today, so I was finally able to scan in some photos a friend took of my sailboat and post them up here.

They were scans of prints, so they have some aberrations in them, sorry.
Posted by Guz | May 01, 2011 @ 11:42 PM | 14,255 Views
Well,

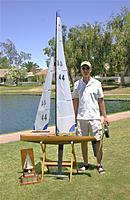
I think I did a good build on my Sailboat.

I made it to 2nd Place in the Arizona State Marblehead Championship and earned the boat some green chevrons.

Then I place 1st in the Lost Dutchman Gold Cup!! My second trophy ever so far in my life. To bad I have to give it back next year to whomever wins it then (if I don't win again)
Posted by Guz | Jan 22, 2011 @ 10:06 PM | 15,217 Views
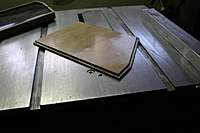
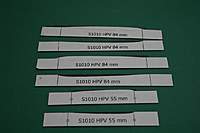
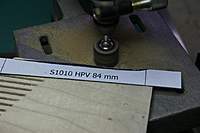
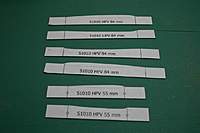
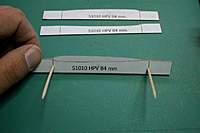
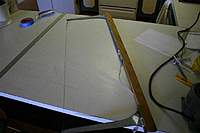
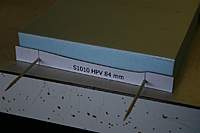
This should be labeled as my adventures in vacuum bagging. But it's what I decided to do to make the fin/keel and rudder.

Here's the steps to making a fin....Continue Reading
Posted by Guz | Jan 18, 2011 @ 11:59 PM | 15,095 Views
Well some time has passed. I've been busy learning how to hot wire foam, and then vacuum bagging, for the rudder and fin.

So here are the pics so far. I'll comment on them in the build thread later.

EDIT

To many pics to comment on, and I have redone things so the next blog post will be more coherent.

But here is the just the hull shots.
Posted by Guz | Dec 22, 2010 @ 11:35 AM | 15,606 Views
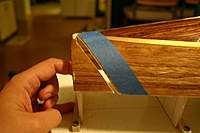
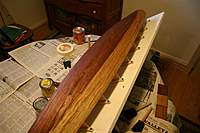
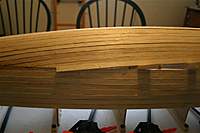
Continuing on. Finished planking and sanding. Still trying to figure out which stains I want to use. I'm thinking of a dark stain under the water line and a lighter stain above. The question is how light. Still experimenting with samples.

Pictures in no apparent order. Will use them for a build log and link back to these....Continue Reading
Posted by Guz | Dec 15, 2010 @ 04:09 PM | 15,664 Views
Well time to continue on with the Monarch.

I went out and bought a Proxxon Table Saw FKS/E to make the strips of paulownia. WOW!!!! I should have bought one of these saws YEARS ago! This is an awesome tool. Expensive, but awesome! MicroMark also supplies this saw under their own name, and for more money. So why pay more than you have to, go to Proxxon and get the real deal. I know they are coming out with, or already have, a new table saw, the FET. I wish I could have gotten it, instead, but I don't think it's in the USA yet (Proxxon is an Australian company).

But I will be purchasing more of their tools in the future. Their roto tools look a lot better than Dremel.

But enough on the tools, on to the boat.

It's been slower this time in building. Mainly because I am using wood glue, instead of CA (Super Glue). I've planked down to the approximate waterline. I think I will shift to the keel and then plank back to the waterline now. I saw this technique in a book and I think I'll try it. Also I've moved to a narrower plank since I have a bit more of curve to work with.

Attached are the current photos:
Posted by Guz | Nov 22, 2010 @ 03:07 PM | 15,382 Views
Well I finished planking the hull, and tried to sand it. I did not like how it turned out

Issues:
1. Wood thickness. Since I was being "frugal" I ordered the Paulownia wood as rough planed, not sanded. I figured I can sand it down my myself. Well without a horizontal thickness sander, the pieces I did sand all came out with varying thicknesses. I was worried about, but thought why not try. Lesson learned.

2. The balsa stripper. What a nightmare. It kept following the grain of the wood, no matter what I tried. Keeping it stationary, burring the tip of the blade, longer fence, etc. I ended up with wavy strips.

I tried to work with the wavy strips of wood, but keeping all the waves lined up. That actually worked, but I ended up wasting a bunch of wood. And I still ended up with huge gaps in the planking.

3. CA glue. I really hate using CA (super glue). I originally intended to use wood glue (Titebond III, waterproof), but I kept reading how other people just used CA and how they didn't have issues. I should have followed my original gut instincts. It just sets to fast, and getting your finger stuck to the wood get old quickly. Because it sets so fast, it caused the biggest issue...

4. Gaps and uneven planking. Dry fitting the wood I could get nice smooth, no gaps, planking, but as soon as I start gluing, things got ugly. Once the glue goes off, ripping out the wood isn't an option. Well if I didn't have issue #1, I would have ripped out the plank and tried...Continue Reading
Posted by Guz | Nov 18, 2010 @ 11:44 PM | 16,691 Views
After fixing up a friends Marblehead sailboat, I have gotten the bug to build my own. So here it is:

Hull: Monarch Marblehead Class (50/800), designed by Graham Bantock 2003
Material: Paulownia Elongata, Birch Plywood.

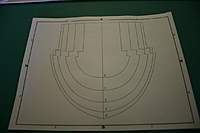
I chose the Monarch because it was modern boat design, but in wood. I ordered the plans from Traplet Publications The plans are classic blue prints. Unfortunately they look like copies from a copy, so the shadow lines (aka profiles) weren't the best. I set out to scan them and convert them to CAD for better printing. For doing the work, I thought it would be nice to make PDF documents and send them to Graham in case someone else felt the plans weren't decent copies.

I ended up with a nice email conversation with Graham about CAD and Marbleheads in the USA. I came out of the conversation with true CAD drawings of the shadow lines from Graham, Wooo Hooo!!!! He recommended that I try to narrow the beam and try to shallow the draft a bit, since I live in an area of really light winds. I decided to do it "by the book" instead. Maybe later I might modify to a narrower, shallower hull.

I also decided to try a different material. The plans call for Balsa or Ceder and Birch plywood. I've read about Paulowina as an alternate for Balsa. It's almost as light as Balsa, but stronger. I can attest that it is stronger. In planking the hull, if I had used Balsa, I would have broken several pieces trying to bend it to the shadows.

The bummer part, is that...Continue Reading
Posted by Guz | Sep 13, 2010 @ 09:07 PM | 16,248 Views
Well the deck repair is done. I've taken the old gal out sailing several times and it does OK.

I met the designer of the hull, Dennis Desprois' from Walrus Sails. I've learned that the current sails are really C rigs (for high winds) and that they are over 20 years old, and not really up to current standards. I've been able to obtain sails for an A and B rig. I just need to make the masts and booms and etc to put them on the boat. I'm still shopping around for materials. Soon.

But I had a bit of a set back. I was out sailing in 10 MPH winds, and I had the boat setup perfectly. It was awesome to see it scoot along, without any input to correct course, just sheet in or out to get the proper heel angle.

When I came in, I noticed that the main sheet had caught the hatch cover. While trying to get it into shore the hatch popped off and sank. No big deal, I'll just make another one.

While making a new hatch cover, I noticed that the new deck hadn't adhered properly and there were gaps. I noticed that I could pop the deck off without any effort, so I did

I remembered that I forgot the first rule about glue. Always apply glue to both materials for a proper bond. This time I didn't forget.

But here are some pics for anyone's amusement.
Posted by Guz | Sep 07, 2010 @ 08:33 PM | 21,425 Views
I finally got around to building my own USB to Multiplex RoyalEVO/PRO data cable. I already had the older 25 pin Serial to MPX, but all of my newer computers no longer have serial ports.

Reading up on other peoples posts on trying to get a Serial to USB converter to work was really hit and miss.

I didn't want to just go buy the new MPX USB data cable at $39.99 + shipping and handling. Why? Cheap bastard, and this a hobby. Hobby's require building things

So off I went building.

It turned out really easy. All you need is:
1. 1 - FTDI USB to serial 5V wire ended cable. (Digikey Part # 768-1029-ND)
2. 1 - 7 pin round din male connector (Digikey Part # CP-1070-ND)
3. 1 - 1K Ohm resistor (local Fry's Electronics)
4. 1 - 4.7V zener diode. (local Fry's Electronics)

Everything total was under $25. Almost half of buying the adapter. Plus it was REALLY, REALLY simple to solder up. And, the official Multiplex converter has a really short wire bundle (I borrowed a friends once), to the point of being stupidly short, my cable is nice an long.

As for drivers for the USB device. When I plugged it into my Windows 7 64bit O/S, it automatically downloaded and installed the proper drivers. But you can go to FTDI's website and download and install the drivers manually. You only need the Virtual COM Port Driver. When I plug in the cable and start the Multiplex data manager it shows up as COM 6.

Here are the schematics, and pics.

OK, I need to remember to follow the schematics. I didn't quite solder things up as it should have been. So here is the corrected soldering picture

********************************************* WARNING ***********************************************
Do NOT use "any" USB cable. You need to use the specified cable.

USB by itself, is NOT a serial cable. Using "any" USB cable may damage your radio, or your USB port on your computer.
************************************************** ************************************************** *
Posted by Guz | Aug 25, 2010 @ 12:42 PM | 17,193 Views
Well a friend found out that in the old days I liked R/C sailboats and mentioned that he has two sailboats just sitting around and he has really doesn't know much about them. So he asks me to check them out and see about getting them sea worthy.

The first boat is a nice 50/800 class boat that is in perfect working order. Just add receiver and battery and it's a done deal.

Now what looks like a 36/600 class boat is another story. Looking it over, I notice that some of the deck hardware is loose, and I try to tighten it up. Nope, things are stripped. Looking that the deck, it feels like the deck it rotted out, and the pin stripping along the deck and the hull is just nasty. So I peal off the pin stripping with the intentions of replacing it. Sitting at my bench with the setting sun shining in, and just looking at the boat I notice something odd. There is light shining through sections of where the deck meets the hull. Not good. Now I know why they put pin stripping all around, it was acting as a seal.

Poking around some more, I find that what I thought was rotted deck, was in fact the epoxy used to glue the deck to the deck supports has died. So with quick work with a putty knife, off comes the deck.

With a nasty surprise of looking at the deck supports. One look and I can tell, it's gotta go. Here are the photos of the progress of the repairs....Continue Reading
Posted by Guz | Aug 07, 2010 @ 09:30 PM | 16,248 Views
This is for those of you who are frustrated that you have to have an internet connection to Hitec to update your Aurora, Optima receivers, and Spectra Module (can’t help on the other products).

***** WARNING: THIS FOR COMPUTER GEEKS WHO UNDERSTAND SETTING UP A WEB SERVER *****
If you have no idea on how to setup a web server, stop. Go read up on the subject, or bug someone else who does (i.e. not me). This isn’t for the layman. If you don’t set things up properly, you have a good possibility of ruining your equipment!!!!
************************ WARNING **************************************************


The summary of what you are going to be doing is “spoofing” Hitec Korea website on your own computer/laptop, so you can be out in the field helping friends update their equipment.

Step one: Get a lightweight web server software. I found HFS (Http File Server) works nicely. It’s a single file executable for windows. It’s “donate ware” (free, but if you like it, please donate some coin to the programmer). Read the instructions.

Step two: Get the URL’s and files from Hitec Korea for updating the Aurora, Optima Receivers, and Spectra module. I used a program called WireShark to capture the network traffic between the HPP-22 software and Hitec’s website. If you don’t understand this, STOP!!! This isn’t for you.

Since I’m a nice guy, I already sniffed my network traffic here are the URL’s that the HPP-22 software looks for:

Code:
http://hitecrcd.co.kr/tester/firmware/
...Continue Reading
Posted by Guz | Nov 13, 2009 @ 11:32 PM | 17,711 Views
I fly DLG, and fast turn around times are important. Jun C noted that he uses a rubber band on his flap stick so he doesn't have to 'think' about getting his flapperons up during his turn around.

I tried the rubber band on my Tx (MPX RoyalPRO). It worked, but I didn't like how it made the side-to-side movement stiff (I like sloppy sticks ) So off I go tearing apart my Tx. I ended up using a rubber band, but worked it into the gimbal. Here are the photos.
Posted by Guz | May 14, 2009 @ 10:22 PM | 18,830 Views
It took a bit of trial and error to work out how to weave the pull-pull string into the servo horn and tie off so it would not slip.

I experimented using 20 lb Spectra line, which is stronger than the Dymond D47 servos. So the servo's should strip before the line breaks.

But back the to servo horn. The first thing I did to the stock horns was to enlarge the holes to 1 mm in diameter. Then added some extra holes, four on two leads. Then I weaved the string through the holes. The problem was how to secure the string. Most people will wrap the string around the securing screw in the center of the horn. But the D47 servo's, that screw is just to small.

I sat there looking at horn and then realized I was basically looking at a cleat from a boat. Using a cleat tie I tried it out.

WOW. Works great. I ended up breaking the servo horn with no string movement. I also cut my finger pulling the string. I had to use a screw driver wrapped around the string to test.

Here are the pics on how it turned out:
Posted by Guz | May 02, 2009 @ 04:54 PM | 17,696 Views
Finally picked up a Blaster II DLG. One of the things I've always wanted to do was to incorporate RDS (Rotary Drive System) for the ailerons. The Blaster II is such a clean aircraft, I feel having servo and control horns exposed under the wing is such a dishonor for such a fine aircraft.

Sorry, but I forgot to take pictures of the wiper pockets. They were made of CF and G10.

The CF sheets were from old, busted T-rex helicopter blades I have picked up from the trash cans at my flying field. A good Yankee will re-use whatever is available. I did find that the blades worked extremely well for the wiper pockets, by using the glossy side in.

So I went about putting in RDS, here are some photos of the what I've done.