Sandancer's blog View Details
Archive for March, 2013
Posted by Sandancer | Mar 27, 2013 @ 02:25 PM | 61,250 Views
The "OLD CROW's" Nerve System!


~Electronics~
RX: Futaba 2.4GHz R6008HS
ESC: FMS oem 65A
BEC: CC 10A
Motor: FMS oem G&C 4250-540kv
Nav Light controller: Lazertoyz Maxi Lite controller
LG E-Tracts: PZ-15091/514 w/metal trunnions
LG Sequencer: OSA MicroGear sequencer
Tail Wheel: FMS oem Tail Wheel assembly
~SERVOS~
Aileron: FMS oem 9g
Elevator: HiTec HS-82MG
Rudder: HK939MG
Flaps: FMS oem 9g Slo.Mo digital
Tail Wheel Steering: HXT900 9g
LG Inner Door: Turnigy TGY90SMG
Wing wiring harness: 16-pin headers


First off I would like to complement FMS for the new battery tray they have installed in the P-51B! Let's hope they do the same to all their latest versions where applicable!


Once again, I found it necessary to change out the FMS oem elevator & rudder servos with a HiTec HS-82MG for the elevator, and one of these newer HK939MG for the rudder. What I can't figure out is the arrangement FMS has taken on these 2 servo placements? The rudder servo is arranged in such a manner where I found it difficult to reach the 1.5mm grub screw on the pushrod adjuster. So what I did to remedy the arrangement was to make a new socket in the tray for the HiTec moving it towards the outer edge, and arranging both servos so the arms pointed inward. Both pushrod adjusters are now easily accessible.

I found the FMS oem tail wheel steering servo, like the one on my BBD, wasn't centering properly, so I changed it out with a...Continue Reading
Posted by Sandancer | Mar 11, 2013 @ 03:14 PM | 64,166 Views
I got the "Old Crow" all lit up for the night skies!


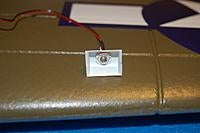
FMS has taken the steps to make their newer planes much easier to modify the Nav lights! I no longer need to drill holes in the wings to run leads!

P-51B Old Crow Nav Lights (1 min 40 sec)


*CAUTION* The LEDs I use for the following applications all have a forward voltage of between 3.5v-4.2v, therefore a 75ohm resistor is required for each lead on a 5v system!

To enhance the Nav light system on the Old Crow I added a tail beacon light on the rudder using a 3mm flat top LED. I cover how I went about doing this mod on the "FMS 1450mm P-51B: The Tail Feathers!" pg.

The next addition was a 5mm Round Top Diffused Red LED in the cockpit to simulate a dash panel reflection on the pilot. To do that I simply drilled a hole, actually I used a round file as a bit, as per Tom H's tip, a file makes a much cleaner hole in foam then a drill bit. I cut off a piece of plastic soda straw, glued it in the hole, and it serves as a great fixture for the 5mm LED. I like to run an extended lead so I have room to sit the cockpit on the wing while I'm accessing the interior of the cockpit. 32ga. red/black wire and a JST connector, and the cockpit LED is easy to plug into the Lazertoyz Multi Controller I like to use on all my newer planes.
*The Maxi Controller has it's own built in resistors, so no additional resistors are needed.*

One other item I added to retain a scale look to the...Continue Reading
Posted by Sandancer | Mar 08, 2013 @ 11:44 PM | 63,440 Views
This is the Old Crow's 1-piece wing mod!


Before I glue the two wing halves together I like to do all the mods on each wing beforehand.

First off I like to install the control horns and get the linkages adjusted. I then cycle the servos (aileron & flap) with the MT-1 to check their reliability, and loosen up the hinges a bit more.

I really like these digital slow-mo flap servos FMS is now installing! But the foam hinging is still inadequate. I re-hinged the flaps with the HK Super hinges and used medium gap filling CA as it's not as thin and runny as reg. CA.

What I didn't like are the PZ-312s E-Tracts! As I did on my P-51D BBD, I dug into those plastic wing pockets and modified them to fit the PZ-514s. To fit the FMS struts to the PZ-514s I, once again, made a couple of 5mm pins (see thumbs for specs.). I disassembled the struts so I could drill the larger 5mm hole in the upper aluminum housing using a #8 bit. I once again made some aluminum mounting plates to fit the 514s to the 312s mounts in the plastic pockets. Because I don't trust those Chinese philips head screws, I used #4 x 1/2" socket head sheet metal screws to attach the 514s to the plane.

There was some discussion earlier today on the FMS 1450MM P-51B Mustang thread concerning the reliability of the V7.5 struts, so I decided to disassemble one of mine to see if FMS was still welding the lower units together? Sure enough, they are! I also discovered why FMS might be...Continue Reading
Posted by Sandancer | Mar 05, 2013 @ 02:34 AM | 64,485 Views
This is my Re-paint of the FMS P-51B from the Shangri-la to the Old Crow livery!


I have to say, this livery re-paint was more of a challenge then when I re-painted my Corsair to the "Marines Dream" livery!

Prepping this plane for paint was nothing like the Corsair I did a couple of years ago. All it took to remove the decals and paint on the Corsair was 120 lbs. of psi and a needle air gun. FMS has come a long ways with both their vinyl decals, and a much denser paint. I will fully agree with Todd/Aros, if you plan to re-paint using the same livery/decals, it might be a better choice to just leave the decals in place and paint over them. Because I was changing liveries I had no choice but to remove the Shangri-la decals. These newer FMS vinyl decals have a much stickier adhesion. I found that they lifted everything beneath them, the paint, and whatever sealant FMS applies to the EPO foam? Needless to say, I had some work ahead of me!

Okay, I got the plane stripped down, and now it was time for primer. One additional step I did before priming was to apply some Green Zinc Chromate #1734 in the LG & tailwheel bays, and engine compartment. After thoroughly wiping the surfaces down with Acetone to remove any & all residue, I proceeded to apply a couple of coats of gray primer with some light sanding in between. I used my HFT 4 oz. detailing spray gun to apply both the primer and later, the clear coat. It has a much wider spray pattern...Continue Reading