kman24's blog View Details
Posted by kman24 | Feb 08, 2019 @ 01:06 PM | 11,941 Views
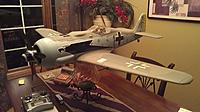
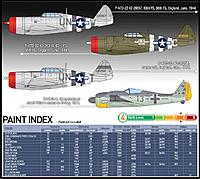
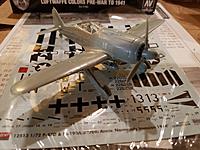
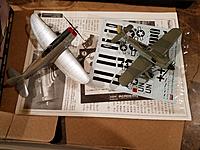
I have been building balsa ARF airplanes (warbirds and civilian) over the last few years and have really been enjoying it. So, for this year I wanted to do something a little special marking the 75th Anniversary of the D-Day Invasion at Normandy, France. It all started when I came across a plastic model kit for sale that featured a P-47 and a FW-190 together in a tribute to the 70th Anniversary of D-Day. It had both planes in 1/72nd scale and it really reminded me of my childhood building the plastic model planes and cars. Gluing all the tiny pieces together, painting the models, and applying the decals... ahhhhh such fun. They always looked so cool when complete. But then when July 4th came I usually just blew them up with fireworks as my friends and I staged a mock battle with them

So, I just recently put the kit together and was really happy with how they turned out (attached some pictures along with the information supplied with the kit). And I have decided that this would be my next ARF build project. The plan is to take a Hangar 9 P-47 20cc and a Phoenix Model FW-190 and build them in the same schemes as the model kit. I chose these two mainly because they were the best representations of these planes that I could find and they are roughly the same scale in relationship to each other. They are both roughly 1/7 scale.

With that said, let the tribute begin

...Continue Reading
Posted by kman24 | Jan 15, 2018 @ 01:50 PM | 32,523 Views
Here it is... the beginning of the Yak 3U build! This plane will be a fun project for this winter. I am hoping to get this thing assembled and ready for maiden flight this Spring

Kman
Posted by kman24 | Apr 11, 2017 @ 10:36 PM | 14,720 Views
Here are some pics and a video of my new RC Rescue Boat

RC Rescue Boat Testing (4 min 35 sec)


Kman
Posted by kman24 | Feb 25, 2017 @ 02:15 PM | 15,357 Views
I decided it was time to retire my old Dynam SR that I had since 2011 and transfer the guts over to an Airfield/FMS 182 Skytrainer kit that I had picked up a number of years ago. I plan on using all of the electronics (9g servos, 40A ESC, radio receiver), but I plan on using a new motor. The motor from the SR is pretty much worn out.

The new motor will be a spare Detrum 3720-650kv brushless outrunner that I have on hand. It was just a spare motor I had in case I needed it for one of my other Dynam planes that use the same motor. With that being said, I plan to run this plane on a 4s 2650 to 3300mah battery as those are plentiful in my battery cache.

Hope to put this one together over the next few weeks or so in time for spring

Kman
Posted by kman24 | May 26, 2015 @ 01:27 PM | 20,050 Views
I recently inherited this partially built balsa plane. I plan to go through it and finish it, but convert it to electric in the process. After I assess it, I'll come up with a plan to get it completed
Posted by kman24 | Nov 28, 2014 @ 07:07 PM | 17,571 Views
The picture says it all
Posted by kman24 | Aug 25, 2013 @ 10:51 AM | 19,172 Views
Here is my new wing I recently got from Nitroplanes. I chose to get the ARF version which includes everything but the receiver and battery. The hardest decision that I had to make was color option. They have several nice looking color schemes to choose from.

The box came nicely packaged and everything was secured as the picture that I attached illustrates. I am always impressed with good examples of packaging and this box is a fine example. The plane was quick to assemble in an evening and let the CA cure overnight. I then spent about an hour setting it up in my DX6i radio and fine tuning the settings.

I did fly it a little just to finalize the radio settings. But, unfortunately it has not been a good weekend for flying such a small plane. 15 to 20 mph winds are not generally good for flying RC planes let alone ones this small. So, I will report back with an official maiden flight video and flight report. In the meantime, I have attached pics of the assembled product

Kman
Posted by kman24 | Jun 23, 2013 @ 04:01 PM | 20,982 Views
I was always interested in getting one of these but was waiting for Dynam to give it a refresh with retracts. When it became available in time for Father's Day, it immediately went to the top of my list of planes to get. Mine arrived is great condition and everything worked as advertised. But, there were a few things that I wanted to change before getting it in the air.

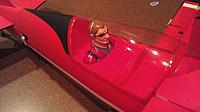
One thing I read about before I even got the plane was to replace the pilot. Luckily, the pilot that was a perfect replacement was available when I got the plane. I just had them add a couple to the order for a couple extra bucks a piece. It was money well spent. When I got the plane and showed the original pilot to my five year old daughter I asked if she would want it. She said no and that it looked like a clown. She said she would rather have my extra jet pilot with the red helmet that I purchased as an extra. I told her it was all hers

The other thing that I wanted to change right off the bat was the landing gear. The wheels that came with it were typical Dynam mismatches. The front wheel was all black and the rear wheels had white rims. The rear wheels were also poorly drilled for the axles and wobbled. So, for the front I cut off the landing gear stem and stuck on an extra 7075 oleo that I had left over from a set that I used for my Dynam T-28. It looks perfect on the front of this plane. Also, because it had changed the look so much on the front gear I had to do something with...Continue Reading
Posted by kman24 | Apr 10, 2013 @ 12:46 PM | 20,859 Views
I had my eyes on these WWI Bipes for some time and was always saying to myself that I needed to get one of these. At first I was going to get the Spad. But then after watching the movie Flyboys, I changed my mind to the Nieuport. I am glad I did because this is one beautiful plane and this kit is a gem

Since I have been traditionally a "foam guy" this plane was a new experience for me. It is a balsa/ply structure with a monokote film covering. It is very strong and easy to work with. I don't know yet how repairs will go, but I will find out hopefully later than sooner. The build took me about a week and a half, although that is working on it in mostly small chunks. There are a lot of little pieces or holes that have to be CA'd, so I would try and do several of those at a time to try and speed up the process from day to day.

Before I even got the plane, I had already looked into using an existing motor and ESC of mine which was a good match for the airframe. But since the motor mount included in the plane was setup for a three hole motor and mine was four, I ended up getting an aluminum motor mount from Small Parts CNC. It matched up perfectly with the motor I had and bolted right up using the existing hardware included with the plane kit. And it looks pretty nice on top of that.

Here is the list of materials I ended up using with the kit...

- Exceed RC Rocket 2215-1050 Brushless Motor
- Exceed RC Proton 30A ESC
- Small Parts CNC GP Motor Mount
- Solar A108 Servos (x4)
- Turnigy 2200mah 3s 20C Battery
- GP Electrifly 10x4.5 Prop

Assembly of the kit was straight forward and the instructions are some of the best in the business. The only modifications I made were the alternative motor mount that I had mentioned and having to slightly enlarge the servo mounts for the tail surface servos. But other than that, I pretty much put it together just like the instructions recommended.

Hope to fly it soon in the upcoming few weeks
Posted by kman24 | Mar 10, 2013 @ 09:36 PM | 23,607 Views
Here is the how to on installing a set of the oleo struts on the standard retracts of the Dynam Corsair...

Please note, that this is not a beginner level modification and should not be attempted if one is not competent and comfortable with using the procedures and tools listed below. Perform at your own risk. You could ruin your retracts if you are not carefull with the disassembly and modification of them. Also, please use all safety precautions and safety equipment, such as safety glasses when using a dremel with a cutting wheel. Cutting wheels are known for breaking easily and when they break during use, the pieces go flying off at high speed (watch out!!! ).

Materials Needed

- HK Oleo Stuts (set of 3, only need 2) - Item #OL-LGEARSET/19430
- 4" Black Tie Wraps (need 2) - Item #46-104UVB
- K&S Engineering Brass Tubing (5mm x0.45mm) - Item #9823
- Blue Locktite (as needed)

Tools Used

- Small Metric Screwdriver Set
- Small Wire Cutter
- Fine and Medium Grit Sandpaper
- 1.5mm and 2.0mm Hex Head Wrenches
- Tape Measure
- Electric Drill with 5/32" (4mm) Drill Bit
- Electric Dremel Tool with Cutting Wheels
- Vice w/Wood Blocks
- Servo Tester (optional, used for activating retracts)

Preparation of the Oleo Struts

A-1.) Remove the wheels and axles from each of the oleo struts by removing the two hex head screws (one on each wheel) and loosen the 3mm grub screw located on the bottom of the strut. Place the wheels and axles aside as...Continue Reading
Posted by kman24 | Jan 01, 2013 @ 08:32 PM | 20,602 Views
I picked one of these kits earlier in the year and got a chance to throw it together over the recent Holiday. It is a pretty easy build despite of few mods that are required for the setup that I have. Fit and finish are good considering that these kits are around $40. I used components from HobbyPartz including the following:

- Exceed RC Rocket Series 2210-1650 Brushless Motor
- Exceed RC 30A Proton ESC
- Four Solar 9g Servos
- Blue Lipo 3s 1000mah 20C Lipo Battery

I used a Master Airscrew 7x5 GF Series Prop on this setup and it performed quite well. I don't have wattage/amperage readings on this setup yet, but will post those later.

As far as mods required for this setup were the enlarging of the servo mounts for 9g servos. They are designed for 8g servos, so they were a little small. I also had to enlarge (just a little) the battery bay in order to fit my 3s 1000mah battery in the bay. Lastly, I added a few velcro strips on the bottom and cut an additional LG mounting hole for my GWS float kit that I strapped on. Using the velcro gives it enough hold to keep it on in flight, but it is easily removable to put the stock wheels in its place.

Here is the maiden flight...

Techone Fun Fly Maiden Flight (7 min 19 sec)


And here are the flights with the GWS float kit in the snow.

Techone Fun Fly with GWS Floats in the Snow (0 min 0 sec)
...Continue Reading
Posted by kman24 | Oct 29, 2012 @ 10:00 AM | 19,532 Views
After not flying my F-35 for awhile, I decided it needed some air time in order to get the dust off of it. Even with some 10-15 mph winds this thing just cuts through with no problems

Maxjet F-35 10/28/2012 (5 min 5 sec)


Kman
Posted by kman24 | Sep 15, 2012 @ 08:21 PM | 19,405 Views
Here is my latest little pilot that I got on Labor Day He originally wasn't due till today, but he decided to show up early.

Kman
Posted by kman24 | Aug 26, 2012 @ 02:42 PM | 26,669 Views
I always wanted to get another Corsair to replace the one I lost a little over a year ago. It was such a beautiful plane and it was fun to fly. So, when I heard that this one was coming I had to get it. The fact that it was a bit bigger than the one I used to have, plus had a complete brushless power system, electric retracts, etc for roughly the same cost made it a no brainer.

Build wise, everything went together without any issues. I actually ended up with quite a bit of extra screws when everything was done. At first I was worried that I forgot to attach something. But after going through everything again it was all built. So, it was nice to have some extra hardware on hand just in case.

Things that I noted that I like during this build...

1.) The control horns look much better is size and quality than other Dynam planes that I have. They must be listening to us on these forums that are having issues with them breaking or coming off due to them only using glue to hold them on. These are nicely sized, have a little built in reinforcement to them, and use screws to clamp them in place.

2.) The pilot and canopy are shipped in a separate bag and not attached to the plane. This is great since the last two Dynams I bought had the canopy already on, but the pilot was floating around in the cockpit because the glue hadn't set properly to keep him in place. Also, it allows one to customize the cockpit a little if desired.

3.) I absolutely love the 90...Continue Reading
Posted by kman24 | Aug 08, 2012 @ 10:31 PM | 22,264 Views
I recently got a servo tester to help troubleshoot and test servos and wanted to share the power source setup that I developed for it. The tester needs a power source and it needs to match the voltage specifications of the servos. Since all my servos run on 6VDC, I figured that a four AA or AAA battery holder would be a good candidate for supplying the power that was needed. Low and behold, I found this perfect little AAA battery holder at RadioShack that not only connects the batteries in series, but has a little On/Off switch on it, as well. This allows me to keep the battery holder plugged into the servo tester at all times and just turn it On/Off with out having to unplug it (very handy ).

So here is the servo tester that I got...

https://www.hobbyking.com/hobbyking/s...dProduct=11780

And here is the four AAA battery holder with switch that I got...

http://www.radioshack.com/product/in...lterValue=AAA#

The battery holder comes with two wire leads ready for connecting. I took a spare Spektrum Receiver Bind Plug that I had laying around and extracted the looping wire leads out of it. I cut it in half and then soldered the battery holder leads onto the bind plug wires with the pins entact. Then I just plugged them into the appropriate holes of the bind plug and it was ready.

I put some fresh batteries in the battery holder and plugged it into the servo tester. I flipped the switch on and the servo tester came to life. To test it out, I plugged a couple new 9g servos into it and away they went. I was able to verify that the servos were in good working order and ready to be installed. Not bad for around $10

Kman
Posted by kman24 | Jun 16, 2012 @ 08:24 PM | 25,141 Views
I just got this plane as a Father's Day gift from my girls (thank-you ). I had always wanted a Focke Wulf warbird and this one was at the top of my list. I was able to put it together very quickly as it is put together with screws mostly. There was a little gluing between the two wing halves, but that was it.

Most of my time was spent making adjustments and getting everything fine tuned for flight. The original pilot was already floating around in the cockpit, so I cracked it open to fix that issue. But, instead of gluing the original pilot (see pic below) in place I put the WWII pilot from my Dynam Peaks (yes, a sport plane ) into this plane. I had to trim his shoulders a little bit to squeeze him in, but he looks at home in this plane

I also had to spend a bit of time on the landing gear. The left wing was fine, bu the right wing didn't have as much built in rake and was binding up in the wheel well when retracted. I used some 3mm washers to angle it out a bit, but I could only do so much with that method. I ended up sanding out the back of the wheel well (see pic below) so that it wouldn't get caught anymore.

The maiden flight went good for the most part. It had been awhile since I flew a taildragger on the pavement, so that was a bit of an adjustment for me. But, once I got it up in the air things went pretty smooth. It only needed a couple clicks of down and right trim to level it out. The only problem I had from that point was landing. I aborted my first attempt and then managed to nose over on the subsequent landing Oh well, I needed to rebalance the prop anyway

Kman

Dynam FW-190 Maiden Flight (8 min 9 sec)

Posted by kman24 | Jun 09, 2012 @ 11:38 AM | 21,574 Views
Here is my latest addition to the hangar, the Dynam Peaks Biplane! I am not a 3D pilot, as you can see in my maiden flight footage, but it is still an entertaining plane to fly and I hope to learn some tricks on it as I go. The plane is pretty big (42" wingspan) and has a nice presence in the air. I am currently flying the plane on a 4s 2200mah Sky Lipo 40C battery.

Building the plane was straight forward and I didn't have any issues whatsoever. It took a little time to get the control surfaces all adjusted and dialed in and I did spend extra time making sure everything was secured well. The prop did need a little balancing, but not much.

I did replace the pilot right from the get go. The pilot that came with the plane was floating around in the cockpit. I figured if I was going to crach it open that I would swap him out since it was a warbird pilot. Dynam makes some great looking and flying planes, but their pilot selection in these planes in interesting to say the least. I replaced the original pilot with a Hangar 9 1/7 Scale Civilian Pilot that looks much better in there. I did have to cut about a 1/4" off the bottom of him in order to get him to fit in there. I also had to trim a little foam where he gets glued into place.

Overall, the maiden flight went well and I hope to try some tricks with it the next time out. Enjoy!

KMan

Dynam Peaks Maiden Flight (8 min 6 sec)

Posted by kman24 | Apr 28, 2012 @ 07:42 PM | 22,315 Views
I hadn't flown my smallest T-28 in awhile due to a burnt out motor and had bought the brushless upgrade parts, but just hadn't ever installed them yet. So, since I had gotten the itch to fly it again I went ahead and installed the upgrade.

The installation went pretty straight forward. I installed it like some others had recommended here on RCG. It took a few hours to perform, but it was well worth it IMO. Here is a list of parts that I used...

- HK AP05 Brushless Motor
- HK XP3A ESC
- HK Wiring Harness for ESC
- HK Battery Wiring Extension
- Three 3" Pieces of 24 AWG Solid Wire
- One 2" Square Piece of Plastic
- Three 1.5mm Screws
- GWS 5x4.3 EP Prop
- Miscellanous Tape, Heat Shrink, Tooth Picks, and Gorilla Glue White

Overall, I am very pleased with the results. It flies just like the stock plane using the same single cell batteries, but with all the advantages of a brushless setup. I managed to put a half dozen flights on it today and it worked flawlessly.Attached are photos of the final assembly

Update - 4/29/3012

Here is a video I shot of it today...

Parkzone UM T-28 Brushless Upgrade Flight (3 min 59 sec)


Kman
Posted by kman24 | Mar 19, 2012 @ 11:04 PM | 21,241 Views
Here is the latest scratchbuild that I have been working on - a nutball with a warbird theme (hence the name Nutbird, whick is in fact a "portmanteau") I based the plane on the 24" nutball design that goldguy has published here on RCG. But since I had only 30"x20" sheets of foam board, this plane ended up being 23.5" in diameter in order to minimize waste.

Here is a list of the major parts that were used...

- Grayson Hobby Disposable Sport Foamy Brushless Motor/ESC
- Tower Pro 9g Servos (x2)
- GWS Stick Motor Mount
- GWS 8x4 Electric Prop
- Generic 3s 2200mah Battery
- Orange6 Rx
- Various Colors of Duct and PlasticTape

Other materials included various screws, control rods, control horns, tape, glue, sticks, and velcro.

Total weight comes in at 20oz.

I still plan to add some LG using some .032" music wire and a couple Dubro Super Lite 2" wheels. That and add some decals to finish out the warbird look

Update - 3/24/2012

I updated the setup information above to reflect some changes that I made. I didn't really care for the 2s setup I was using. It just didn't have the performance I was looking for, plus I had to add quite a bit of nose weight in order to balance the plane out. Total weight is up to 20oz now What I might do is just use a bigger battery later on because I had to add 5 pz of nose weight in order to balance it out. But, it flies pretty nice as you can see from the video below

Nutbird Flight 03/24/2012 (6 min 23 sec)


Update - 3/26/2012

One more video just because this plane is so much fun...

Update - 3/24/2012

Nutbird Flight 3/25/2012 (4 min 57 sec)


Kman
Posted by kman24 | Mar 04, 2012 @ 12:53 PM | 22,006 Views
Here is my first wing that I recently built and flew. It turned out to be a pretty nice little plane; easy and inexpensive to build and a great flyer. I still have a little more fine tuning to do on it, but for now I am having fun with it.

The plane was a design that I picked up from schraut5 here on RCG. The thread that he started on it is here...

https://www.rcgroups.com/forums/show....php?t=1468553

I stuck to the design for the most part. Demension wise the main wing is identical to plan, but I did deviate from that design on the winglets. I only have the top parts of the winglets and not the bottoms. This was because I wanted the bottom surface of the wing to be completely flush for unobstructed belly landing capabilities.

Here is a list of the materials I used:

- 1 sheet of 3/16" white foam board
- 1 piece of scrap 5/8" EPS foam from packaging
- Duct Tape (various colors and designs)
- GWS Motor Mount
- Exceed RC Proton 30A ESC
- Exceed RC Rocket 2210-1650kv Motor
- Turnigy 1300mah 3s Lipo Battery
- APC 7x5 Thin Electric Prop
- Orange6 Rx
- 2 TowerPro 9g Servos
- Misc (control horns, rods, connectors, screws, etc)

It is a little heavy weighing in at 21 ounces ready to fly, but it currently is nose heavy. I do plan on lightening it up a little as I fine tune the CG.

Schraut5 Wing Flight 3/04/2012 (8 min 33 sec)


Update - 3/12/2012

I managed to strap a camera onto this wing today. I basically removed my 4 oz ballast on the front and velcro'd my Sony Webbie onto it. Worked out great

Schraut Wing Flight with Onboard Camera (5 min 35 sec)


Kman