Comments (4)
Add Comment
-
 Views: 432
Skins on wax paper. Dont want the sticky tow sticking to your table -
 Views: 587
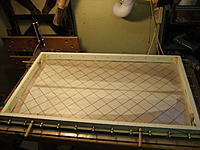
Mist /spray the tow with 3M 77 spray adhesive and lay over the skins. Apply wax paper over the tow and roll it to contact the glass skins -
 Views: 443
cut around and remove disser tow rack -
 Views: 436
cut by laying your fabric template on top before removing the wax paper -
 Views: 475
I then flip the skins over so the tow is trapped under the glass for the layup -
 Views: 438
wet out real good -
 Views: 465
roll the tow flat -
 Views: 455
-
 Views: 288
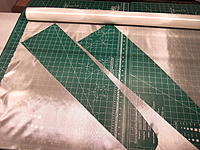
Trace around or cut around your mylars -
 Views: 219
Im not concerned with maxing out the mileage of my glass for this demonstration but note two identical pieces -
 Views: 242
Just for a edge to go by so the weave of the fabric is the same direction I placed the root edge at a 45 to the warp direction of the fabric ["warp" runs the length of the roll , "fill" runs the width of the roll -
 Views: 254
-
 Views: 279
-
 Views: 274
-
 Views: 261
-
 Views: 265
note how the top skin mirrors the bottom skin. If the warp direction of the fabric shrinks it will shrink against the warp of the lower skin. Im using a balanced fabric here so warp has approx. the same threads per inch as the fill so its not as important
-
 Views: 230
-
 Views: 185
-
 Views: 182
-
 Views: 228
-
 Views: 266
kevlar tip patch is large but could be trimmed -
 Views: 234
.067 HM carbon wing rods. Theses rods are like steel compared to some of the cheap carbon rods I have bought. 4 rods are enough with these rods . -
![Name: 003.jpg
Views: 205
Size: 180.3 KB
Description: 3/4 wide 1.7 o bias kevlar LE material [adhered to transfer tape] Name: 003.jpg
Views: 205
Size: 180.3 KB
Description: 3/4 wide 1.7 o bias kevlar LE material [adhered to transfer tape]](https://static.rcgroups.net/forums/attachments/3/0/9/9/0/3/t5103042-255-thumb-003.jpg?d=1345690758) Views: 205
Views: 205
3/4 wide 1.7 o bias kevlar LE material [adhered to transfer tape] -
 Views: 235
pre-cured uni carbon tail spar caps;
-
 Views: 403
Pay attention to panel lengths. -
 Views: 440
gently peel away pulling toward the TE -
![Name: 6.jpg
Views: 418
Size: 167.6 KB
Description: To help get a more elliptical shape to the LE a small amount of foam can be sanded off and hand sanded to smooth the transition of the panels. The cores shown are a 4 panel design [edge] Name: 6.jpg
Views: 418
Size: 167.6 KB
Description: To help get a more elliptical shape to the LE a small amount of foam can be sanded off and hand sanded to smooth the transition of the panels. The cores shown are a 4 panel design [edge]](https://static.rcgroups.net/forums/attachments/3/0/9/9/0/3/t5118988-102-thumb-6.jpg?d=1346288340) Views: 418
Views: 418
To help get a more elliptical shape to the LE a small amount of foam can be sanded off and hand sanded to smooth the transition of the panels. The cores shown are a 4 panel design [edge] -
 Views: 520
before and after -
 Views: 420
-
 Views: 408
Fine sponge sanding pads work well -
 Views: 418
-
 Views: 395
-
 Views: 514
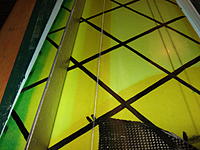
score where you want the kevlar to fold -
 Views: 444
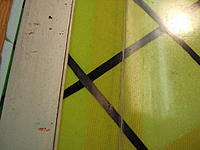
in this case there is a layer of glass over the kevlar that will leave a chalk like film until hitting the kevlar -
 Views: 460
be sure to go through the carbon tow -
 Views: 451
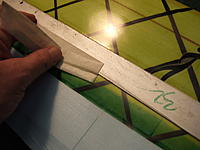
flip the wing over and cut through the glass and into the balsa strip in hinge gap -
 Views: 453
always peel tape from skin at a sharp angle -
 Views: 498
I usually stop around here and hand file some more from the kevlar in the fold. As I keep making scores I can feel it flex more and become freer -
 Views: 505
do what ya gotta do and get the balsa out -
 Views: 471
a nail file works nice to sand the excess glass back from the gap after removing the balsa
-
 Views: 620
hardpoint should be inline with brass inserts or binder posts -
 Views: 673
supergee wing in picture shows front wing bolt location 1.750 inches back from LE of wing -
 Views: 719
-
 Views: 685
-
 Views: 518
-
 Views: 547
-
 Views: 576
-
 Views: 695
This is called :flox . Its a cotton fibre mix that works very well for making hardpoints when mixed with epoxy. A good replacement for micro balloons for structural joints. Very hard to sand once cured.


 ...
...


