scotsoft's blog View Details
Posted by scotsoft | Apr 16, 2013 @ 06:29 AM | 10,135 Views
I modified my V911 charger so I could charge batteries fitted with JST plugs
Sticky:

Specs Cam

Posted by scotsoft | Jun 08, 2011 @ 01:51 PM | 13,229 Views
I have a pair of those sunglass cams but the sound is terrible and the video quality is not much better, so I was thinking of a way to glue a platform to one of the legs so I could Velcro a decent key fob cam on to and see if that worked better

I have a few empty SD card boxes stacked up at my computer which are all hinged so I picked one up, looked at it for a minute or so then took it to my hobby room and grabbed my Dremel

This is such a simple idea I feel sure someone may have done this already, however I am not aware of seeing this particular mod before and I hope some of you might find it useful

The series of pictures explain how to do this much better than words can

I would like to attach a viewfinder to place in front of one lense so I could ensure I had the subject in view 100% of the time.

At the moment I am keeping the subject in view 80% to 85% of the time and the initial results are very good.

I will do a video and post it on You Tube to show my efforts

If you don't need spectacles like I do (I was told it would make me blind but would I listen? ) you could buy a pair at the £1 or $1 shop and remove the lenses. The legs need to be wide to keep the SD card box horizontal so don't get wire legs
.
Posted by scotsoft | May 29, 2011 @ 06:52 PM | 14,300 Views
I saw this mod on a You Tube video, the guy who did it made an excellent tutorial that will guide you through.

I contacted him and he was kind enough to guide me to a company where I could buy the parts.

There are two main parts you have to buy.
1. EL Foil - Link http://www.conrad.com/Electrolumines..._17651_0212060

2. Inverter - Link http://www.conrad.com/EL-inverter-WE..._17651_0212060

You will also need some wire, soldering iron, solder, heat shrink and a double sided sticky foam pad.

The link for the tutorial video - Customizing my DX6i Part 3 - backlight - (4 min 31 sec)

As I was doing the backlight mod I found there were a few parts of the video where it left me to decide what to do so I have listed these parts in a Word document.
This has to be read in conjunction with watching the video, it is not a stand alone guide to completing this mod.

I did see a member "maukabud" has done this mod using the Hobby King Turnigy Radio Backlight Kit, however I do not have any details how he did this.
Turnigy Backlight Kit link - https://www.hobbyking.com/hobbyking/s...dproduct=16720

Link to his post - https://www.rcgroups.com/forums/show...6&postcount=44

This is a reasonably easy mod to do and I would now be happy to do anyones DX6i for them as I found it a low risk mod

If anyone wants to do this mod and has any questions the video or the Word document does not cover then please feel free to get in touch and ask as many questions as you want
Posted by scotsoft | Feb 28, 2011 @ 11:30 PM | 12,806 Views
I was given the opportunity to have new side plates and tail fins made out of carbon fibre so decided to give my old 6020-1 heli a make over

The new parts cost me £10 delivered and when they arrived I found an extra tail fin included .

I set aside some time and started to strip the old plates off the 6020-1.
Fitting the CF plates was a bit tricky for my not so nimble fingers but after a bit of quiet cursing under my breath the side plates were finally fitted, fitting the two tail fins only took a matter of minutes and my 6020-1 had it's new look .

Check out the pictures as I am very happy with the finished result .
Posted by scotsoft | Jan 10, 2011 @ 01:49 PM | 12,804 Views
I thought I would remove the undercarriage from one of my U801's to give it a more realistic look when in the air.
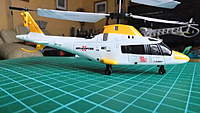
I took all the screws out from the fuselage and carefully parted each half.
The frame with the motors and gears stayed in one half and the other half came away clean allowing me access to remove the two screws securing the wheel covers. I prised the wheel cover off the side of the fuselage and this allowed me to remove the wheel then I replaced the wheel cover and screws.
I prised the frame holding the motors and gears from the other half of the fuselage which allowed me to access the screws securing the other wheel cover and I removed the other wheel. I removed the front wheel which was only secured by a location pin.
I placed both sides of the fuselage together and replaced all the screws.
Now for the first flight
Without the wheels the U801 is slightly tail heavy making it drift slowly backwards so a small weight will need to be placed in the nose to compensate. I tried weighing the front wheel but my scales did not register anything when I placed the wheel on them, so it will be a bit of trial and error
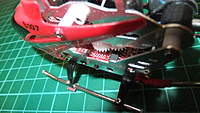
Here are some pictures of the U801 stripped down....Continue Reading
Posted by scotsoft | Dec 22, 2010 @ 04:26 AM | 16,190 Views
Follow the pictures and descriptions to make a cd case Helipad .

The graphic should be sized to 13.7cm wide by 11.9cm high (I insert the graphic into Word and size it there and have two on one page), it will then fit perfectly into the base of a cd case

Now have fun aiming your 3ch or 4ch helicopters at these inexpensive landing pads .
.
Posted by scotsoft | Dec 10, 2010 @ 06:34 AM | 13,586 Views
When landing on the cd case helipad, it is like landing on ice. If you don't drop your heli just the right way you slide off. This was discussed a while back with various remedies suggested. The two pictures I have posted shows the remedy that has worked out very well for me and is very easy and quick to do. I cut up an elastic band and superglued the small pieces to the underside of the skids. This gives a good grip when landing on the "icy" cd case helipad

I am in the process of creating the "Helipad of Death" to land on
This is only a bit of fun and yet another creative way of wasting time
Pictures will follow when I have finished it
Posted by scotsoft | Dec 09, 2010 @ 06:51 PM | 13,640 Views
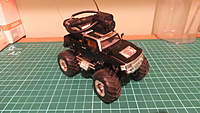
First pictures of an idea I have had to take one cheap rc 4x4, add wireless camera plus 9V battery
Posted by scotsoft | Nov 24, 2010 @ 05:22 PM | 14,295 Views
I ordered this on the 9th November from Gigson and it arrived this morning 24th November. The one and only reason I ordered it was because I liked the look of it and it had a tilted tail rotor .

They call it the 2 in 1 Land and Sky Helicopter, 2 in 1 because if you select "Running Mode" on the front of the transmitter you can taxi along a smooth surface before switching over to "Flying Mode" and taking to the skies.

After I took some pictures whilst unpacking it, I put it on charge. No USB charger, so first bad point awarded. Both the red and green LEDs light up when charging with the red one flashing and when fully charged the red one goes out.

I switched the transmitter on with Channel A selected and the red LED flashed, I then switched on the heli. As there did not seem to be any binding going on with the transmitter I pushed the throttle up and down to arm the transmitter then up again and it lifted off .

An extremely stable helicopter, it did not need trimmed, I pushed the right stick forward and off it went doing a few circuits. It has a slow pirouette rate, which is no big thing for me as I rarely do them and a steady forward speed with the gyro doing a good job. Flying in reverse is much faster than forward flight so I should check the C of G.

I have flown it six times since this morning, never timed the flights but they do seem to be shorter than some of my other 3ch helis .

It is a nice enough looking heli when it's flying but...Continue Reading
Posted by scotsoft | Nov 23, 2010 @ 01:03 PM | 13,300 Views
I decided to try and take a few pictures of some of my helis in the air .
This means controling the hover one handed and taking the picture with the other hand .
I picked up three of my helis the U801, Double Horse 9098 and the crazy looking UFO.
There were quite a few of the pictures I deleted but as I only spent around 5 minutes doing this and I am quite happy with the results

I am going to put pictures of my whole fleet here and I think some will be "in the air" shots after seeing how these turned out
Posted by scotsoft | Nov 07, 2010 @ 08:38 AM | 13,262 Views
My main interest is rc helis but when I saw this little plane, it got me thinking about how easy this would be to do to a cheap plane (which I already have)

Here is the link to his thread -

https://www.rcgroups.com/forums/show...6#post16484992
Posted by scotsoft | Oct 27, 2010 @ 09:06 AM | 13,443 Views
The Syma S030 is the latest addition to my scale fleet .

It is a helicopter I have been after for a long time and kept putting off hoping there would be a gyro version out there .

The price of these have also been dropping so I pushed that buy button and this landed a few weeks later.

It flies well, but as in all non gyro helicopters it needs to be kept on the move

It is a nice size as I fly indoors and the more I fly it the more I am enjoying it and having fun
Posted by scotsoft | Oct 27, 2010 @ 08:50 AM | 13,258 Views
I recently saw the U801 advertised from Focalprice and ordered the white and yellow one .

When it arrived and I removed it from the box I was really taken by its scale look .

It is very sleek, looks longer than it really is and flys like a dream .

I ordered the other colour in this series and the silver and red are not as appealing to me but it still looks ok .

I shall take pictures of all my scale helicopters and post them here
Posted by scotsoft | Sep 10, 2010 @ 03:18 AM | 14,096 Views
I am happy to show off my fleet of the Syma S107 helicopter which now includes one BLUE one
It soared skyward yesterday and majestically did a few circuits of my room before coming down for a gentle landing, totally missing that damned cd case helipad (perhaps I should make one from an old LP record cover )
Posted by scotsoft | Sep 08, 2010 @ 04:45 AM | 14,908 Views
Here are a couple of pictures showing a good idea from Redbaron25. He suggested printing off the helipad and inserting it into a cd case, that way the case can withstand the downdraught and stay put when coming in to land, simple but very effective - thanks Redbaron25
Posted by scotsoft | Sep 06, 2010 @ 07:09 PM | 13,348 Views
I have never found blogs easy as I never feel I have much to write about. However if I do a small amount on a regular basis and add some pictures of my fleet, then it may have some appeal to a few.

I am changing the use of one of my bedrooms to a hangar. At the moment most flat surfaces have a heli parked on it and it is becoming a bit of a nightmare.

The first picture I am going to upload is a very nice helipad for any of you to copy and reproduce. I would suggest you print it onto card, then laminate it, then spray mount some neoprene/ foam or similar to the back and then trim. You now have a helipad or a mousemat which ever you decide.

More soon - scotsoft