Comments (2)
Add Comment
-
 Views: 274
Get a vise or small clamp and mount it up. This is a PanaVise. I loves it. -
 Views: 259
I use A Hakko T18D32P 3.2mm tip in my BlackJack for EVERYTHING. lower temp for SMD work or crank it to tin 12GA no problem. -
 Views: 282
get a good solder sucker pen. The nice ones are a whopping $12. mine was the $8 flavor and its lasted three years. -
 Views: 269
Use a small flat head to pry off the panel. Make sure the pins are loose or you will pull a pad. You can always run a new wire to the resistor directly if you do pull a pad. Use a unmolested alarm for reference. -
 Views: 285
This is the Teflon Micro Wire. Hobby Kink has this in USA for super cheap. it works perfect. -
 Views: 236
start pinning. you do not need to poke through holes. just tin to pads if you like. -
 Views: 219
keep going -
 Views: 341
Ive tried even the most flexible of stranded silicone wires. they wont stuff down after you twist it.
-
 Views: 325
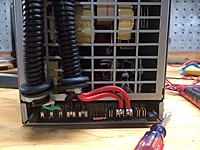
I bridged the 'enable' and 'power' leads together with the ground. Wired the hot A/C to the switch so when it's off its OFF and only need one switch. Just need to build a nice cover for the exposed leads. The grommets and wire sheath are ready and waiting -
 Views: 246
The three prong power jack was pilfered from an old ATX power supply from a dinosaur computer I'de been hoarding in the rafters. -
 Views: 238
Not a ton of room but plenty to add a few more outputs or a light or clamp post etc etc. Think this one will get a USB -
 Views: 245
Two piece project box from Frys or Shack- can't remember which. A cut off wheel on a Rotary tool makes clean cut outs for the display, switch, power plug jack. A pass on the drum sander on each face gives it a nice brushed finish. -
 Views: 290
The display does show Amps and Volts and is calibrated it just has a frequency that my phones camera does not see. Weird. -
 Views: 248
Left room up front for the charger. Should fit a Cell Pro perfect! Ones on the way now :) -
 Views: 260
-
 Views: 275
Stock flange removed and new flange installed with stock bolts. -
 Views: 280
Upper clamp plates. You can really use any bolts you like here. The kits that are shipping now come with them. -
 Views: 265
You can see the countersinking sets the bolts nice and flush -
 Views: 273
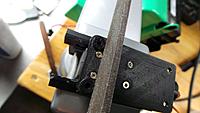
A quick filing made up for the difference in frame size between the clone HK550 used for original beta template and the DJI frame -
 Views: 242
Just a quick filing set the keys right into the DJI slots perfect -
 Views: 271
This is how I installed without removing the top plate. Hex key through the holes on the top plate and pliers below -
 Views: 266
Shot of the clamp plate -
 Views: 248
You will need the longer bolts (now provided) to accommodate the added plate thickness and still have enough bite in the arms threaded inserts.
-
 Views: 395
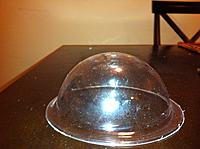
sky ball was smooth and shiny. Also rigid enough when cut in half to not collapse under vac. Turtle Wax lid...perfect! -
 Views: 380
stack em up. -
 Views: 395
Vac on! -
 Views: 372
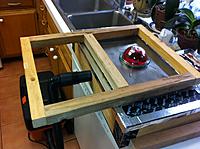
slam some plastic over it. I split the frame so I would not waste a full sheet for such a small form. -
 Views: 363
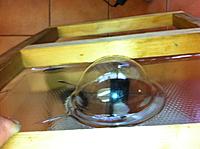
very surprised how great and easy it all worked. Table and frame took less than an hour to make and cost nothing! -
 Views: 364
trimmed the lip formed by the Turtle Wax lid off so I was left with a nice flange to bolt through and its ready to go. -
 Views: 399
Fits perfect with Terriwang's foldable quad frame
-
 Views: 460
-
 Views: 454
-
 Views: 439
-
 Views: 408
-
 Views: 425
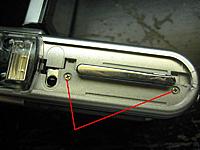
Just get rid of this crap. You wont ever use it again and spending to much time trying to be careful is just a waste. You will not hurt anything, just rip it off. -
 Views: 429
-
 Views: 463
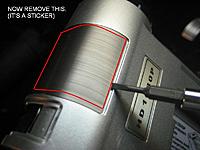
stubborn POS! -
 Views: 413
Just a sticker but it hides a screw.
-
 Views: 440
Its big but still really portable. I like having some space to add stuff if the need should arise. -
 Views: 414
think its pretty clean. Mesh wire loom keeps them all tidy. I ran out of it for the power and fan leads. -
 Views: 387
RX's stacked with rubber isolation for airflow and shock absorption. -
 Views: 418
Eagle Eyes! I hardwired Everything to the bottom of the board. I hate plugs. Its all easily removed leaving the EE seemingly untouched. -
 Views: 361
RX's antennas' were extended (DPCAV.COM) -
 Views: 378
RX's a/v outputs were trimmed and soldered stubby for a space saver and also hardwired to the EE. Power to Rx's is hardwired with long leads. -
 Views: 413
CCPro BEC provides up to 20A at 4.8-12.6V and allows any input voltage up to 50V -
 Views: 392
a/v outs hard wired to Eagle Eyes to save space w/o all the huge RCA plugs. Used a couple MPX plugs to allow for easy removal.
-
 Views: 1387
here is the rough layout. All the necessary components minus the monitors plastic stand cover. I removed it so the monitor can rotate upwards 90 degrees. -
 Views: 1006
The JST is wired inline to the 12v input wires. The 14g wires were hardwired to the board because I got the monitor w/o an ac adapter. Otherwise it would have been done like the description in the text above using the monitor's power cord and stock plug. -
 Views: 927
Here you see the BEC used to regulate voltage to the Video Receivers. I use this here to allow for larger, Amp hungry devices and a broader input voltage range. -
 Views: 814
this is a standard size/shape converter. -
 Views: 1016
this set up allows both inputs to be readily accessible and keeps all the wires inside and neat. This took no more time than wiring a barrel plug to the ESC output. Do It! -
 Views: 799
wear goggles! -
 Views: 778
here is the converter showing the ESC's input plug. It is fitted through a snug slot carved into the case. -
 Views: 958
light, compact, easy, bright and totally portable. Stable enough to stand alone and flexible so it can rotate 90 deg. for stand above viewing as shown.
Sticky:
Removable Tail For Fun Cub
-
 Views: 430
Drill or melt or poke 1/4" hole through center of molded "Target" on horizontal Stab -
 Views: 361
12mm bushing inserted in horizontal stab. (Bottom view) Press fit tight. -
 Views: 386
horizontal stab (top view) -
 Views: 388
flush in bed is very important. Test fit vert, then glue -
 Views: 391
notch the tung on the Vert. stab. about 1.75" -
 Views: 384
notched tung (bot view) -
 Views: 372
1/4x 1/4 Birch/Maple "motor mount stick" will be the anchor plate. -
 Views: 383
channel the notch 1/8" or half the depth of anchor block.


