-
 Views: 140
Batteries on their sides. Piece of ply wood to keep them seperated during transport. -
 Views: 145
Drilled holes for banana connections. -
 Views: 134
Banana Conections installed. -
 Views: 137
Modding terminals, remove plastic and made clamping part bigger. -
 Views: 165
Time consuming part. Modding terminals, cutting heat shrink, and cables. Getting everything ready for solder. -
 Views: 108
Not needed, but just incase. -
 Views: 144
All wires the same lenght, plus a little piece for the 24v jumper. -
 Views: 144
All wired up.
Comments (10)
Add Comment
-
 Views: 220
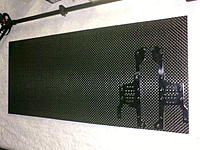
There is enough cf to make 3 sets of frames, and still have some extra cf for another project on your list. -
 Views: 199
First, i measured and marked the area needed for one side. -
 Views: 188
Cut that and trace and cut the area next to it for the other side. -
 Views: 168
I used a new stock upper frame side as a template and bolted it, along with both cuts of cf, together so that in the end they will be exact duplicates. -
 Views: 189
I taped the cuts together to avoid shifting while drilling the first few holes. Also use a piece of wood so that you dont drill into your table. -
 Views: 187
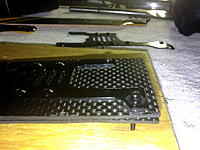
I carefully placed the template on top of the taped cuts and drilled these holes first. Then removed tape and bolted the cuts and template together. -
 Views: 196
Once again i found some bolts and nuts to secure the template frame at the four corners. -
 Views: 245
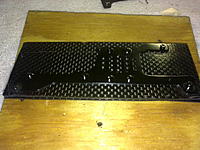
Once the template frame is secured, you can go ahead and drill out the other holes. Be sure to use the same angle of attack with the drill (as straight as possible with each hole). A mistake here can throw of the alignment of other things later.
-
 Views: 221
8mm cf tube cut down to the length of the stock boom. -
 Views: 176
File the cut end smooth, then mark the square cut out points as they are on the stock boom. They should be centered end to end, but i just eyeballed it. -
 Views: 207
I first filed out the square points, then filed down the end of the rod a bit to fit into the tail fin and boom/servo mount. Then with the fin and mount in place (check that the tail fin is striaght up and down when the boom mount base is flat), drill the -
 Views: 171
This is what the cf boom and mount will look when it is snug in place. -
 Views: 189
The metal boom support fits the cf boom with no problems. -
 Views: 179
For brushless tail motors, the 3 wires will fit through the space. Put the ends through the mount first, then push the rest through the boom and place the mount on the end of the boom. Its a little tight but wires can still move in and out. -
 Views: 174
Mounting the turnigy 2211-1700kv motor on a stock fin. I cut the stem off and drilled a extra hole and elongated part of another to get three of the four motor base arms secure to the fin. -
 Views: 177
I found some extra nuts bolts and washers from my parts bin that were perfect for the job.
-
 Views: 290
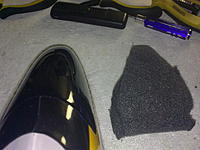
Canopy, StayPro mini cam, and extra foam from heli case. -
 Views: 285
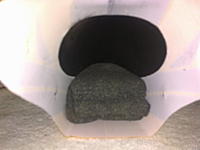
Marked and cut foam to fit snug inside canopy. -
 Views: 252
Foam inside canopy. -
 Views: 248
Carefully grinded the hole in canopy, just the right size for the camera. -
 Views: 242
Marked and cut small hole in foam to hold the base/cover of the camera. -
 Views: 265
Put it all together... -
 Views: 234
A look inside. -
 Views: 256
Good clearence from main rotor blades.
-
 Views: 408
Instead of fileing the frame down, like I did with the Turnigys', I just bent the top of the frame tabs with with pliers. Its not perfect but does help to correct the angle. -
 Views: 339
To make some space between the alie and elev servos, I cut the tabs so that the bracket can fit over the front of the servo. -
 Views: 397
Now there is less 'toe-in' angle on the rear servos. -
 Views: 401
And now the clearence between the two servos is perfect. Also, with the brushless motor I have enough space to mount the ball link on the front of the elev servo arm. -
 Views: 373
I used the wire holder from the other side to hold the tail motor and ESC motor wires. -
 Views: 361
If you have a brushless system, DO NOT keep the signal converter to close to the rx. You can see the tape where I tried to mount mine, resulting in lack of throttle control. In this position it works fine.
-
 Views: 319
What you will need, small cutter, small drill bit (I cant remember the size, but it was the smallest bit the store had in stock), fine tip marker. Also used my pliers. -
 Views: 225
Both of these servo arms that come with the servos will work. I went with the thicker option. -
 Views: 245
The holes line up nicely with the stock servo arm, so I used the middle hole as the stocks did. -
 Views: 226
Cut off the extra side of the arm. Also, it is easier to add the ball link to the new arm later if you get the thread started with a small tapping screw. -
 Views: 236
I centered the servo with the rx and placed the arm to keep track of parts, and remember what servo I'm working on. This is the pitch servo. -
 Views: 231
Here you can see the holes on the bracket not lineing up with the servo tab holes. Use a marker the mark where the bracket holes are on the tabs. -
 Views: 232
Here you can see the mark made to drill the new hole. -
 Views: 242
I was able the drill the hole by hand with this small bit. I'm not sure of the size, but it could fit through stock hole.
-
 Views: 492
ESC attached to the lower CF battery try with electrical tape. Keeping the motor plugs on the right side. -
 Views: 461
I decided to place it more to the front of the heli so I could place the battery further to the back and keep a good Center of Gravity. -
 Views: 383
With the Metal Boom Support there is no longer the need for the struts. Less parts to bend, break, and replace after a crash. -
 Views: 386
With the struts gone, the battery can slide in and out of the rear. -
 Views: 389
Battery connection on opposite side.
-
 Views: 415
Elevator Servo - Flie down the upper tab so that the scerw will fit behind the canopy pin. As you can see I trimed it to about half. -
 Views: 341
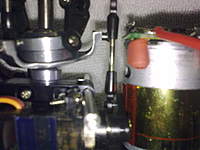
This is the type of stone i used. It makes a nice right angle. I used my dads old drill, I think its older than I am. -
 Views: 368
Here you can see the fitting of the Elev servo and the canopy pin. I used the screws that came with the servos. When screwing them in, it might look like its going in the wrong angle but they will correct once tightend. I used the stock ball joint in the -
 Views: 306
The Alieron and Pitch servos need their tab cut and filed as seen here. Make sure the edges are smooth with no excess plactic around the servo body. -
 Views: 286
This is the Alieron servo. The Pitch servo will be opposite. -
 Views: 304
The servo body is much bigger that the stock. You will have to file down the back of the upper frame. This bigger stone made easy work of the task. -
 Views: 325
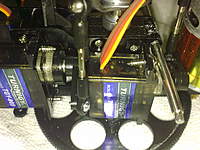
Here you can see how the servo bodies fit snug with the filed frame. -
 Views: 383
On these servos I used to outter most holes on the servo arms. It puts the arms at more of an angle so the rods will need to be a bit longer. I balanced my swash by trial and error. I still need to adjust the rod lengths to properly set my pitch.
-
 Views: 374
After removing the 4 screws and the metal brace on the throttle side, and wiggling the axis control into its new position, I managed to break one of the solder points from the battery connection. (I have not used a soldering iron in over 10 years) -
 Views: 393
Once the 'rudder' axis is in place and moving smoothly, return the 4 screws and metal throttle brace to there original position. -
 Views: 357
Here is the view up close. That little hole in the middle needs to be filled with the 'pin' from the other side. It seems to work fine without it, but just to be safe I carefully removed it with a pair of pliers, and gently hammered it into place. -
 Views: 319
Throttle and rudder control now finished. Now lets close up the other side.... -
 Views: 323
To keep the 'forward/backward' control from swinging left and right, I used the brace plate that was on the throttle stick. (see next picture for details)(L). I also glued the dummy trim in place because there is no hole to screw it into on this side. -
 Views: 349
To secure the brace plate I had to swap the screws because the original is to long. So, I swapped with a screw that was used the hold the axis control in place. -
 Views: 293
Fix any wires that might have come lose. (not bad soldering work, I could'nt do it this good 10 years ago) -
 Views: 314
There you have it.. Return the back cover, and go fly like the "Big Boys" do.
-
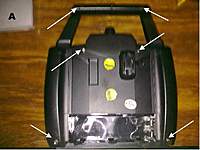 Views: 372
Remove screws from the back of the transmitter. -
 Views: 391
The axis controler for the rudder is placed on top of the 'forward/backward' control. -
 Views: 437
Close view of the 'rudder' and 'fwd/bac' axis controler, and the 4 screws holding them in place. (dont remove them yet) -
 Views: 363
First, remove the brace plate from the 'throttle' control. (keep track of your screws and parts) -
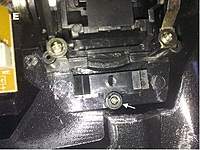 Views: 401
Also, remove the 'dummy' trim tab on the 'throttle' side. -
 Views: 447
Now, remove the 4 screws and the 'rudder' axis control. Place it safley on the side for now, and return the screws to hold 'fwd/bac' axis in place.


